Your Complete Guide to Making Danish Christmas Stars
Whether you add them to your Christmas tree, attach them to presents or string into festive garland, these Danish Christmas Stars are my go-to holiday decor. They are a beautiful and easy way to add a homemade element to your celebrations. Follow along for our guide to making your own Danish Stars. You’ll quickly see why they are so fun and addicting to make!


How to Make Danish Paper Stars
Danish Stars Materials
- Spoonflower’s Pre-Pasted Wallpaper – any repeating design will work
- Craft scissors
- Ruler
- Fabri-Tac or other glue with an instant bond
- Ribbon or baker’s twine: 11”-13” length per star
Steps to Make a Danish Star
Step 1. Cut Your Wallpaper Into Squares
Cut your wallpaper into two equal squares. For this tutorial I will be working with two 4″ paper squares, but you can experiment with different sizes!
Step 2. Fold the Paper in Half
On each square, fold the unprinted sides together at the corners and press the fold flat. Do this in both directions on each square so when the square lays open, you see two diagonal folds going corner to corner.
Step 3. Fold the Paper in Half Again
For the second fold, fold the straight edges to match each other, pattern side together – aka, hamburger and hotdog style. Repeat on both squares. When the squares lay flat, you see fold lines going straight across on each side, plus the corner-to-corner folds.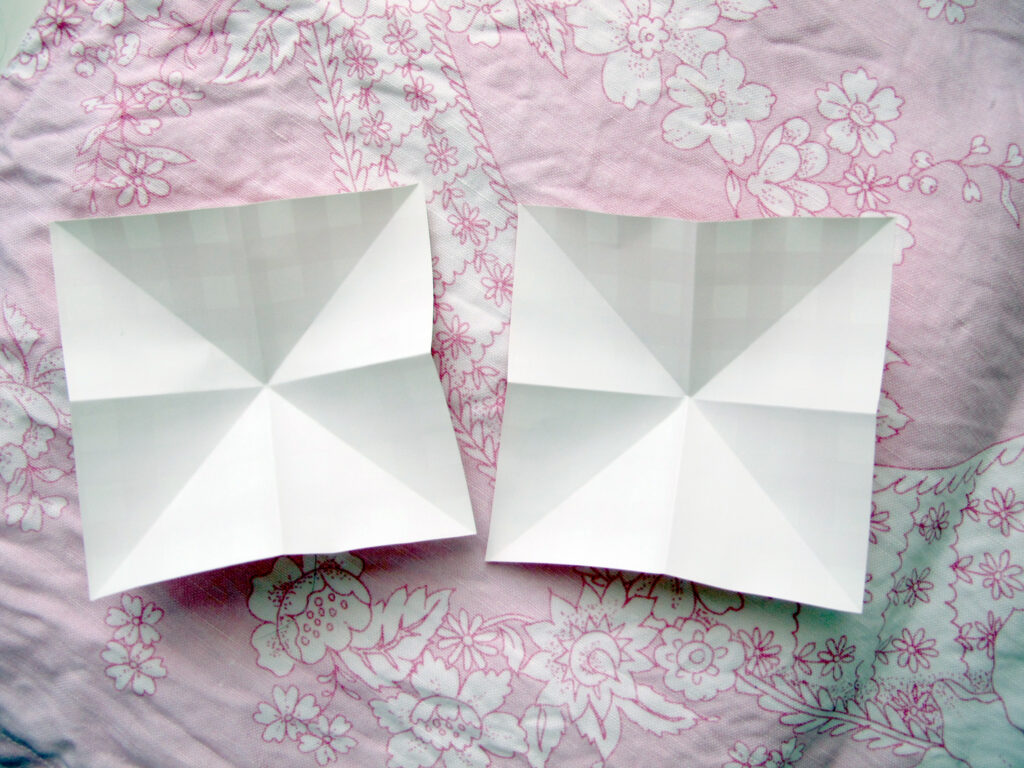
Step 4. Cut the Star Points
To make points that fold, you need to cut the square edges a bit. Using craft scissors, cut almost halfway in from the outside edge towards the center from the center lines only, not the corners! Each square will have four cuts.
Step 5. Make the Star Points
Next, lay the squares on their backs (printed side down) and carefully fold from the cut, towards the fold line, keeping the point in each corner.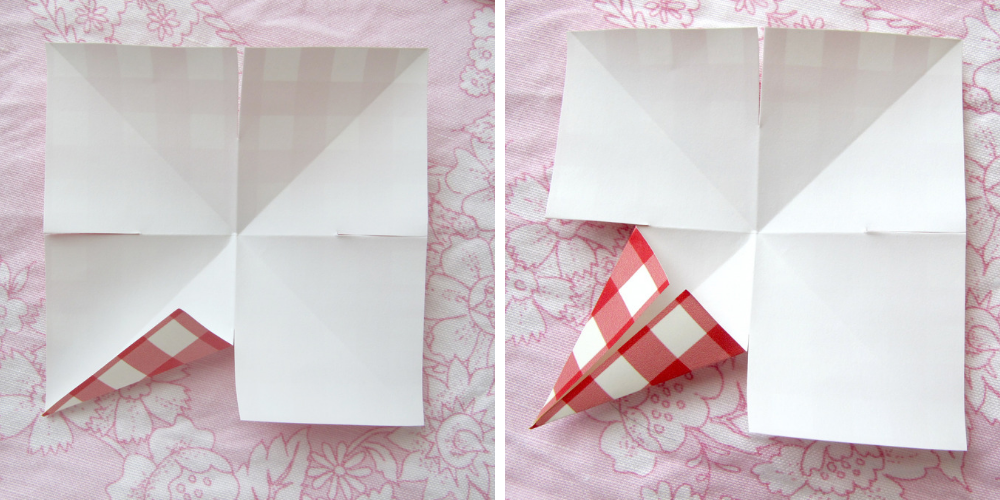
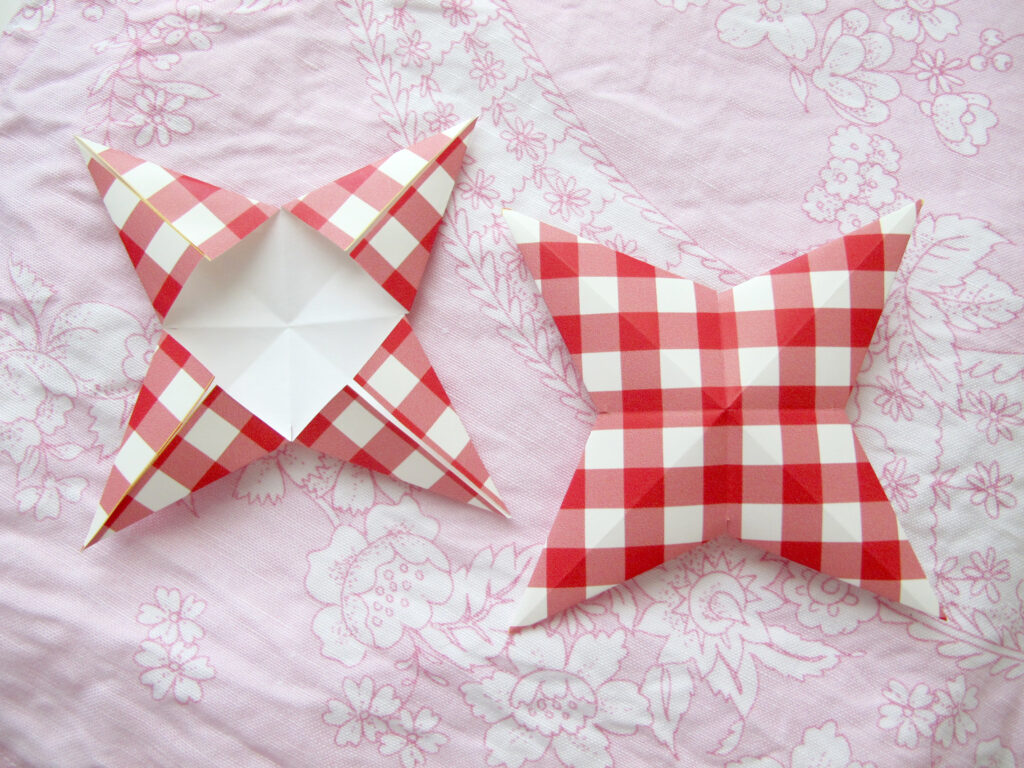
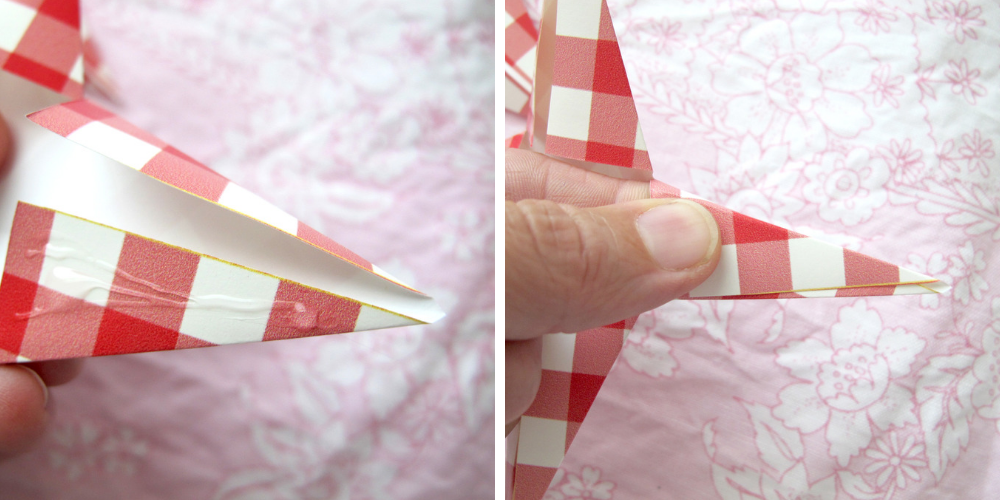
Step 6. Glue the Star Points Together
After they are folded, glue the folded point sides together so they hold their shape and give the stars that 3D look. I use Fabri-Tac because it has an almost-instant bond.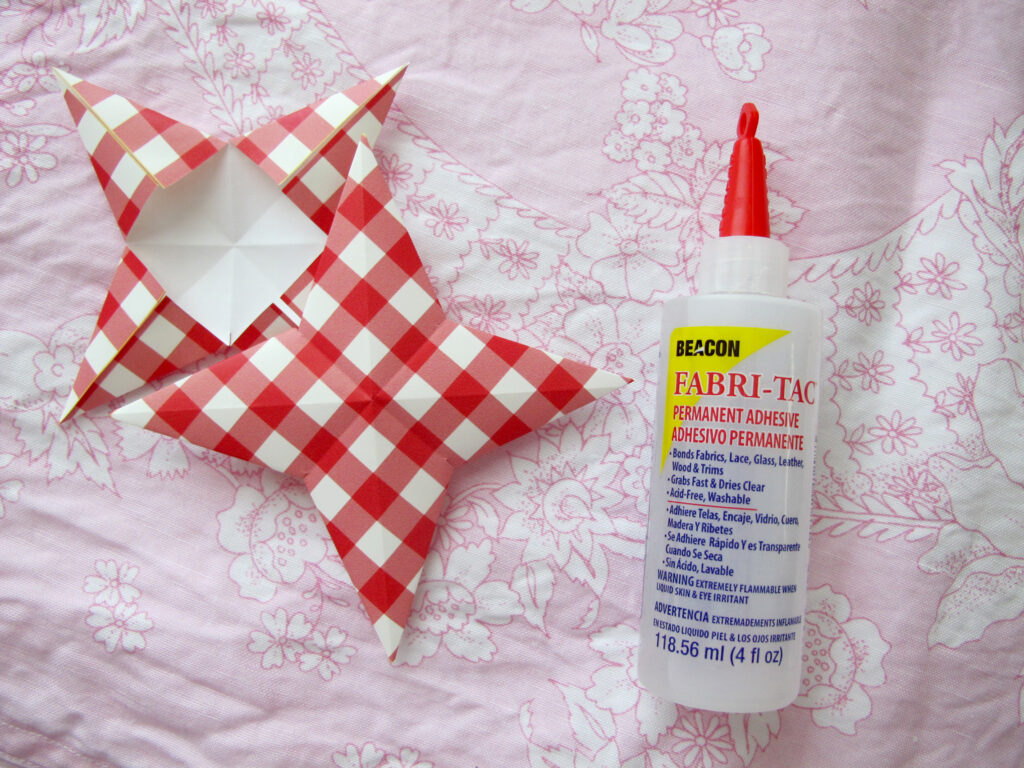

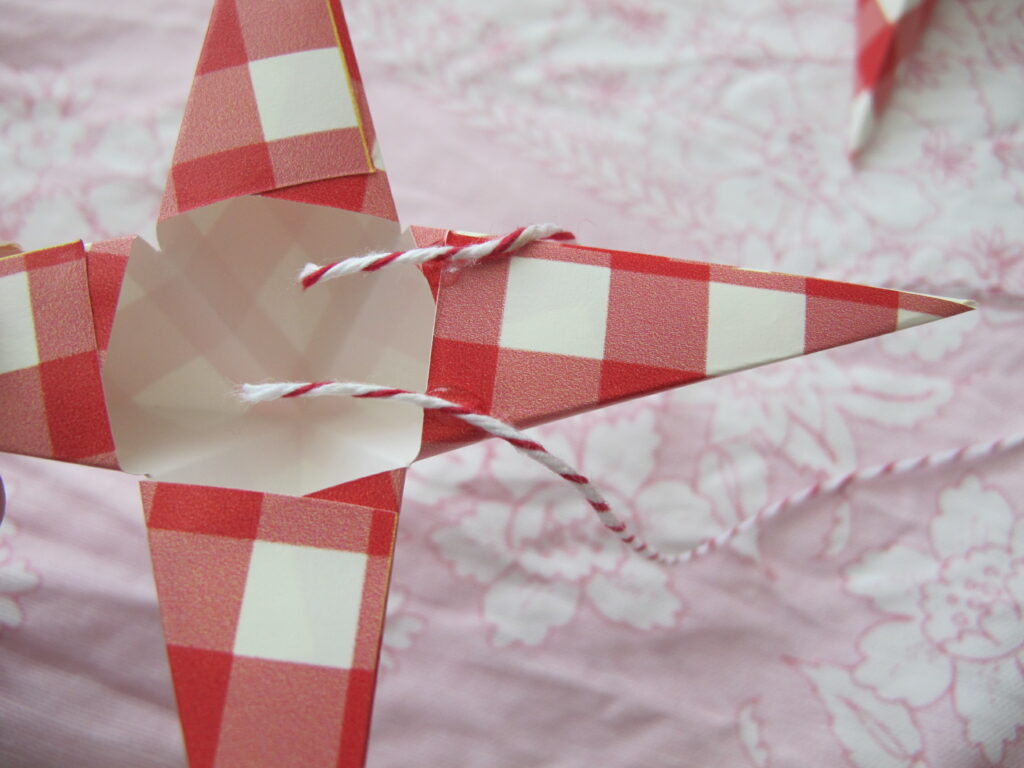
Step 7. Attach the Star Hanger
Once your star points are glued together, it’s time to add your hanger! This step is crucial if you plan on using them as ornaments, but there are so many ways to use these stars. You could stick them to a wreath base, string them together as a garland or whatever else you can imagine – the opportunities are endless! I use decorative cotton baker’s twine found in many fabric or craft shops. For my red gingham stars, the red and white twirly twine looks perfect. You only need one 11”-13” length of twine or ribbon per star. If your stars are smaller, cut a smaller length, etc., but make sure the ribbon or twine is at least longer than one point on the star!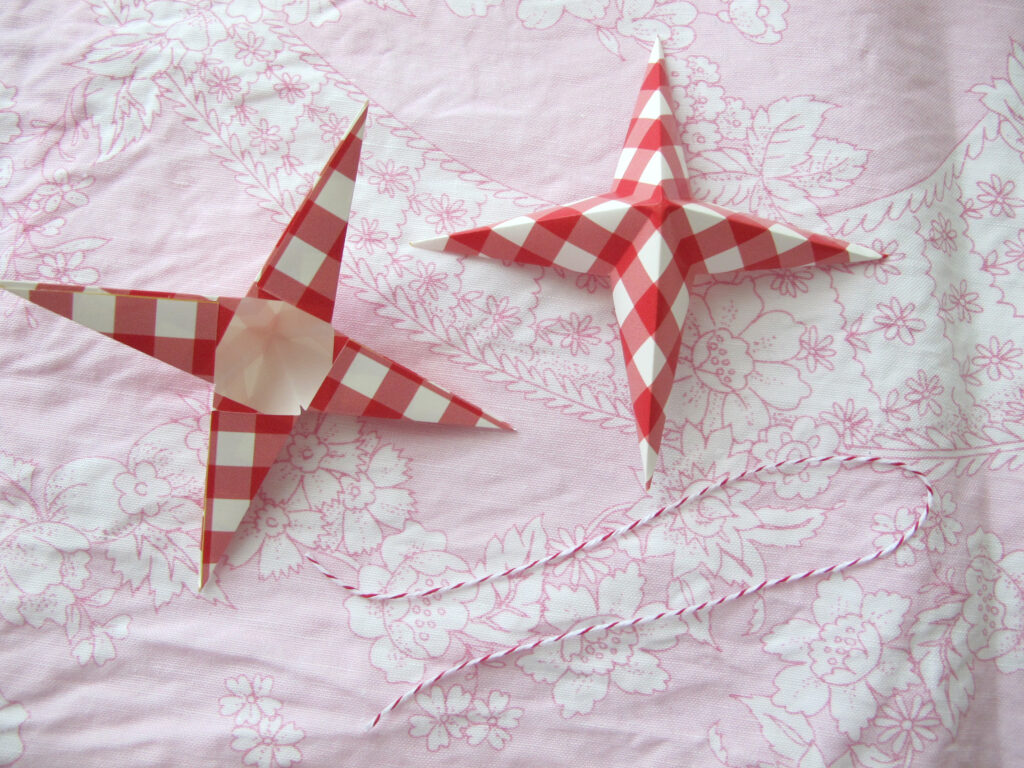
Step 8. Glue the Stars Together
The final step is to attach your star halves. Add a dab of glue to each corner at the base of every point and put the other half of the star on top, with its points juxtaposed between the points of the other star half. Hold it together gently for maybe 20-30 seconds – longer if you use a different glue that bonds slower.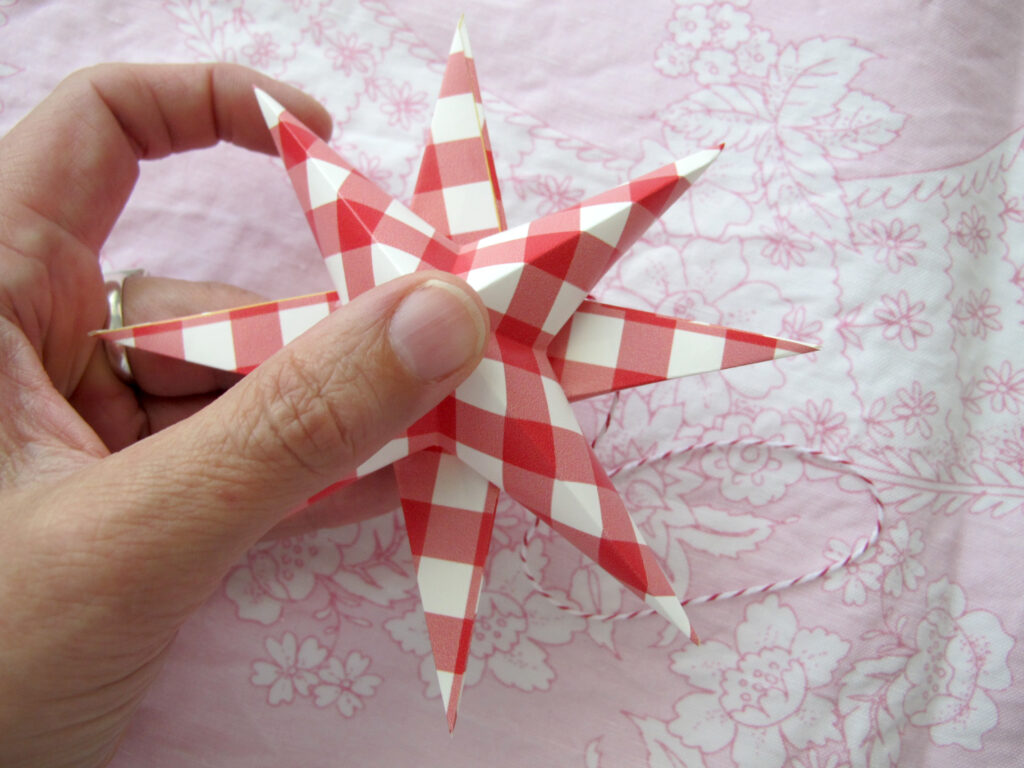
Step 9. Hang and Admire Your Stars
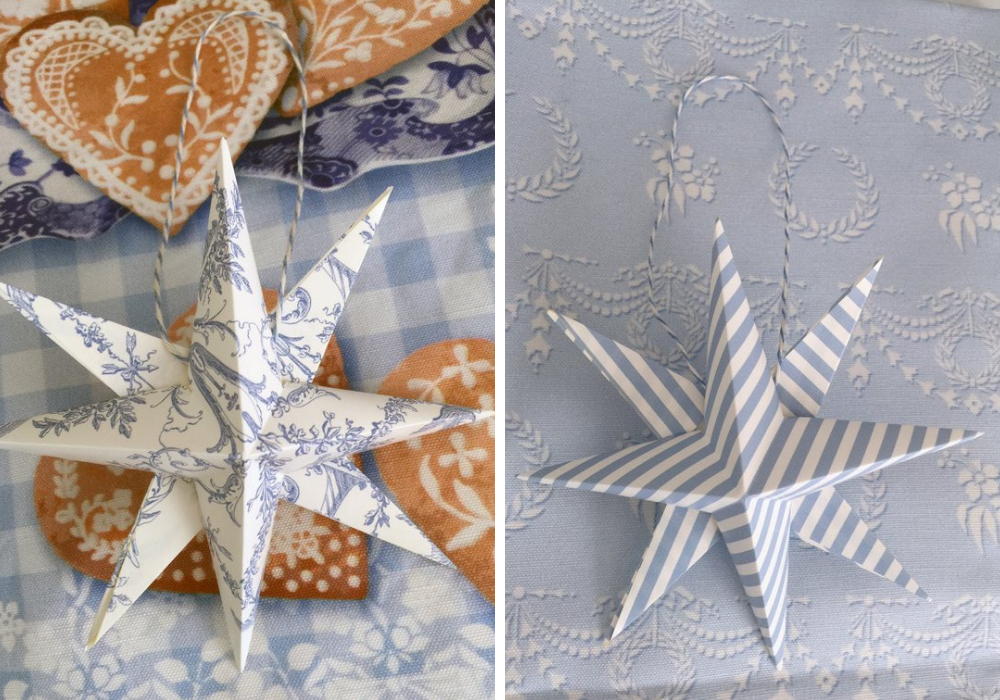
After the glue bonds the sides together, let the stars dry over night so they are adhered permanently. Then hang on your tree, attach as an embellishment to a wrapped present or attach to a door knob.
Made to order using unique designs from artists worldwide.

The World’s Largest Design Library for Wallpaper and Textiles
Discover a world of design—from minimalist to maximalist. Thousands of global artists, with new styles added constantly.

Custom Designs on Any Item
Our made-to-order model lets you print any design on any material. Coordinate patterns across rooms for a cohesive, personalized home.

Premium Materials, Always in Stock
Trusted by pros and enthusiasts, our responsibly sourced textiles and papers offer the perfect finish—from smooth to textured, delicate to durable.

Printed on Demand in the USA
Our print-on-demand model lets you choose your design, material, and quantity—minimizing waste with non-toxic inks and reduced packaging.