How to Create Banding Trim and Add It to Furniture and Home Decor
Ready to add some extra customization to your interior design? Spoonflower artist Danika Herrick is here to share how to create banding trim for elevated furniture and home decor. For sewing and design beginners, she’ll walk you through creating fabric trim out of Spoonflower fabric, which you can sew directly on to items like pillows and draperies. If you’re looking for more, Danika also shows how to create a no-sew banded layout with Adobe® Photoshop®. With these next-level creative skills under your belt, you’ll be creating show stopping home decor in no time flat!

How to Create Basic Banding Trim
Skill Level: BeginnerBanding Trim Materials
- Fabric – amount determined by the perimeter of your project
- Ruler
- Cutting Mat
- Rotary Cutter
- Iron
Part 1: Create Banding Trim
Step 1: Choose a Design
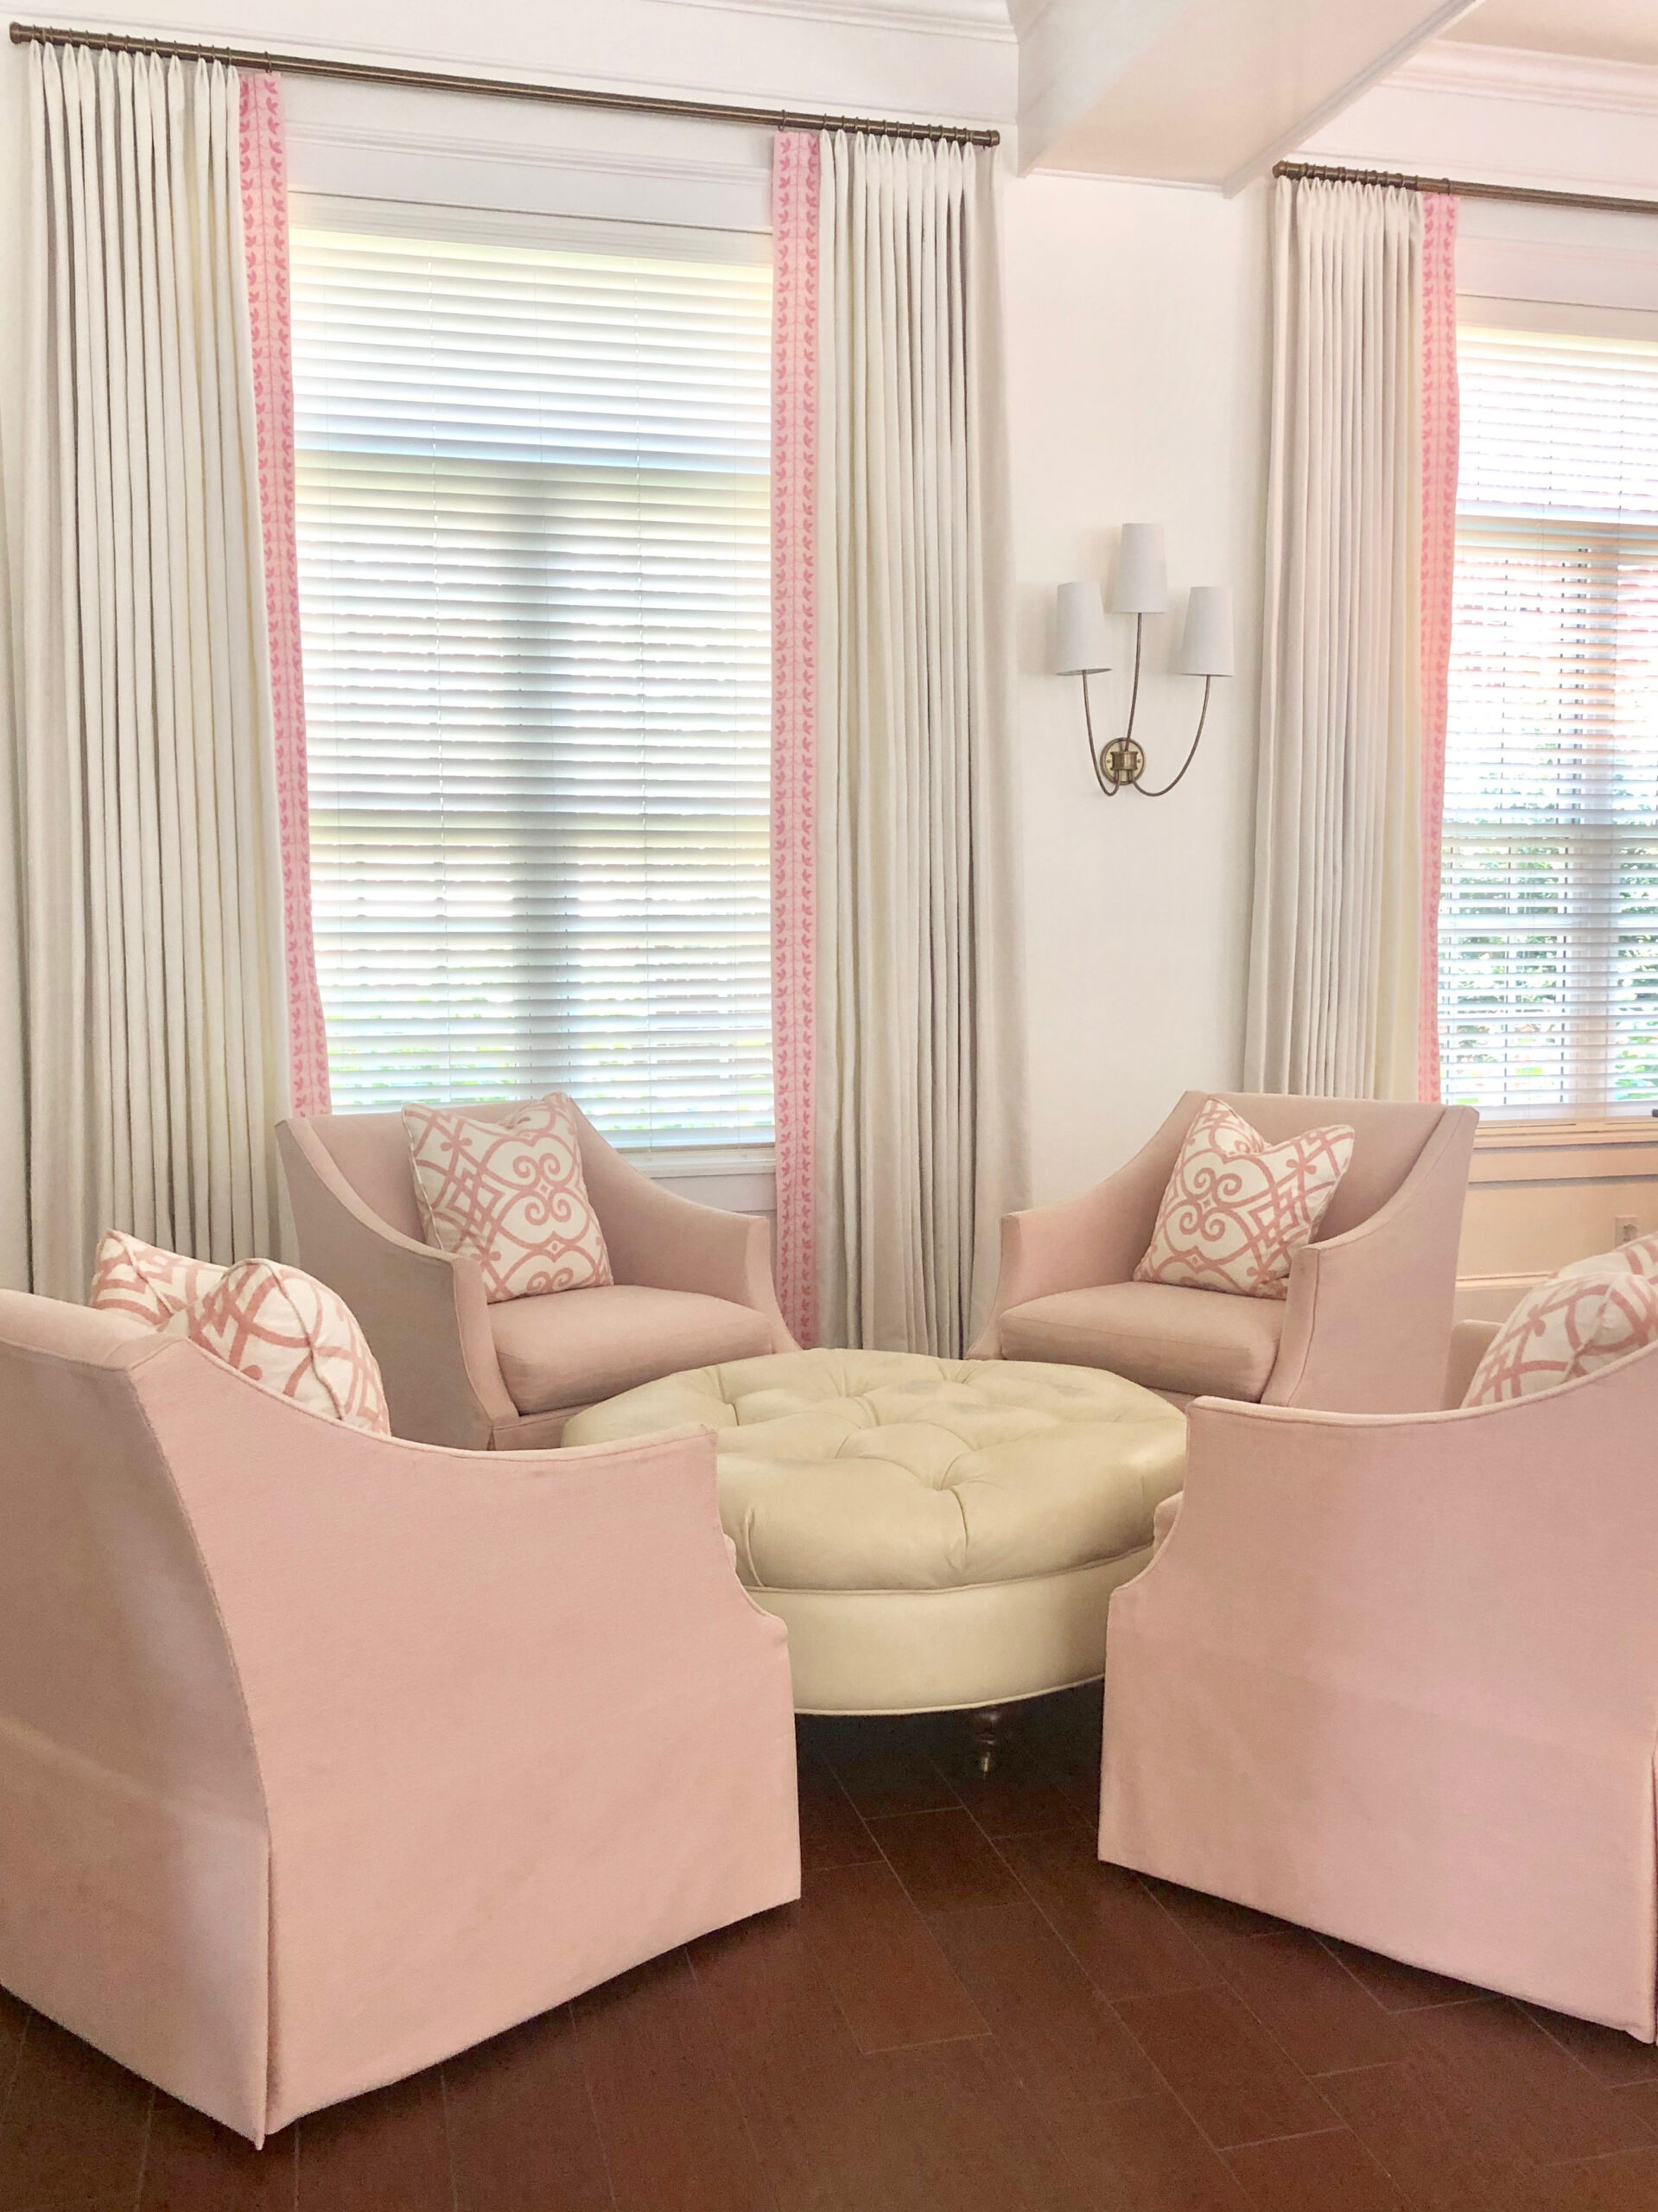
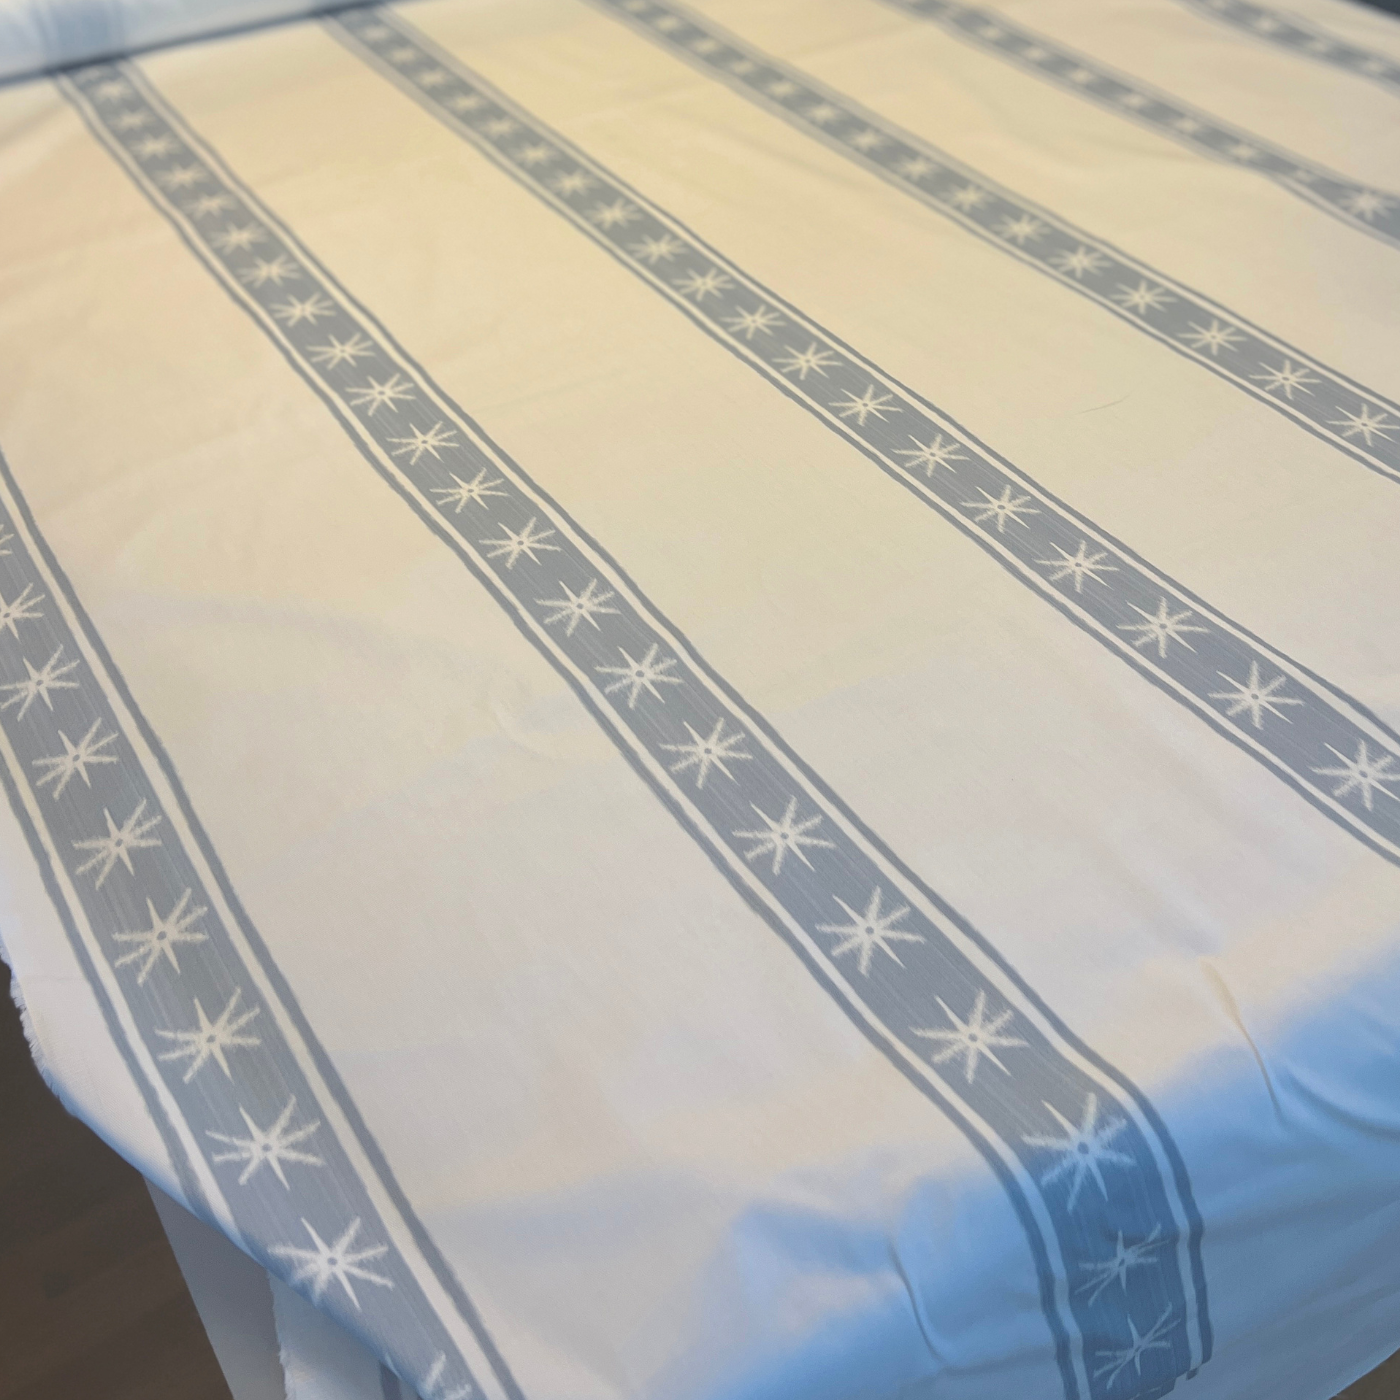
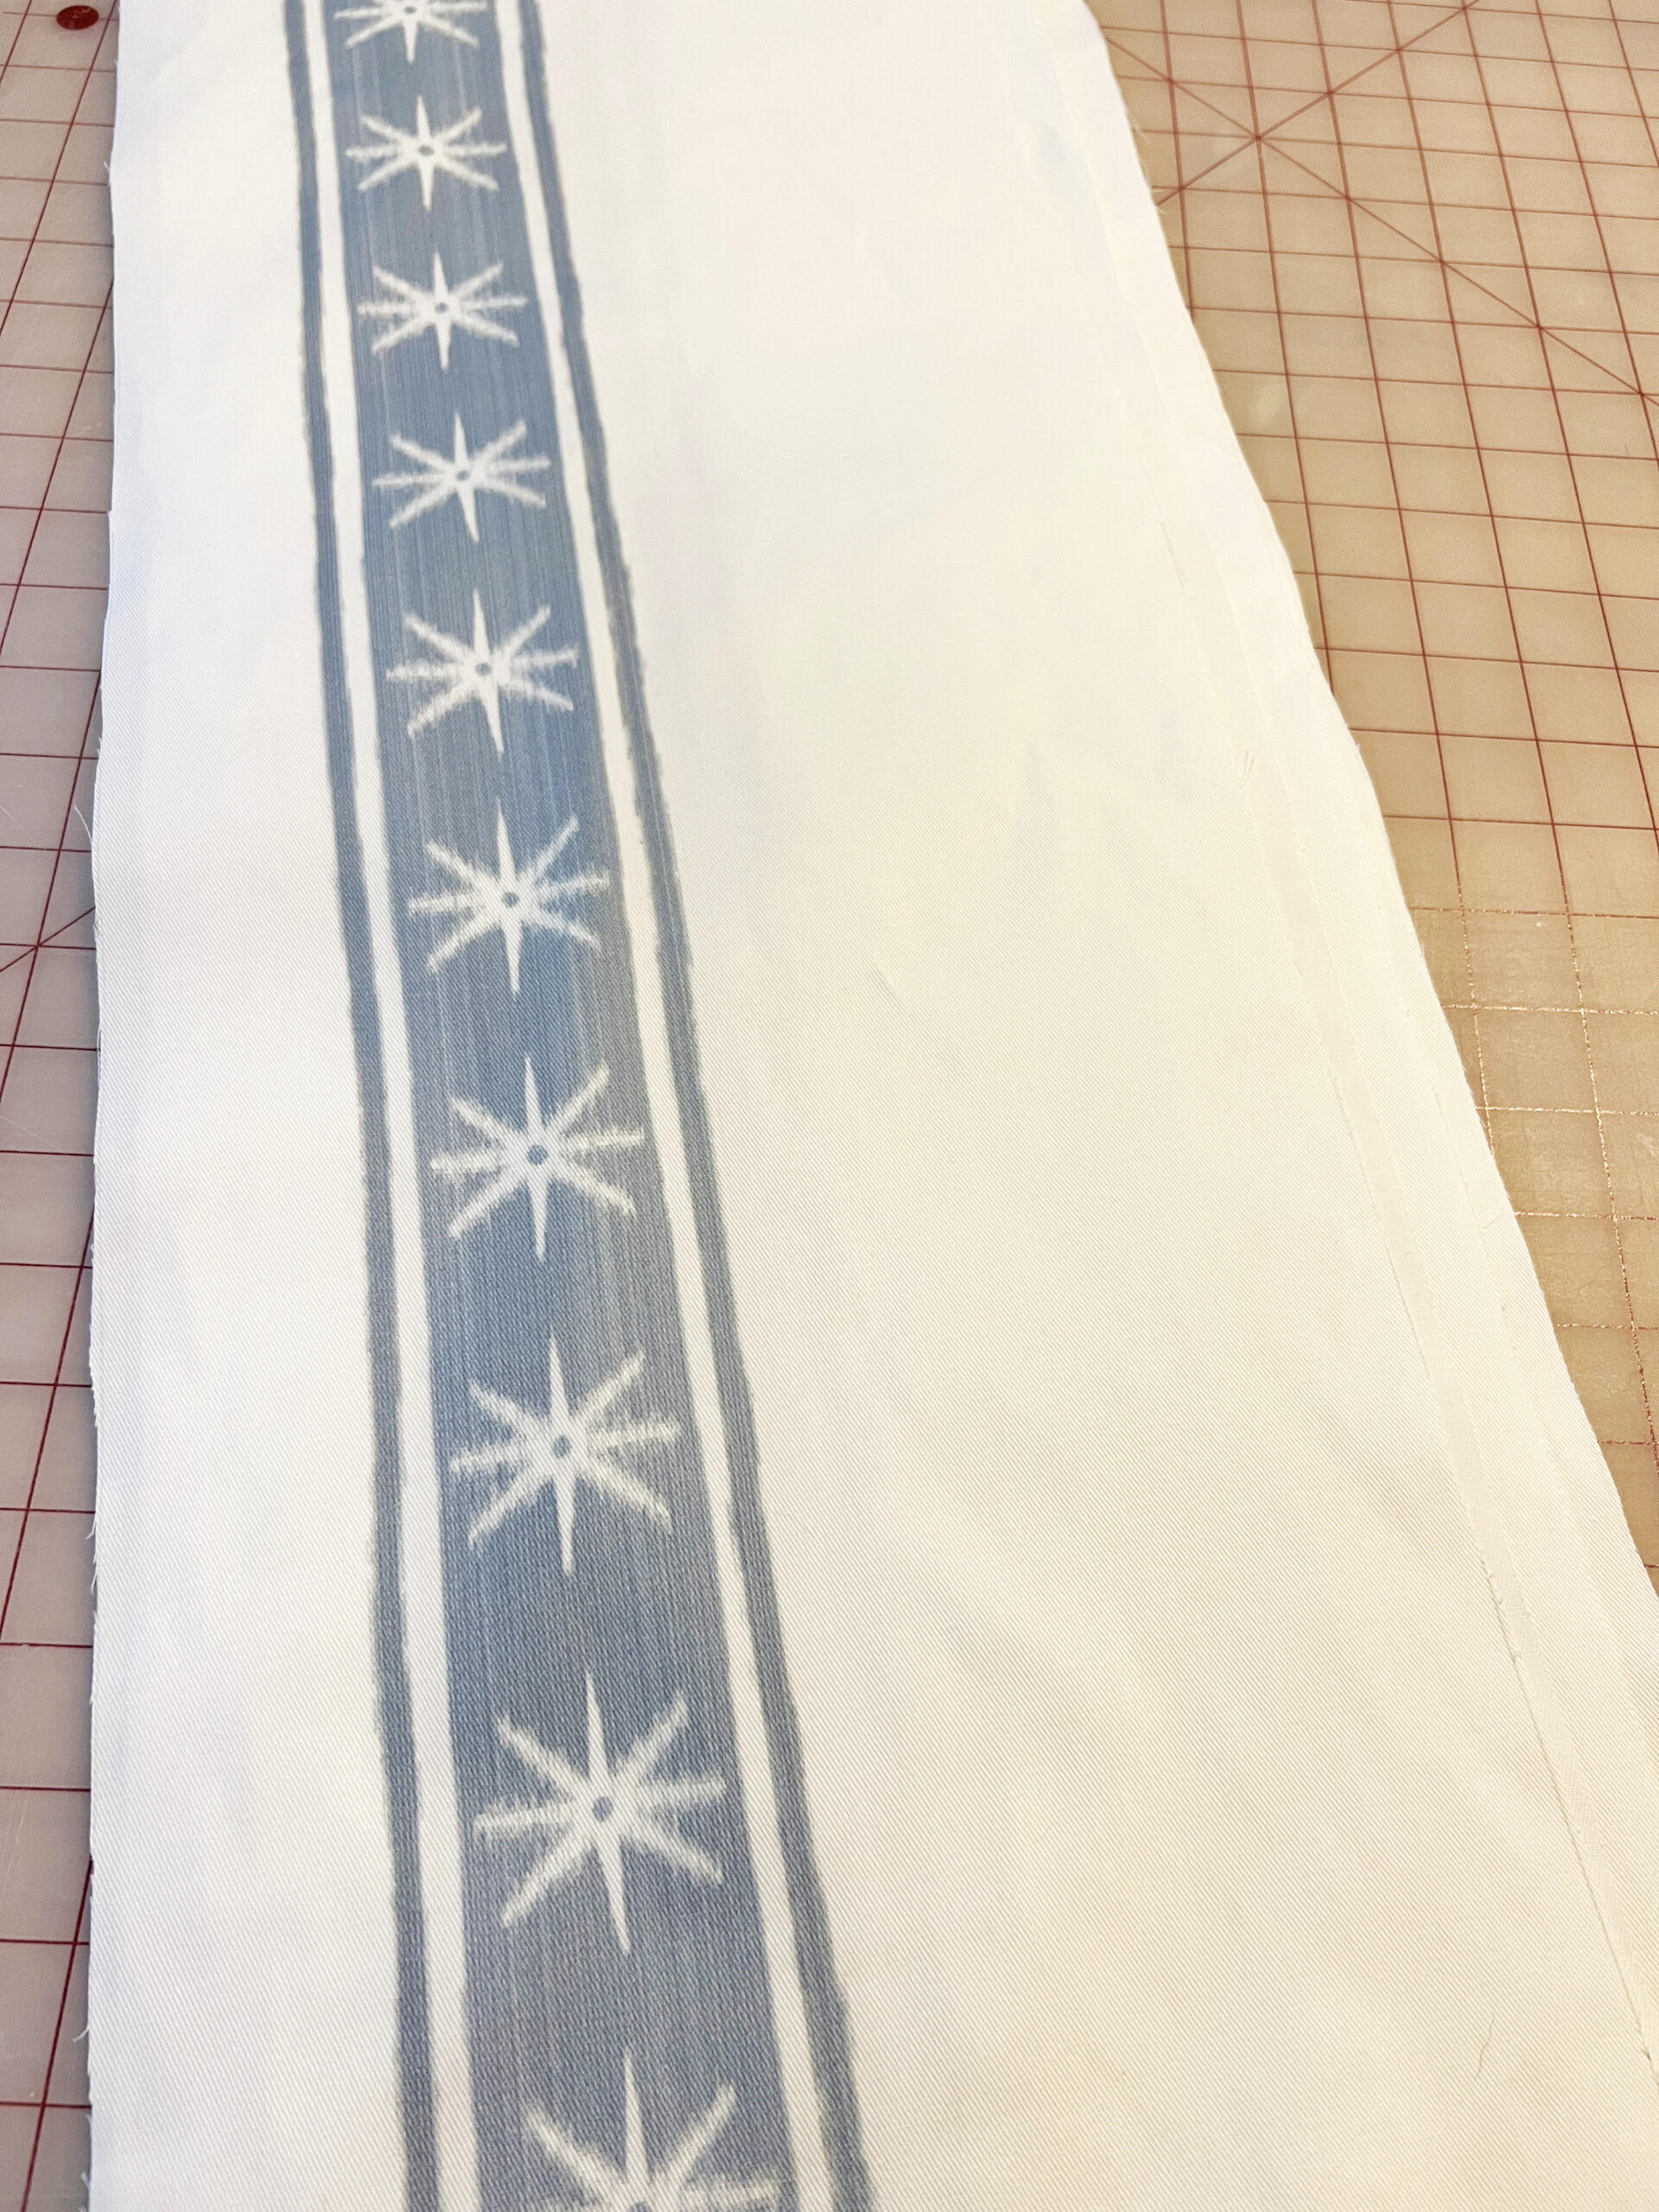
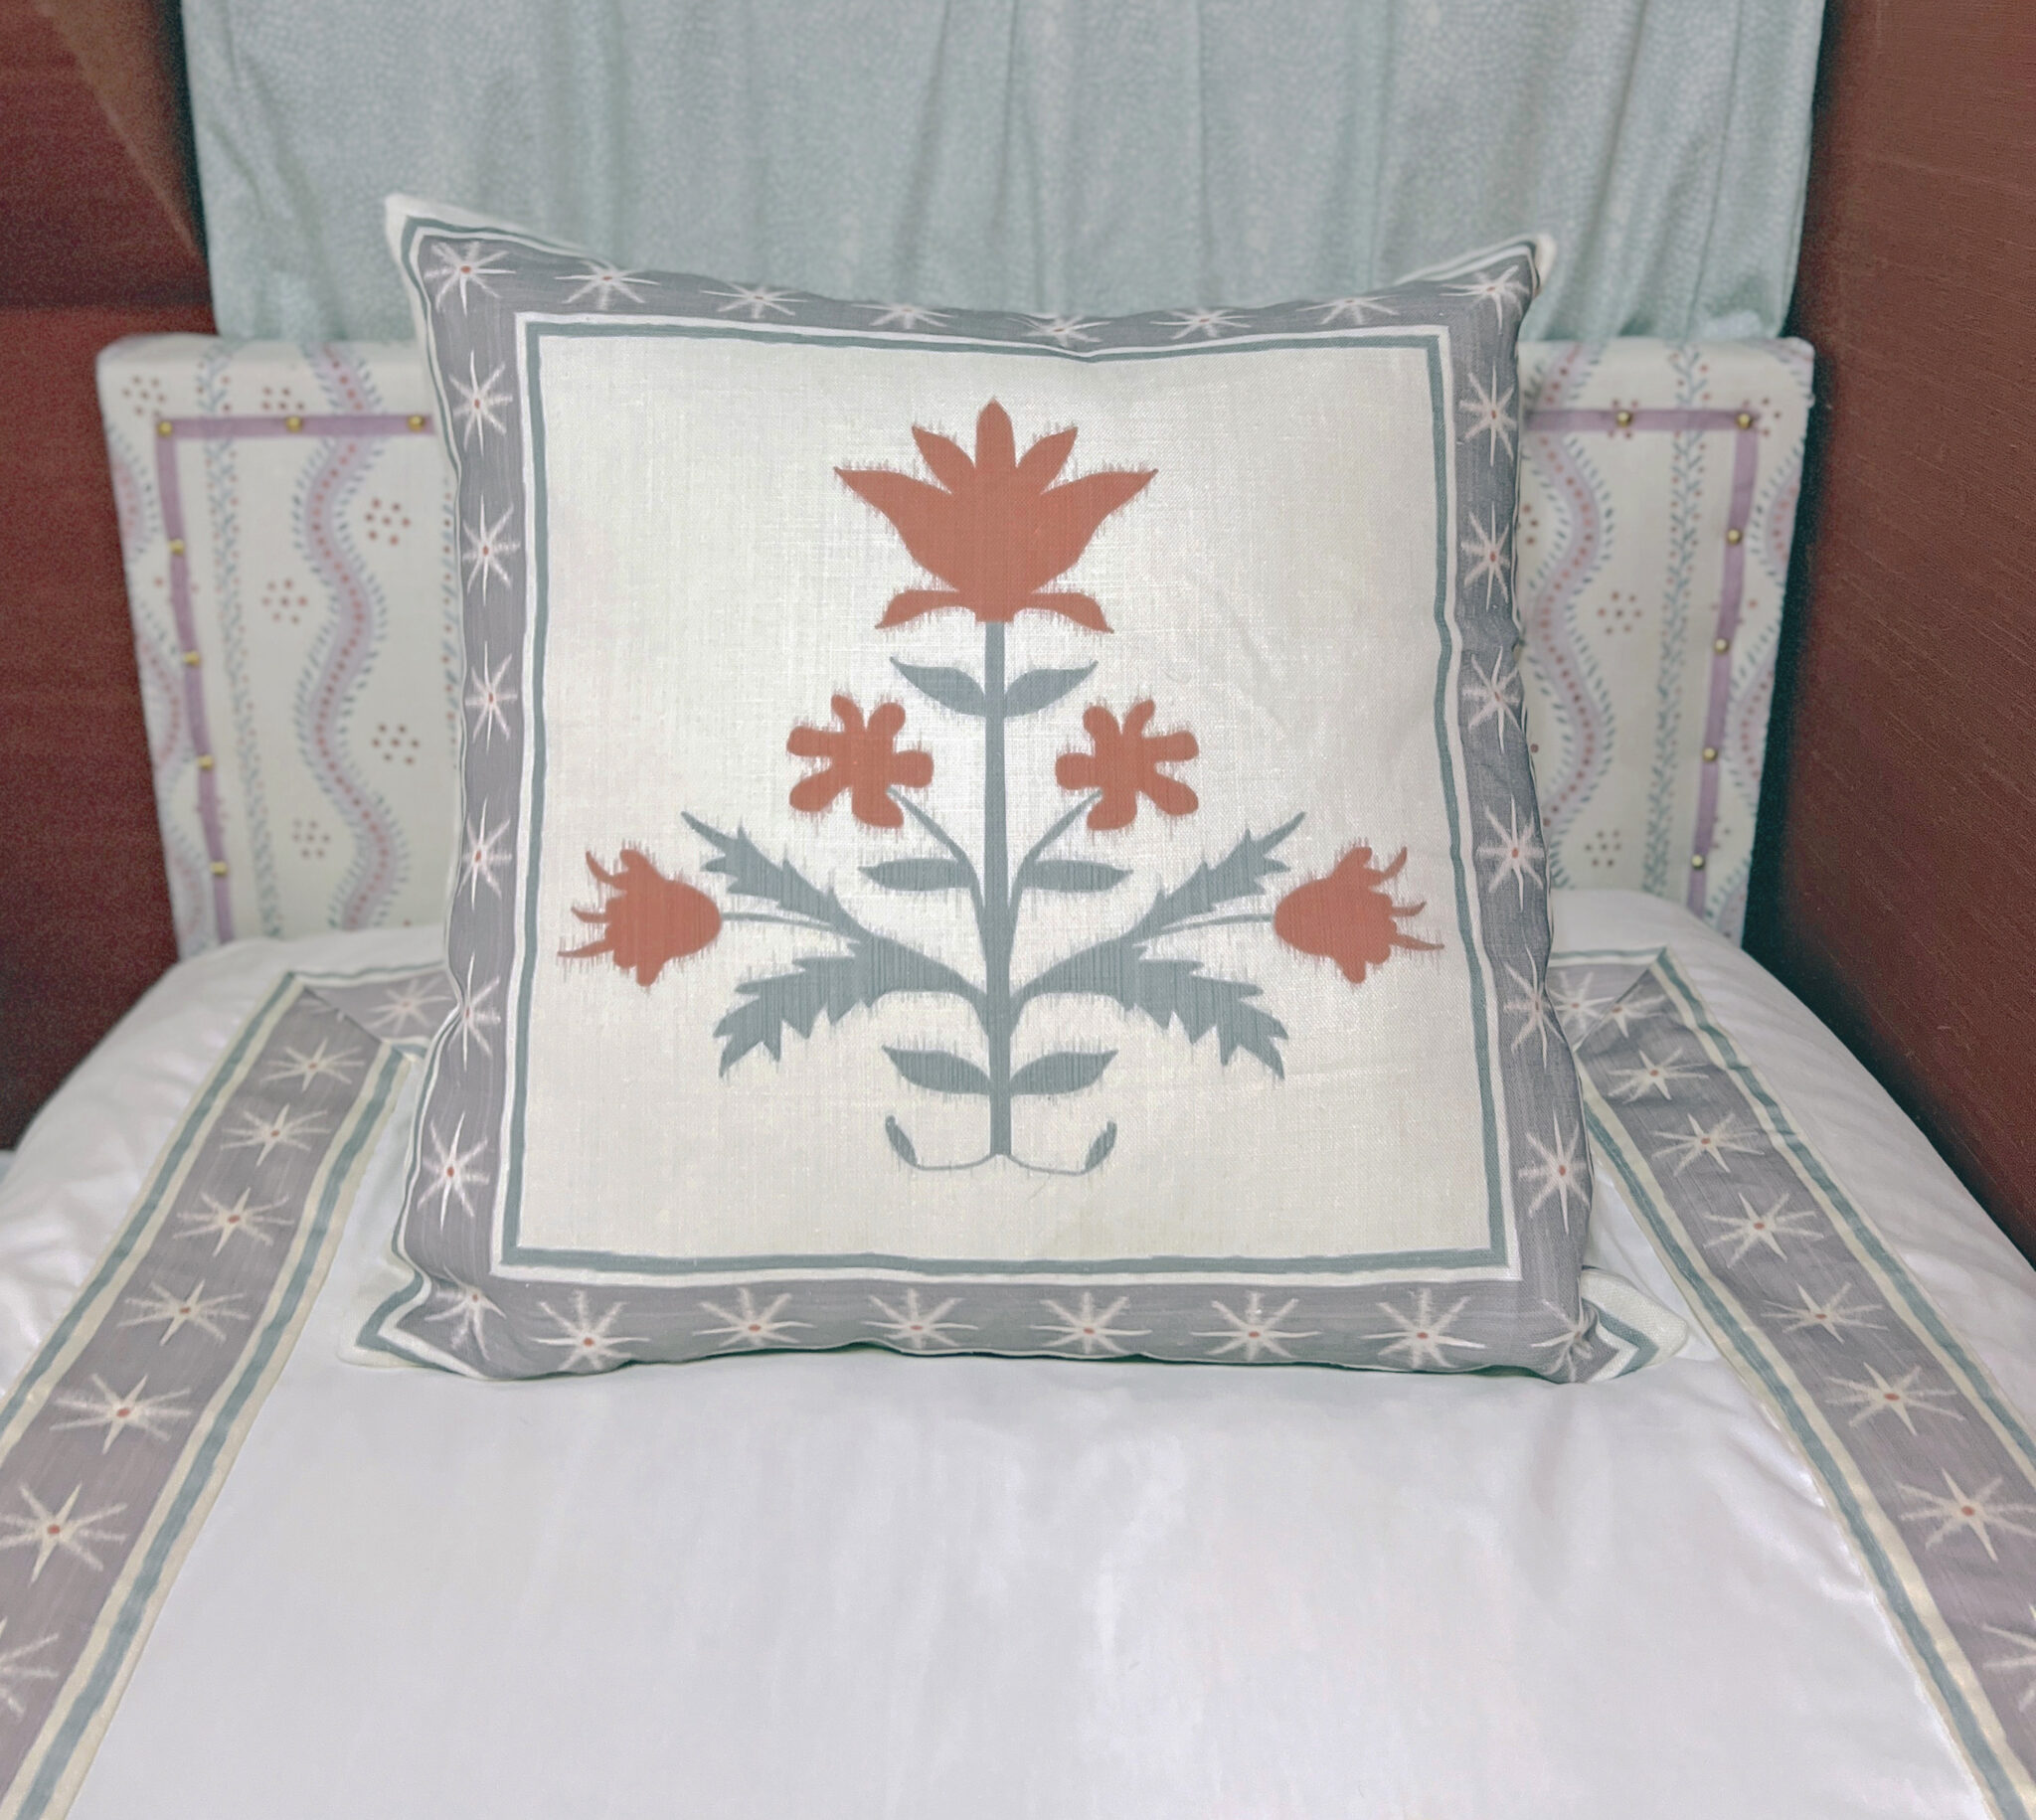
To make basic banding tape you will first want to choose a design. You can design your own or choose from thousands on Spoonflower. Stripes are my go to since they can easily be cut apart and are very straight forward making them easy to use. But don’t let that limit you-solids and prints can also work! For this tailored pillow and banded slip over for my club chair, I chose my Charlie Star Stripe.Step 2: Determine Yardage Needed
Once you have a pattern chosen, determine how much yardage you will need. To do so, measure the perimeter of the banded area and calculate how many strips of fabric you will get from each width of fabric. For small projects like pillows, you can usually get away with ordering one yard of fabric and seaming the strips together. For larger projects like draperies, I suggest ordering fabric the length of the drapery panel so your banding will be one continuous strip with fewer seams. Most average curtains will work with three yards of fabric.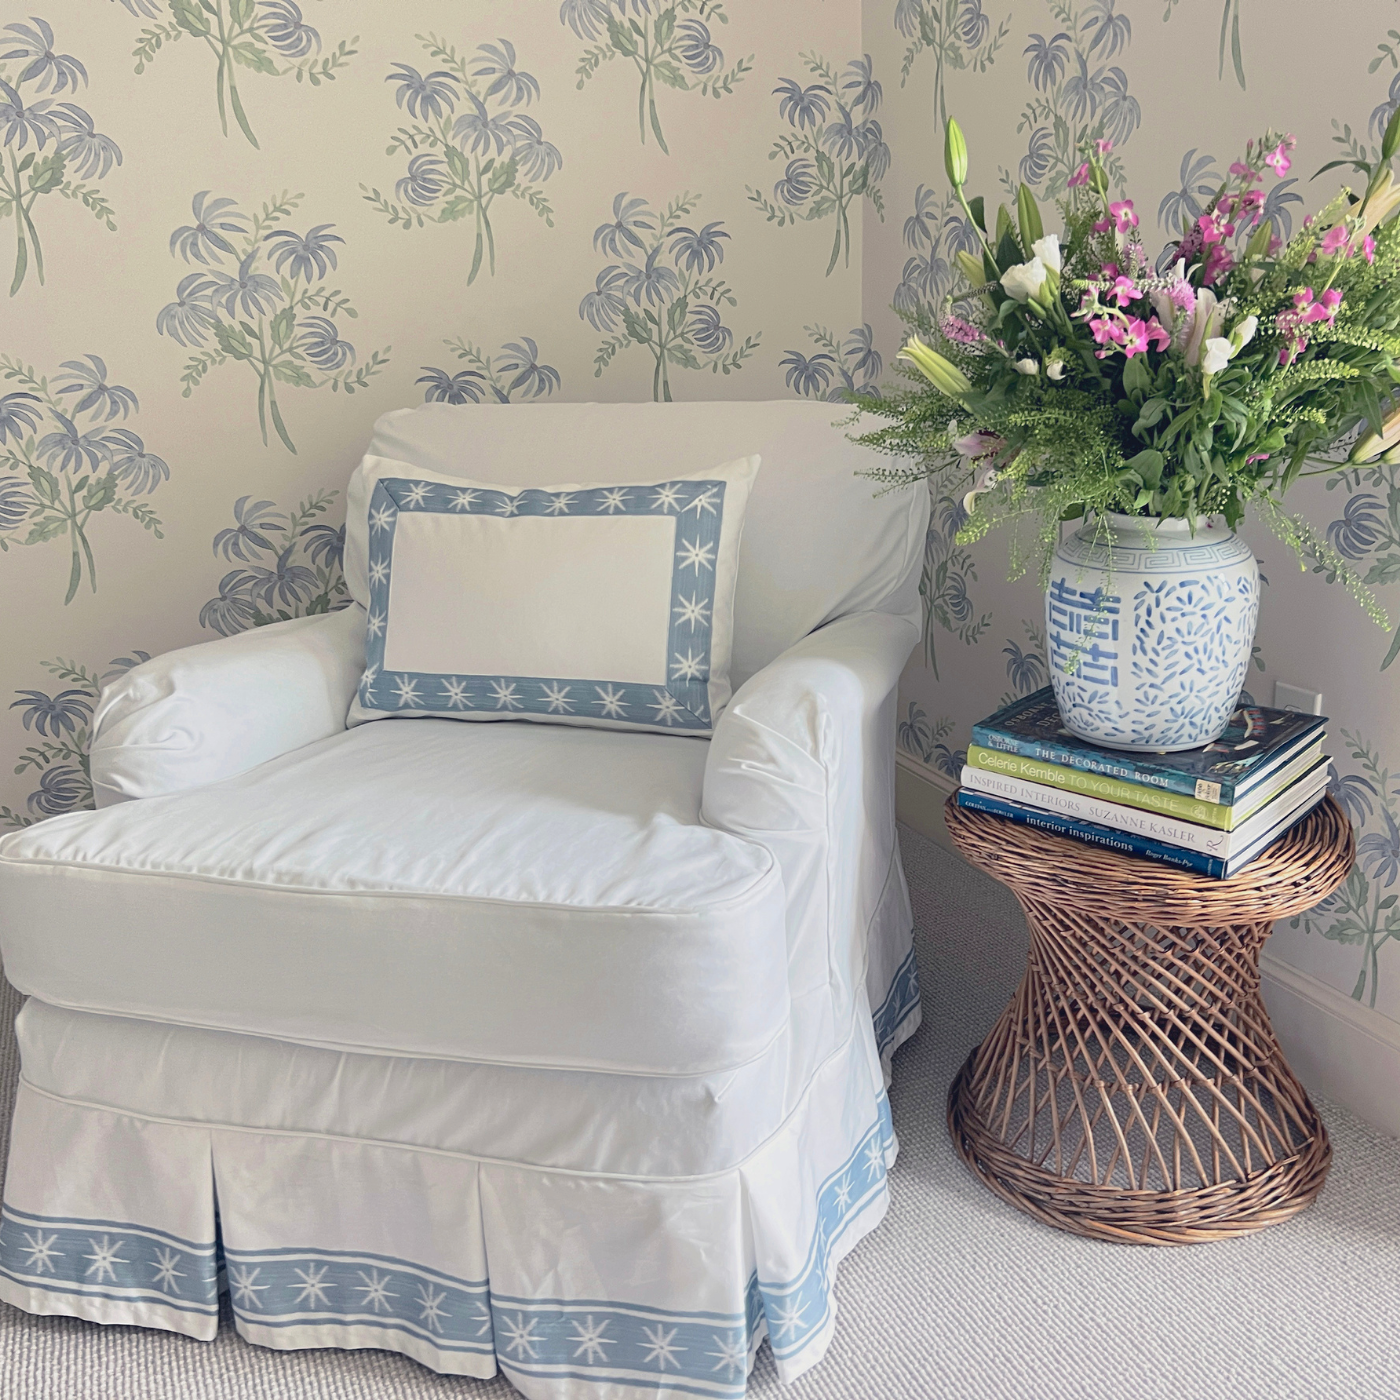
Step 3: Cut Banding Strips
To create the banding for the pillows, I need to cut the stripe into strips, leaving 1/2-3/4” (1.27 cm-1.91 cm) extra along each edge to fold under. I use a clear ruler as my guide and cut the fabric with a rotary cutter.
Step 4: Fold and Press
Next I fold the edges of the strip under to create a simple blue banding of stars and press it in place with an iron. That’s it!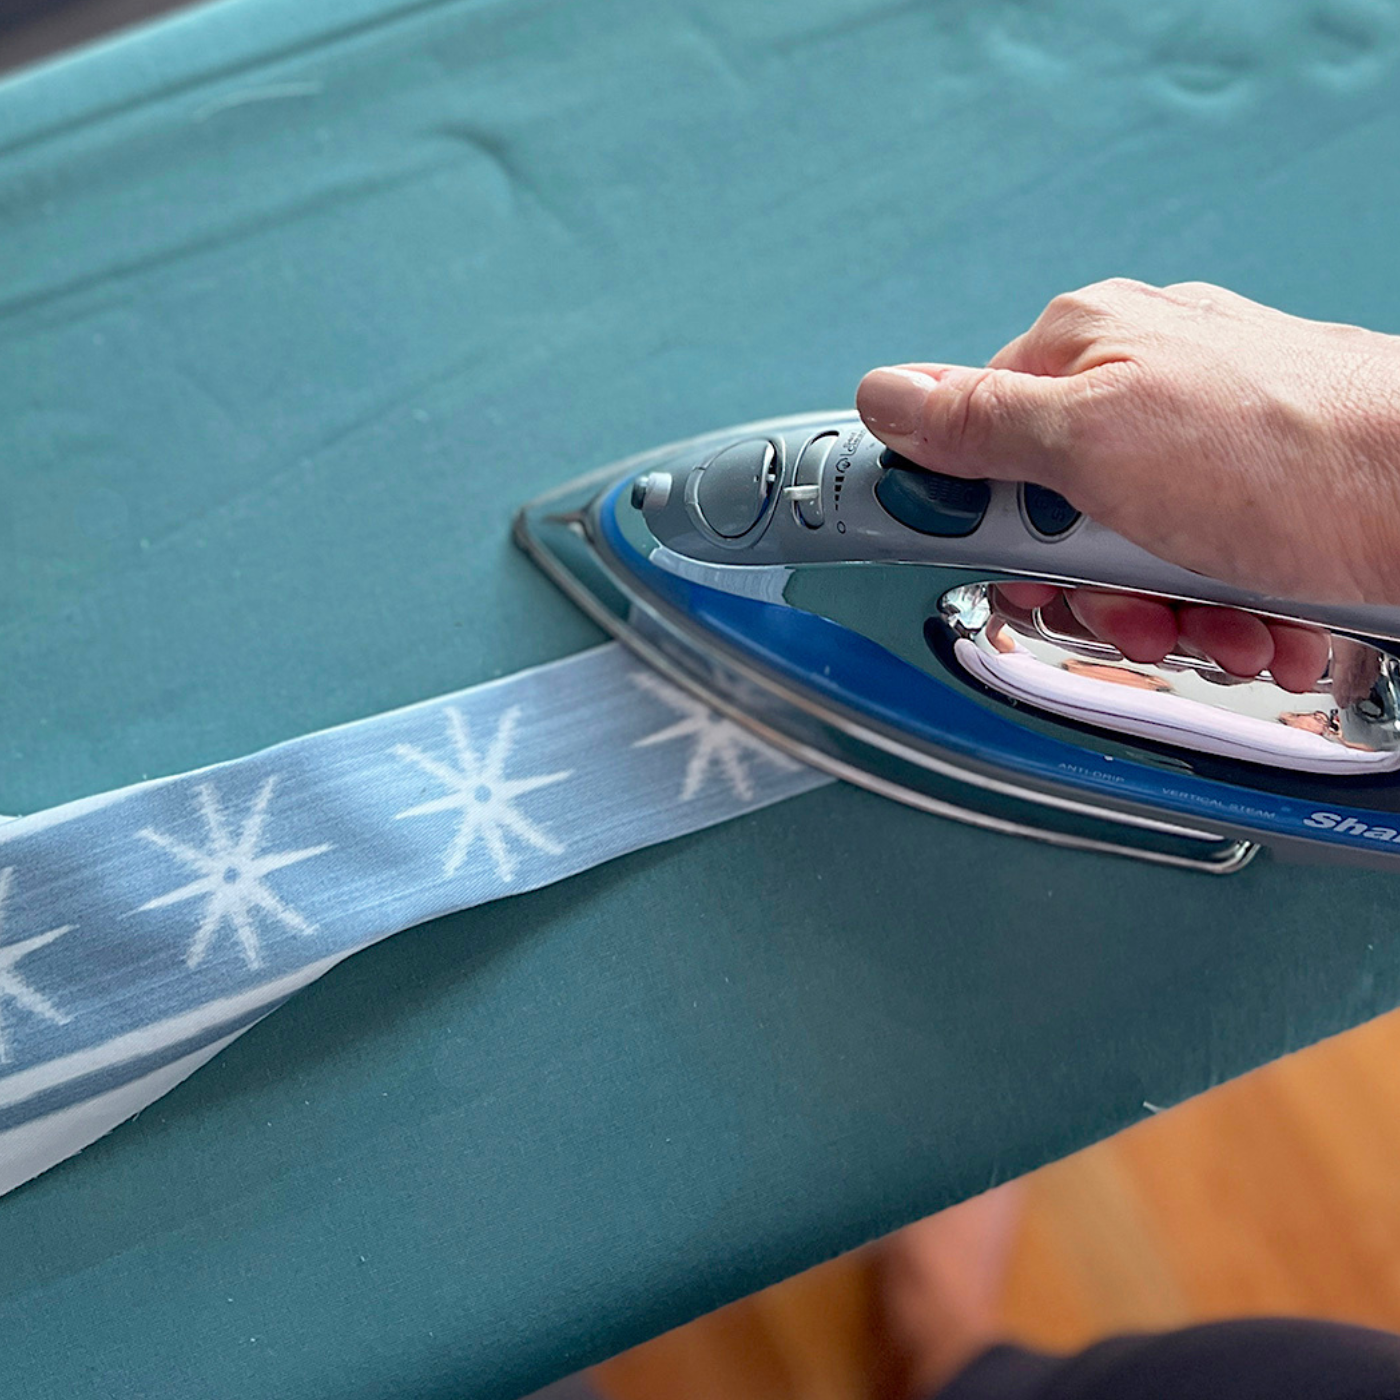

Part 2: Attach Banding Trim
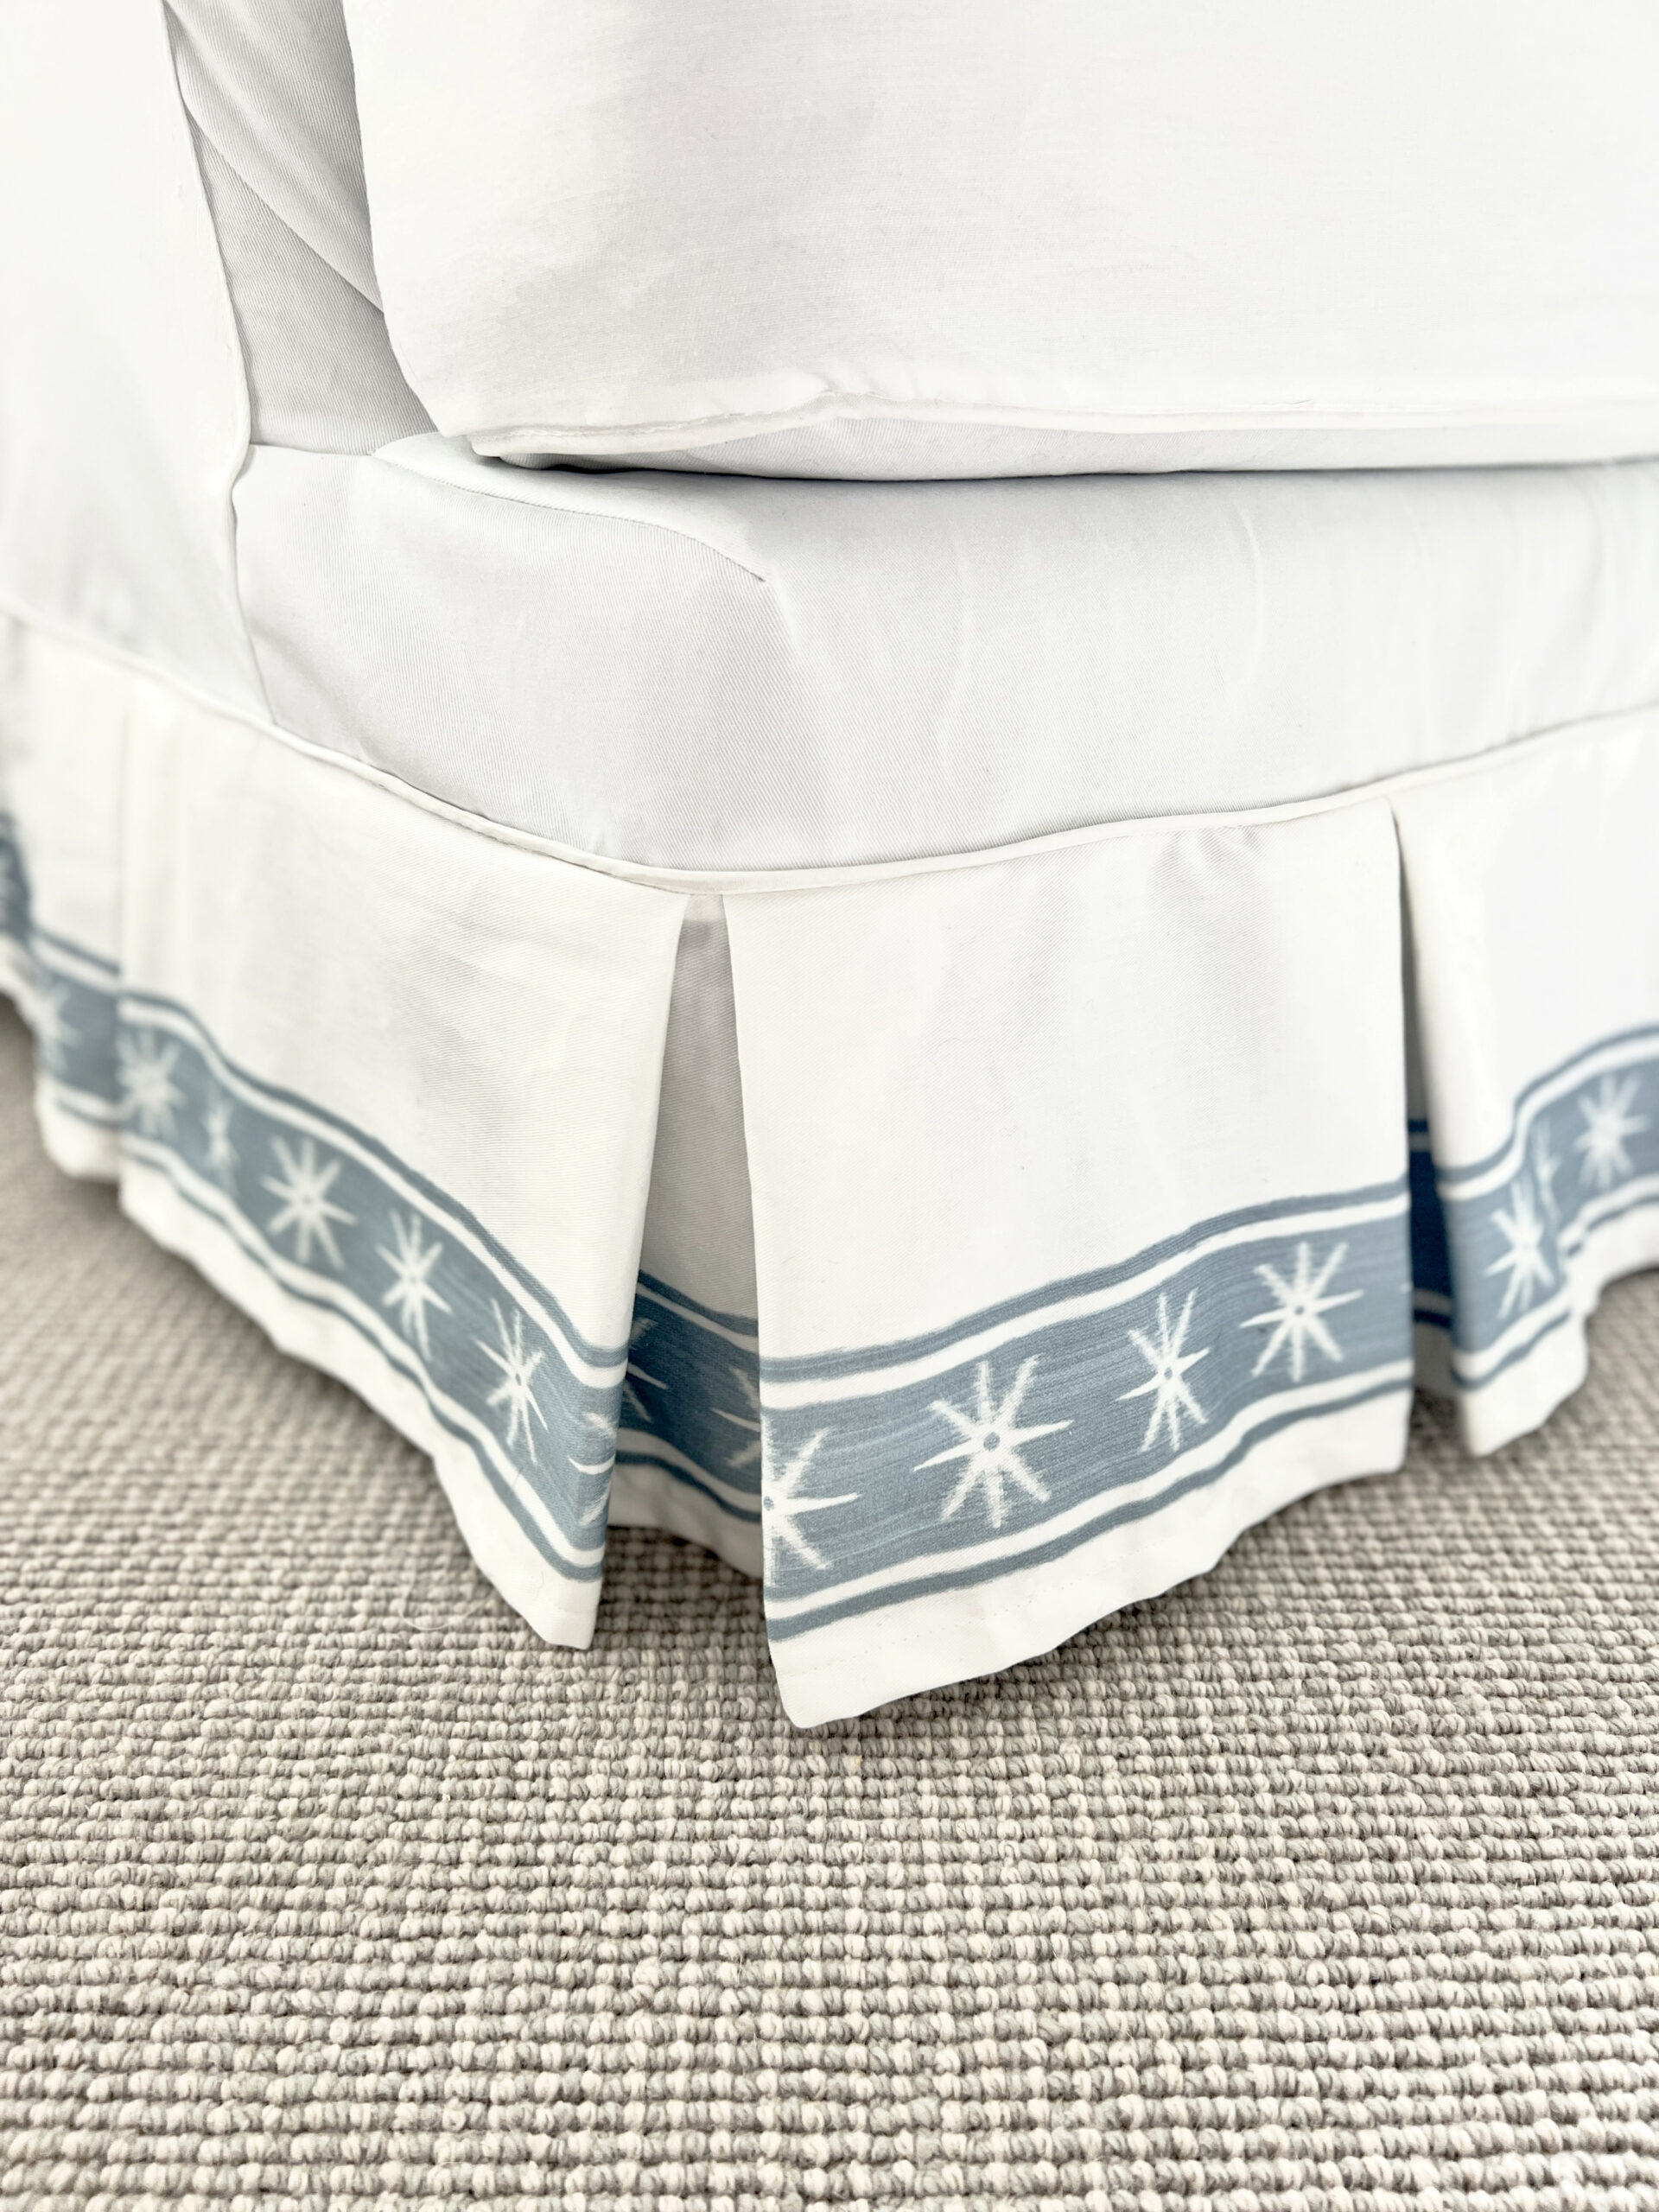
Once I’ve cut and pressed the banding, I attach it to my pillow face. This technique will be the same for any project-whether it’s Roman shades, a duvet, a dust ruffle or draperies. This process requires placing and pinning your newly pressed banding onto your project of choice, just as you would with regular banding tape. If you are doing a straight run of banding with no corners or turns you can skip steps 2 and 3 below as they demonstrate how to create a basic mitered corner.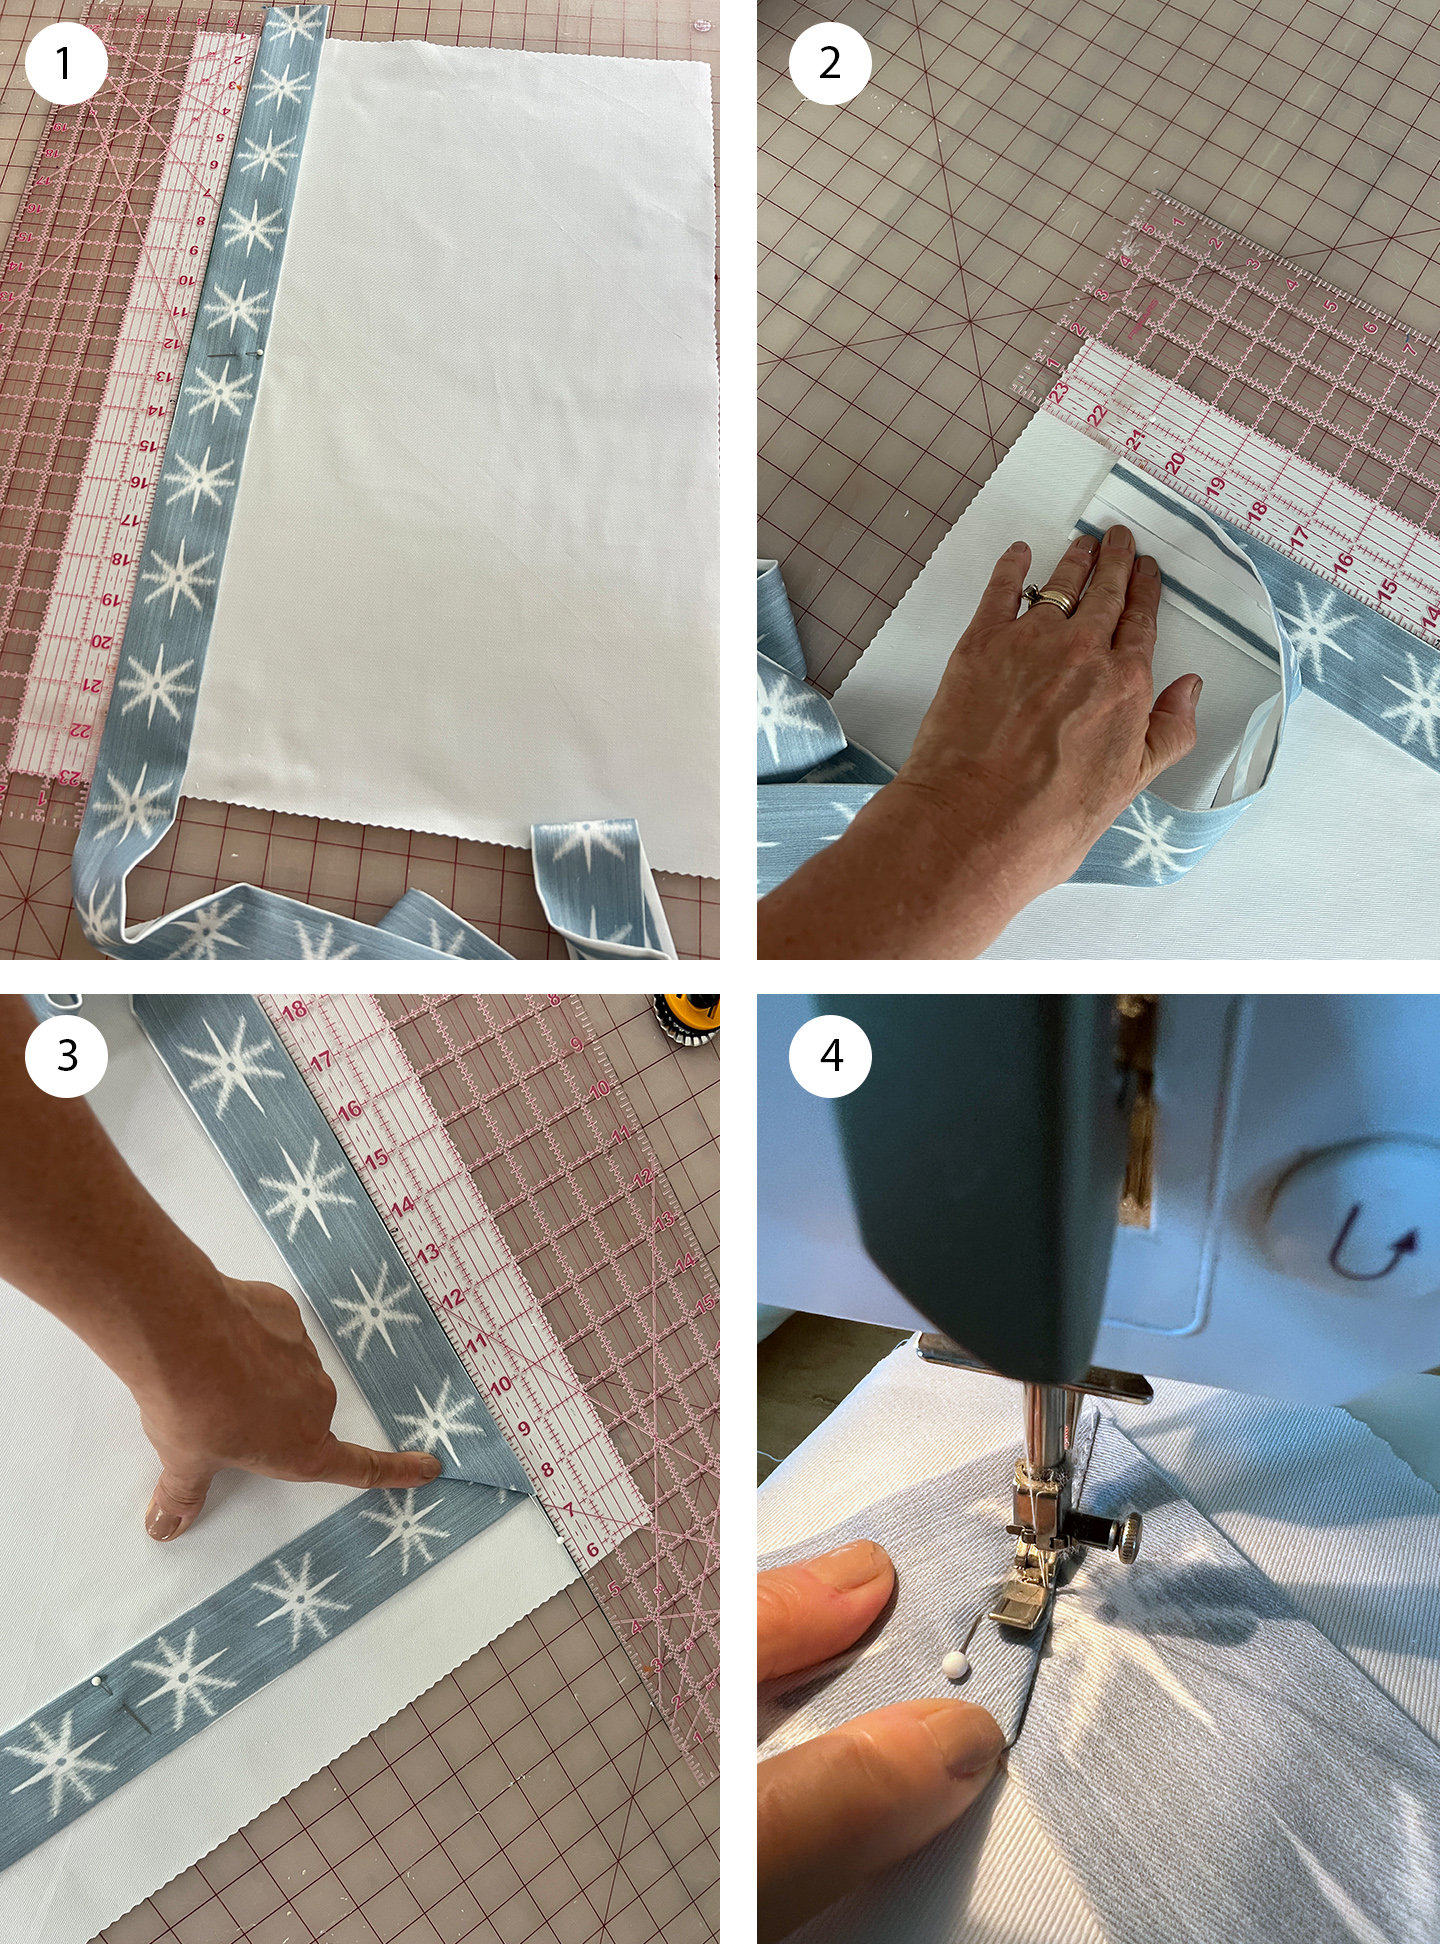
Step 1: Determine Inset Placement and Pin
Lay your fabric flat, making sure it is smooth and pressed. Use a clear ruler as a guide to create any inset. I want my banding set 1 1/2” (3.81 cm) in from the pillow’s edge, so I set my guide at 2” (5.1cm), which allows for a 1/2” (1.27 cm) seam. Next I lay the banding in place, pinning it in the center and working out towards the corners.Step 2 and 3: Make a Mitered Edge
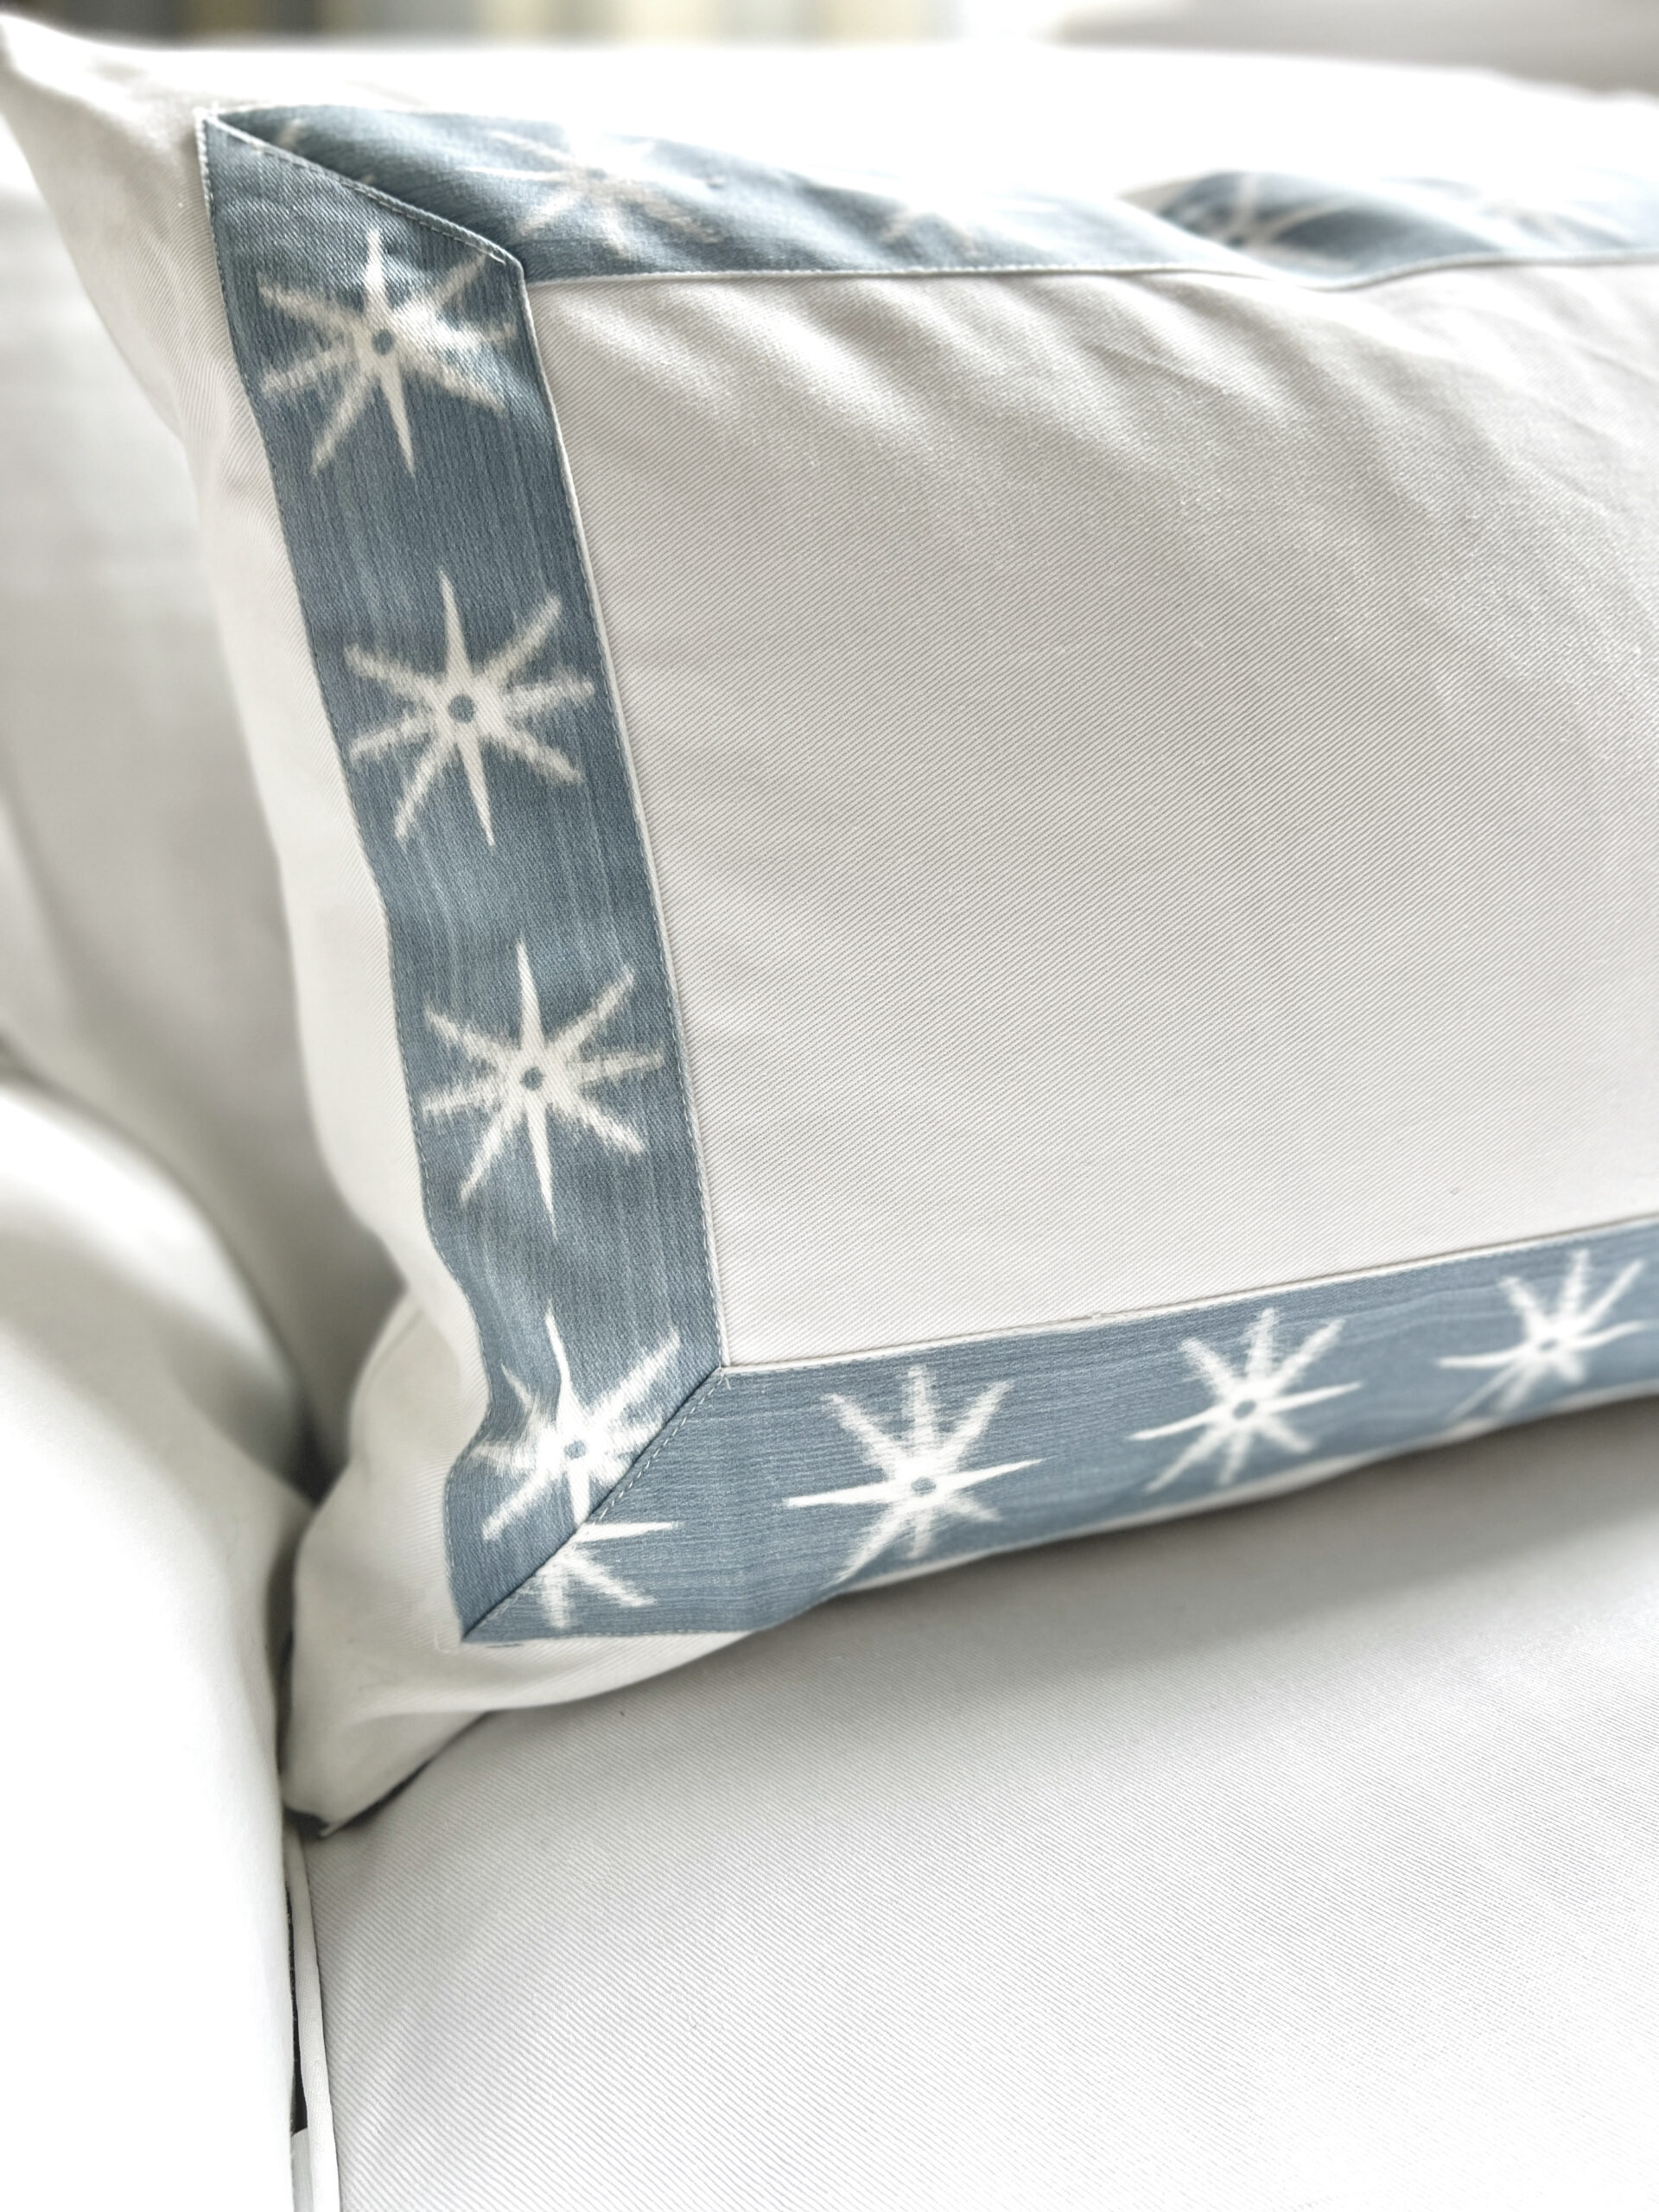
When you get to a corner you will need to make a mitered edge by creating 45-degree folds. Place a pin in the outer corner to hold the fabric steady and fold it back on itself. Next, fold the fabric forward at a 45-degree angle, creating a mitered edge. Pin it in place and press with an iron. Continue pinning the banding to the fabric, repeating this step with each corner. When you get to the last corner, trim your banding to be 3/4” (1.91 cm) longer than needed and hide the unfinished edge into the miter fold.Step 4: Make a Mitered Edge
Sew the banding to the face by stitching closely along the edge. I like to use a zipper foot so I can get as close as possible to the edge, working my way all around the entire banding until it is secure.
How to Design a “No-sew” Banded Layout with Photoshop
Step 1: Determine the Size
Begin by determining your pillow size, including your seams. My finished pillow will be 26” (66 cm) and I will have 1/2” (1.3 cm) seams, so my final size is 27” (68.6 cm). Create a new file in Photoshop in those dimensions being sure to set the resolution to 150 dpi.
Step 2: Create Your Banding Design
You will need to create the banding design you want to use prior to this. Save it as the width you want it to print and make sure it is as long as the length of your canvas. I am using my Star Stripe design again and have placed it as a new layer in my file. In Photoshop, the steps to do this are: File > Place Linked > (choose file) > Place.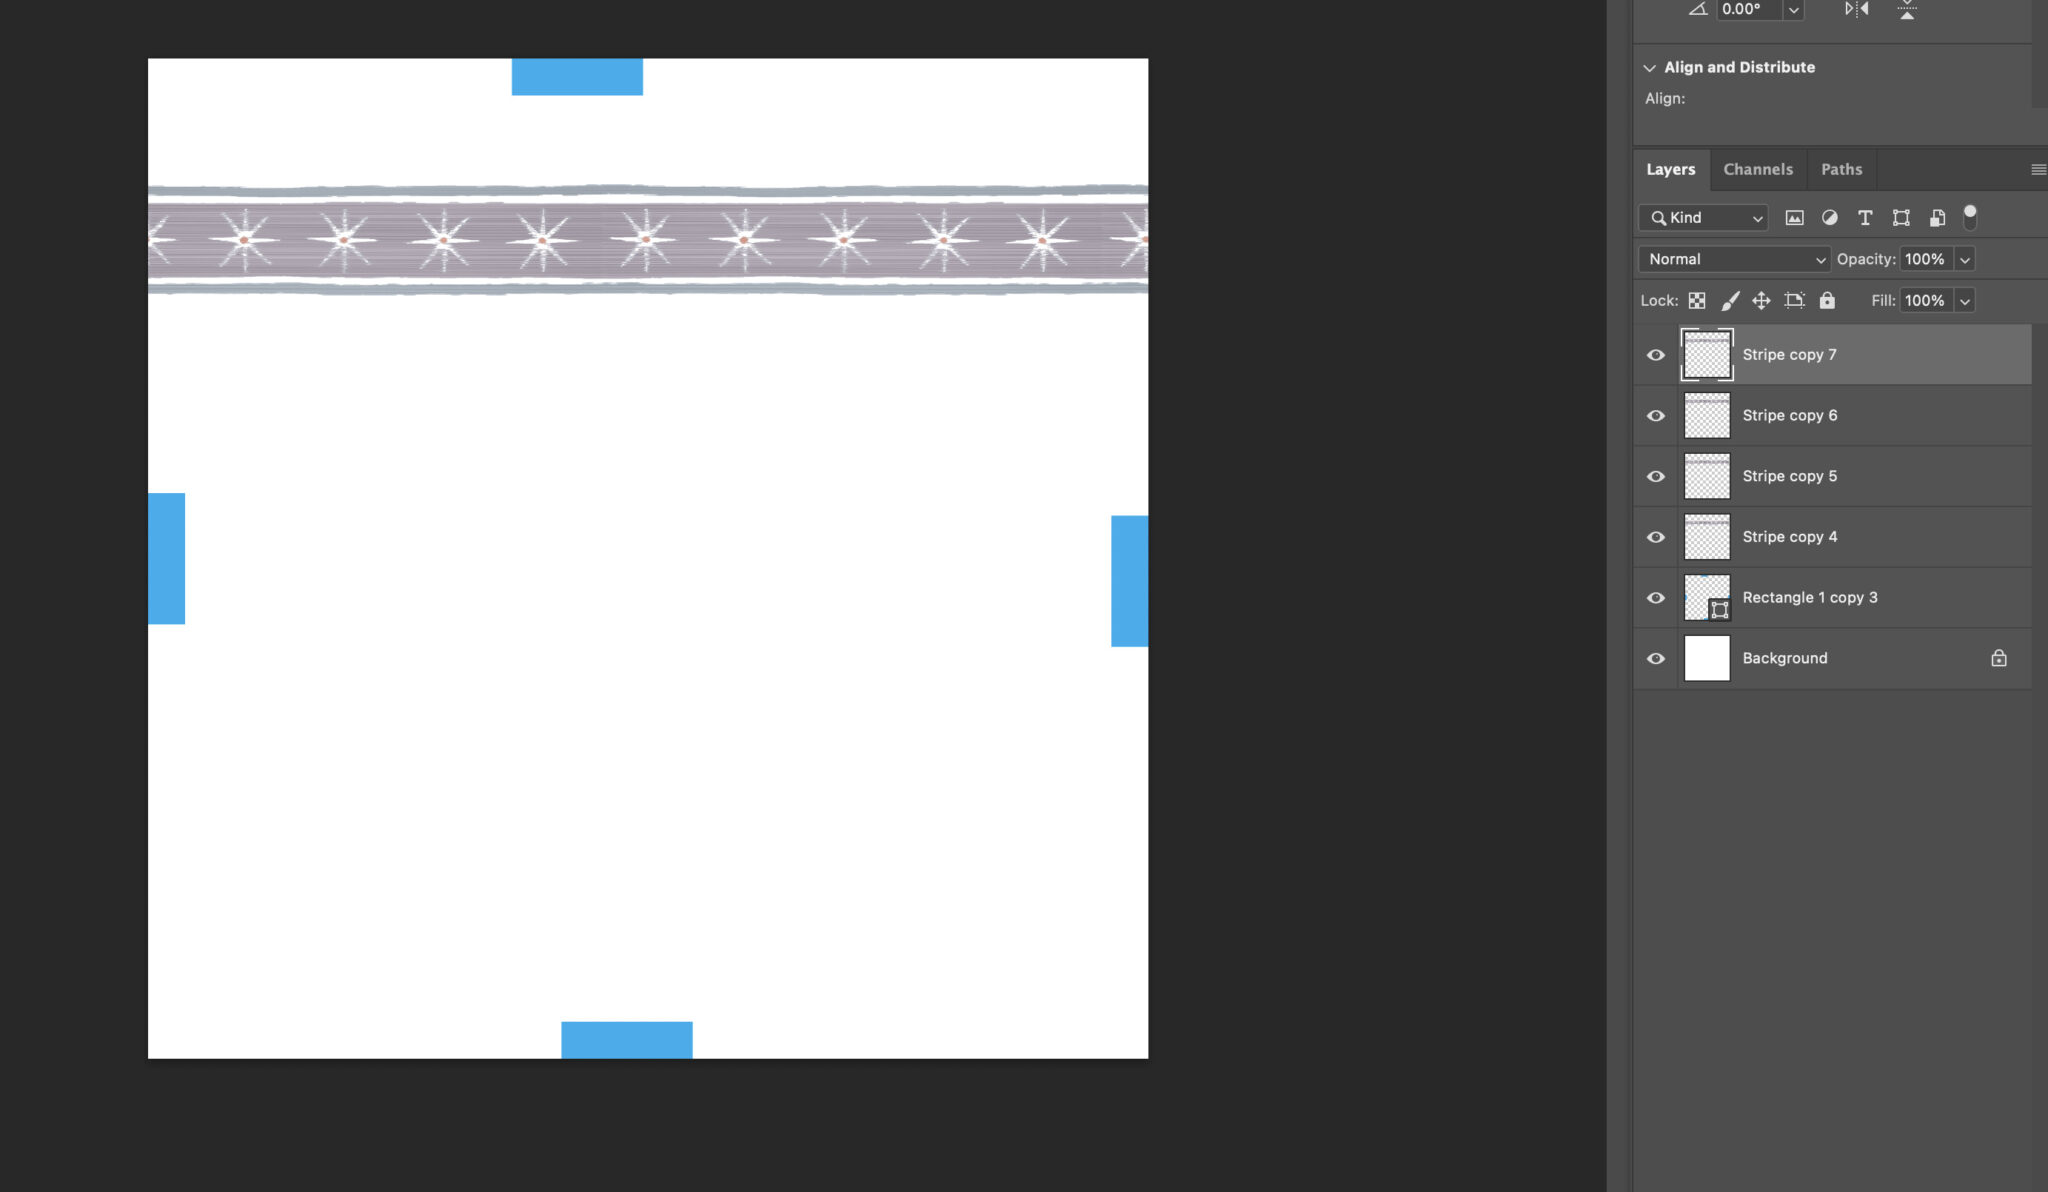
Step 3: Duplicate the Amount Needed
Duplicate your stripe layer 3 times. Photoshop steps: Command + J on a Mac/Control + J on a PC x 3. Move and/or rotate each stripe so that it’s aligned against the edge of each rectangle.
Step 4: Adjust
For stripes containing patterns, you might need to adjust these further for mitered corners. Note how the stars in my corners of the last pictures almost line up, but not quite. I simply click on each stripe and transform them individually, stretching or shrinking them so the corners line up and look neater.
Step 5: Create Miter Edges
Now you need to miter the edges. Using the Polygonal Tool I draw a line through the corner, containing the excess of the top stripe I want to remove. Be sure you have that layer selected and press the “Delete” key.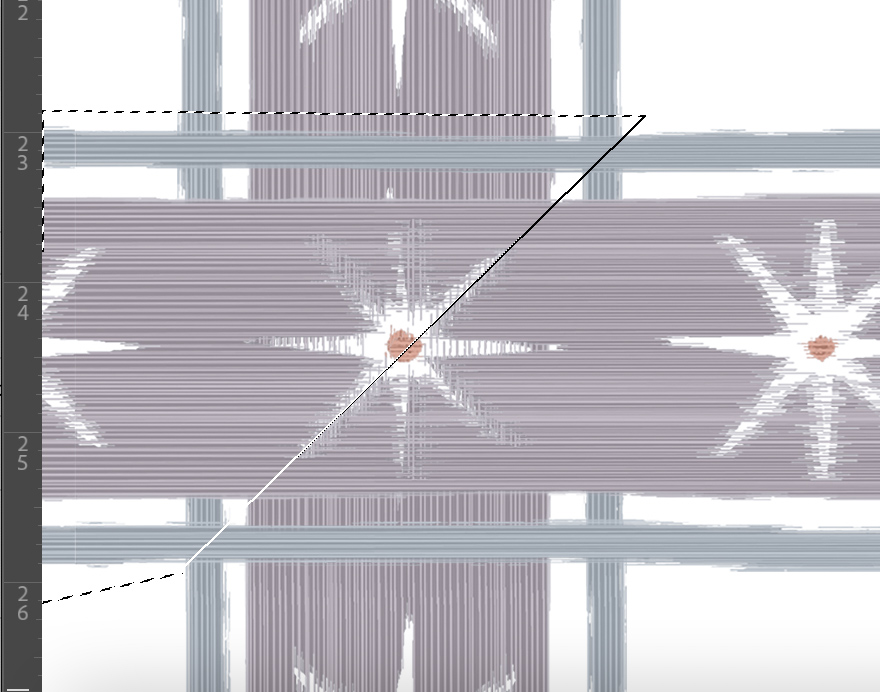
Step 6: Erase Excess
To remove the excess stripe below, click on that layer and then choose Select > Inverse. The area outside marquee lines can now be removed. Choose the Eraser Tool and carefully erase the remaining excess area.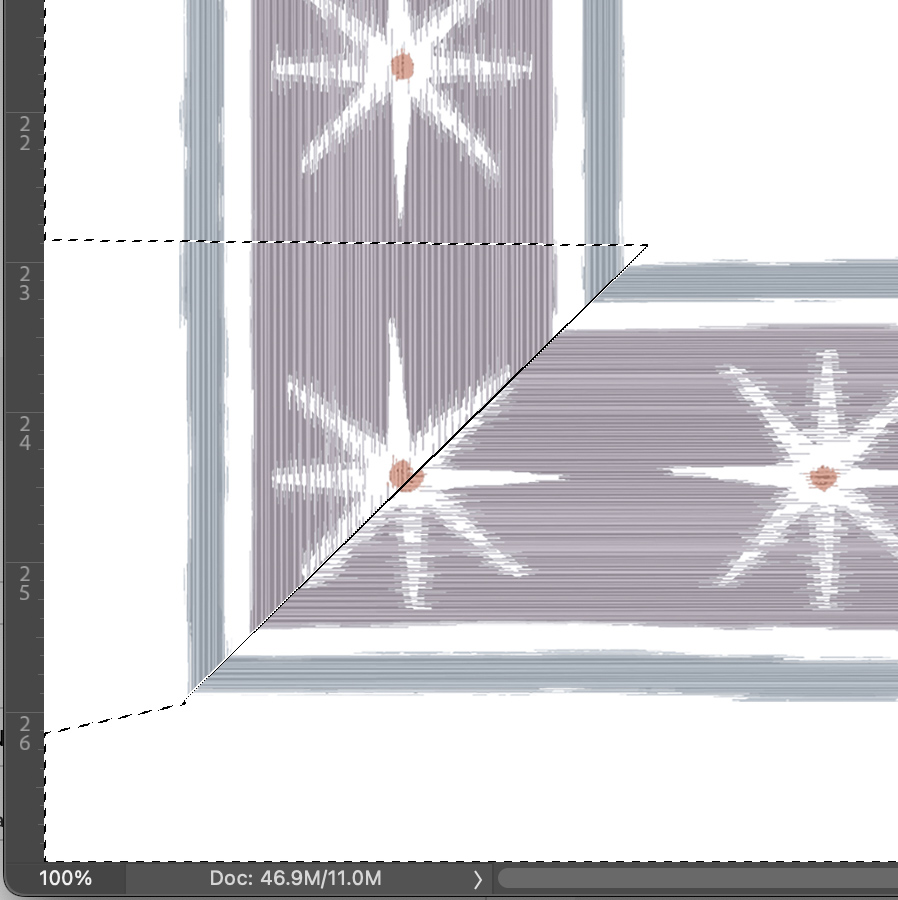
Step 7: Repeat for all Corners
Repeat Steps 5 and 6 for all corners. You will now have a neatly mitered pillow template. Feel free to embellish further if needed. I added a tulip from another design to the center of my pillow. Delete the rectangle spacers.
Step 8: Save, Upload and Print your Banded Trim Design
Save your design as a .jpeg and upload to Spoonflower. Choose the fabric you want to print on and double check how it lays out on a yard of fabric. If you are happy with the design, order a sample or yardage. When you receive the yardage, you can simply cut into your pillow squares and sew them together. Now you’ll have an easy custom banded pillow that requires no additional banding or sewing! Once you get the hang of this it becomes addictive. Here I used this same technique to create these matching Roman shades, factoring in the side/bottom hems and top header measurements into the total canvas size.

Made to order using unique designs from artists worldwide.

The World’s Largest Design Library for Wallpaper and Textiles
Discover a world of design—from minimalist to maximalist. Thousands of global artists, with new styles added constantly.

Custom Designs on Any Item
Our made-to-order model lets you print any design on any material. Coordinate patterns across rooms for a cohesive, personalized home.

Premium Materials, Always in Stock
Trusted by pros and enthusiasts, our responsibly sourced textiles and papers offer the perfect finish—from smooth to textured, delicate to durable.

Printed on Demand in the USA
Our print-on-demand model lets you choose your design, material, and quantity—minimizing waste with non-toxic inks and reduced packaging.