August 19, 2025 • Updated December 30, 2025
How To Make a Fabric Research Poster with PowerPoint
Preparing for a presentation can be stressful enough, and the last thing you want to worry about is how you’re going to get your poster printed without breaking the bank. Enter Spoonflower, where you can get a wrinkle and tear-free fabric presentation poster printed for under $25. Angie Proctor, shares how she uses PowerPoint and Spoonflower to print her presentation posters.

Substrate note: In April 2024, we changed the name of Performance Piqué to Sport Piqué. It’s the same fabric, but a different name! We’ve changed the name of the fabric in the post, but you’ll see the name Performance Piqué on some images in this post as it was written before the name change. When ordering your poster, please select Sport Piqué as your fabric.
Orientation note: Thanks to a comment from a customer who changed their poster to landscape orientation, here’s advice for adapting this tutorial to landscape: To do a poster in portrait, rotate the image itself before you upload it to Spoonflower, so it makes a landscape-oriented image of a portrait-orientation poster lying on its side. If you just directly upload a portrait-oriented image but use 48″ x 36″ fabric, you may end up with the top and bottom of the poster cut off.
**Step 1a. Design your poster with PowerPoint **
Within PowerPoint, select the “Design” menu and the “Slide View” option. Select the “Custom Slide Size” option from the drop down menu.PowerPoint can have a difficult time managing large files sizes, so you’ll want to adjust your file to be half the final size of your poster. I want my final poster to be 42” wide and 36” tall, so I’ll make my slide size 21” wide and 18” tall. In the pop-up box, change the width measurement to half of your desired width (in this case, 21 in) and the height measurement to half of your desired height (in this case, 18 in.) Click OK to proceed.
A close up of the Slide Size box in PowerPoint. The slide size has been changed to Custom. The width has been set at 21 inches and the height has been set at 18 inches.
In the following pop-up box, select “Ensure Fit” to make sure everything will be on the final poster area.
To start from a blank slide, return to the “Home” menu and select the “Layout” submenu to select the “Blank” option. This will give you a clean slide to start creating your poster. At this point, you can import images and figures into the slide and use PowerPoint’s shape and text editor to create your desired poster. These can be found in the “Drawing” submenu of the “Home” tab.
Once your poster is complete, jump ahead to see how to prepare your file for printing.
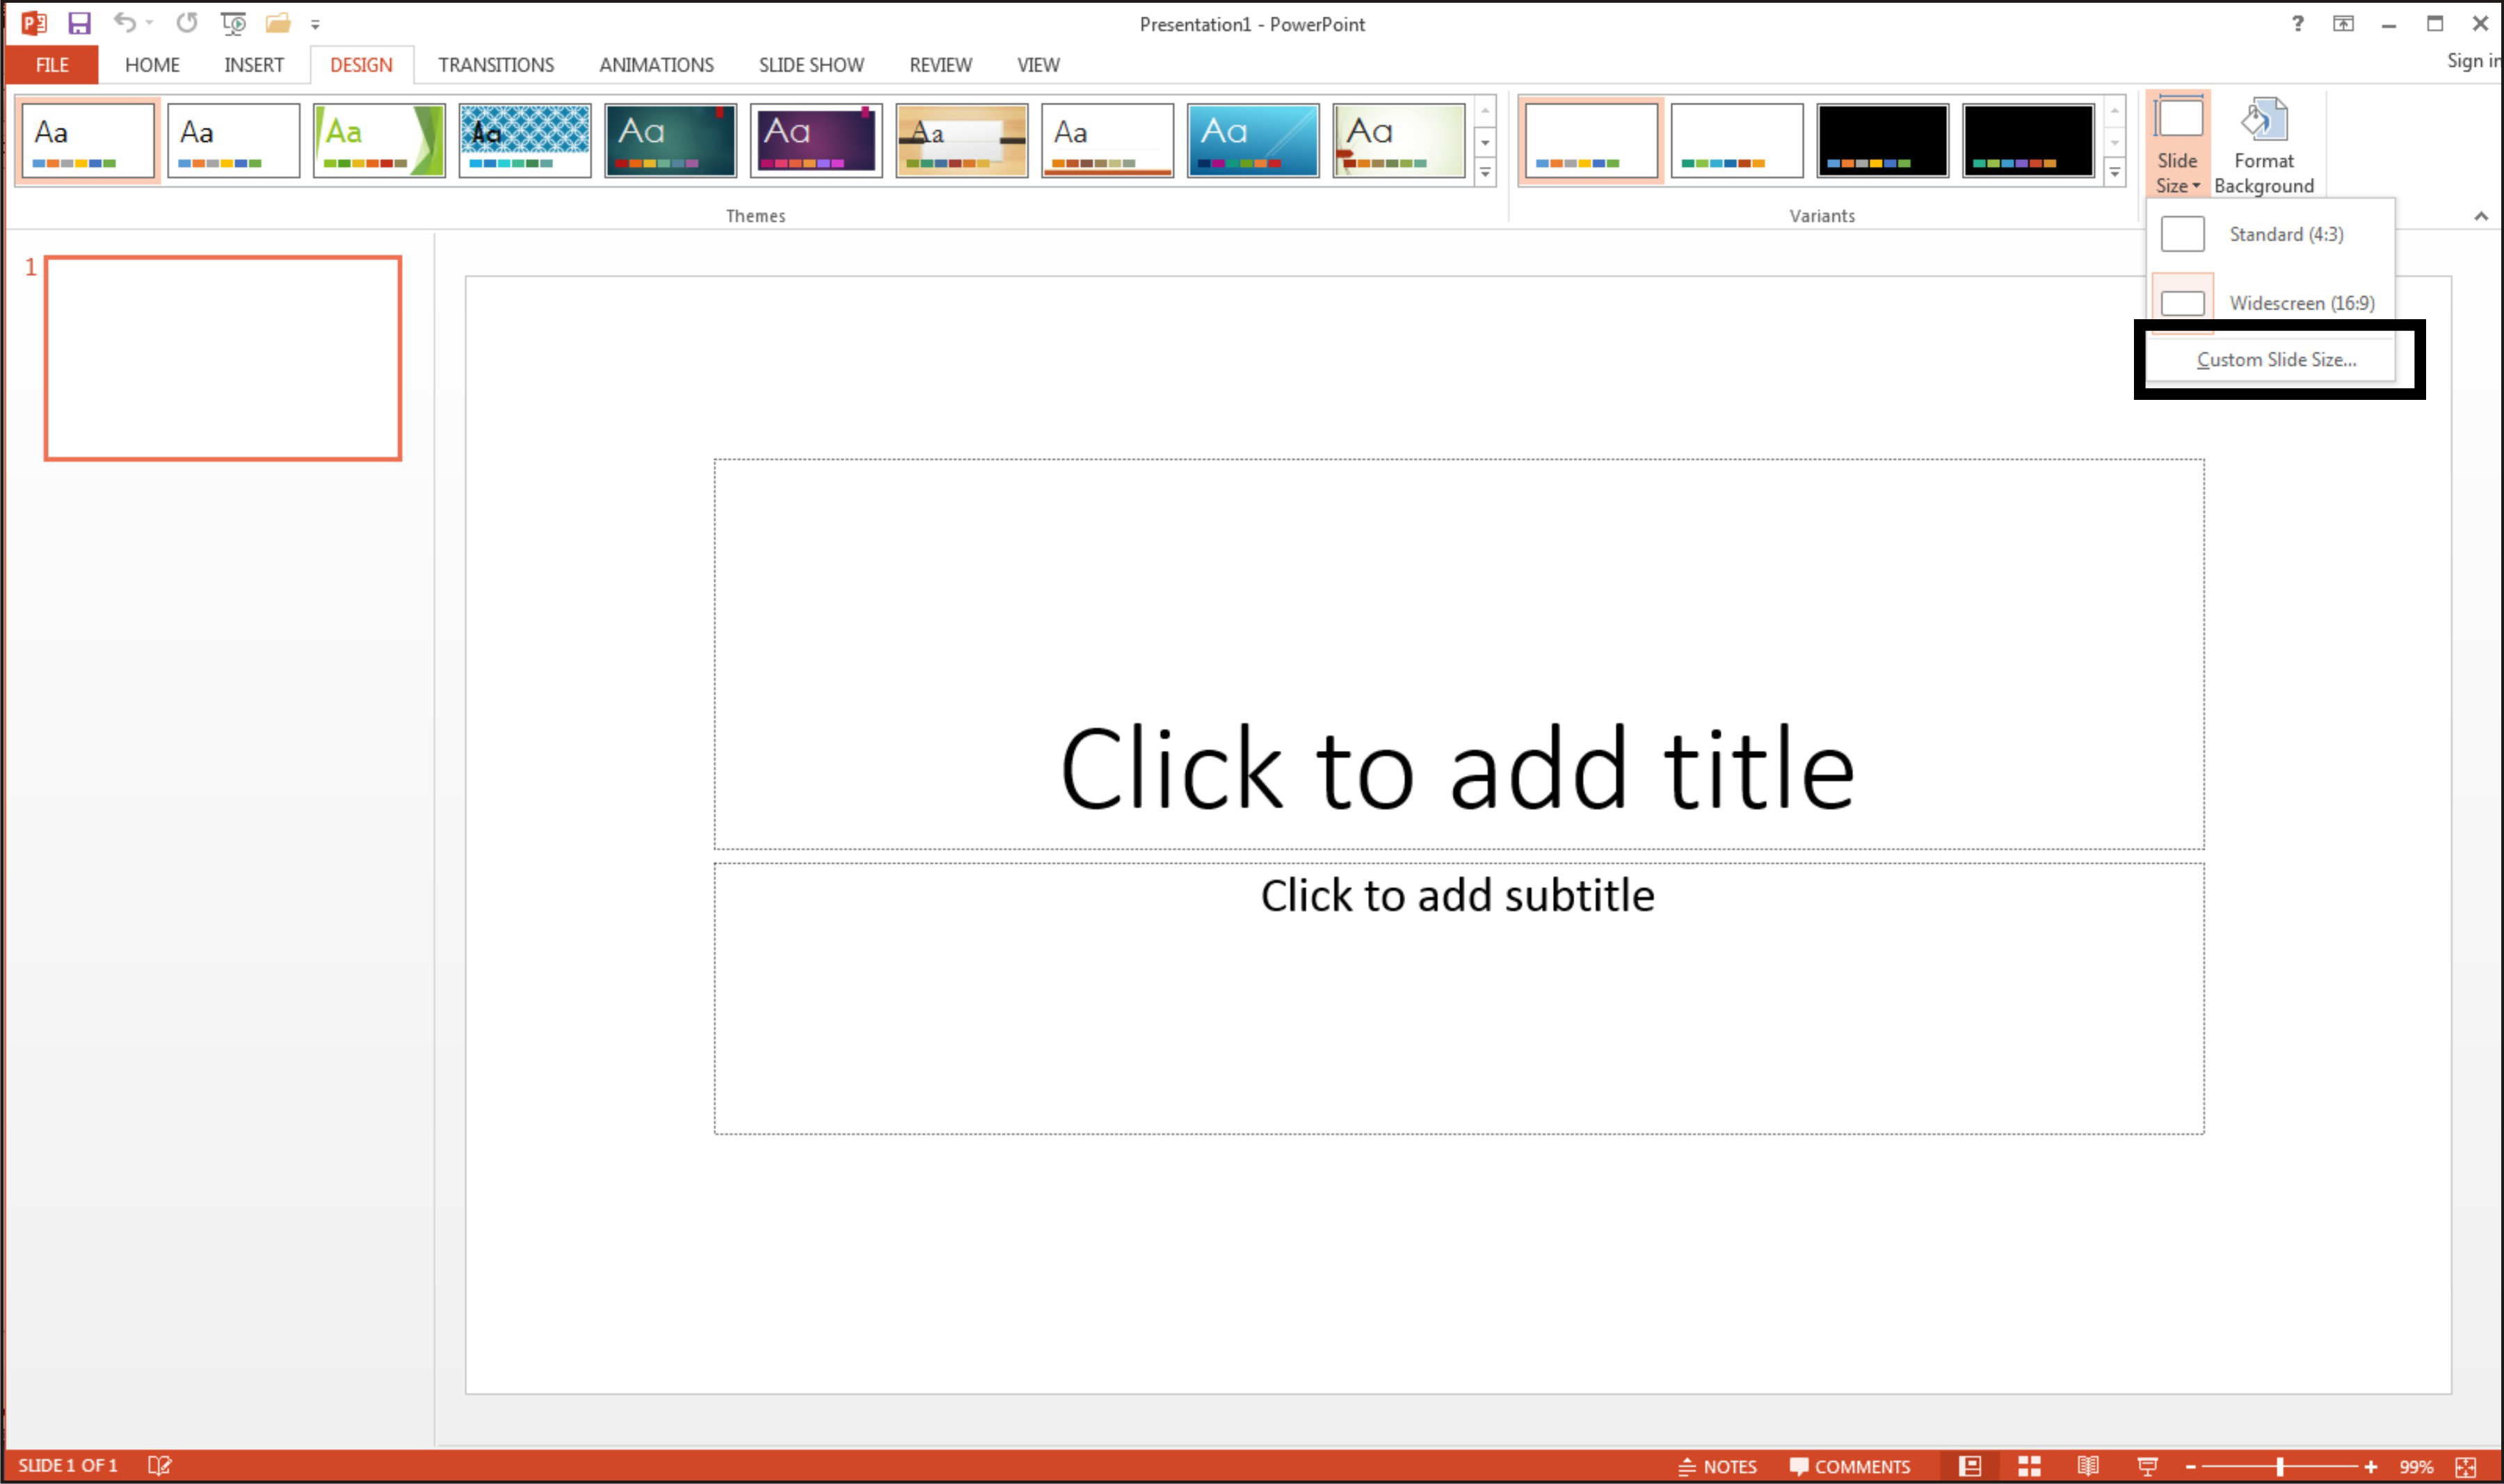
Step 1b. Design your poster with a template
If you prefer to use an existing template, my method of choice, you can do a quick Google search for lots of free poster templates. Once you’ve selected the template format, download the file to your computer. If you don’t find the exact template you need, keep in mind that you can change the colors and arrangements in PowerPoint, so select one that is close to what you want. Open the template on your computer by selecting “Open with Microsoft PowerPoint” and select the OK button. You may have to use the dropdown menu to select PowerPoint if it’s not already selected.Once the file opens in PowerPoint, click the “Enable Editing” button to allow you to make changes to the poster template and to save the file.
Pro tip: The black sidebars on the templates from PosterPresentations.com will not print on your final poster. The template includes useful information on them for how to design and modify your poster.
Before proceeding to make your poster, save the poster template by going to the “File” menu option on the top menu bar and selecting the “Save As” option. Save your poster template to your desired location on the computer or an alternative drive.
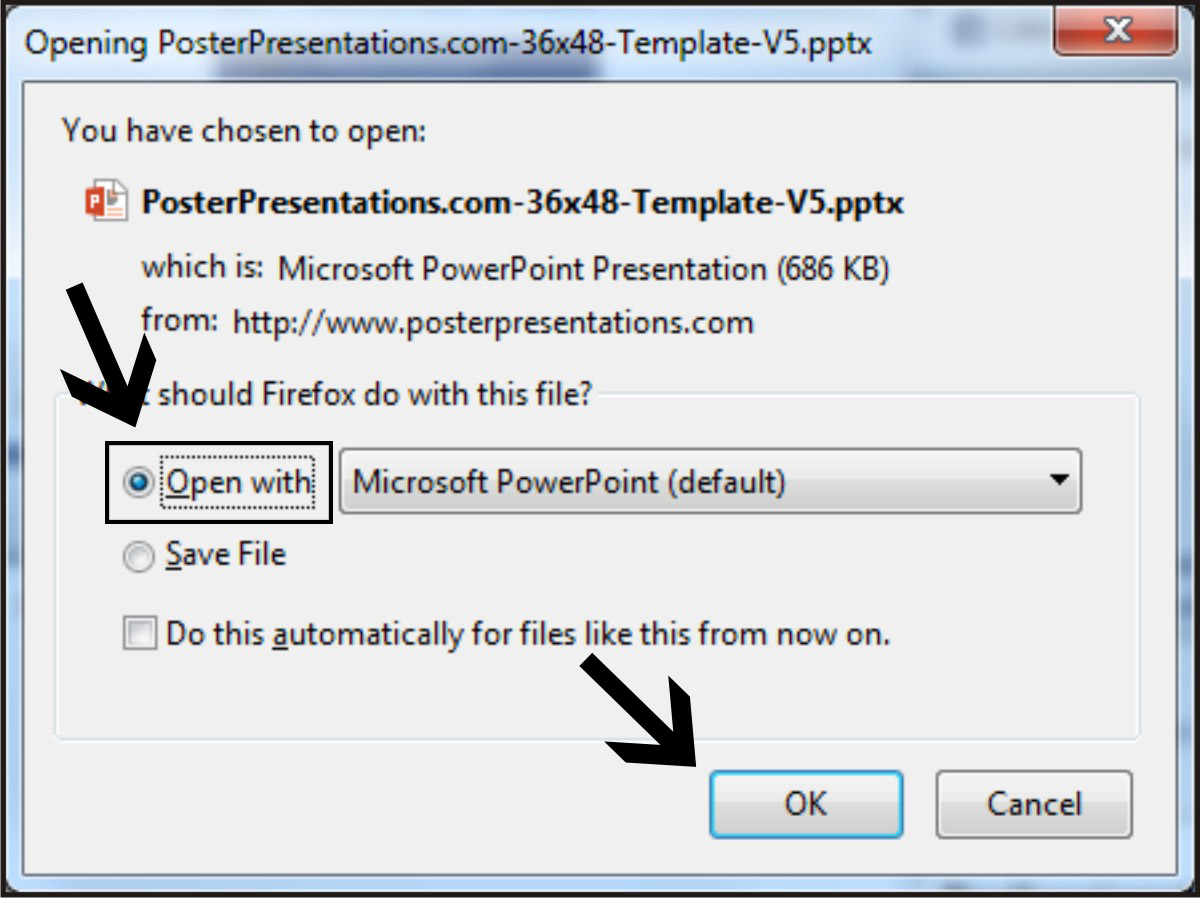
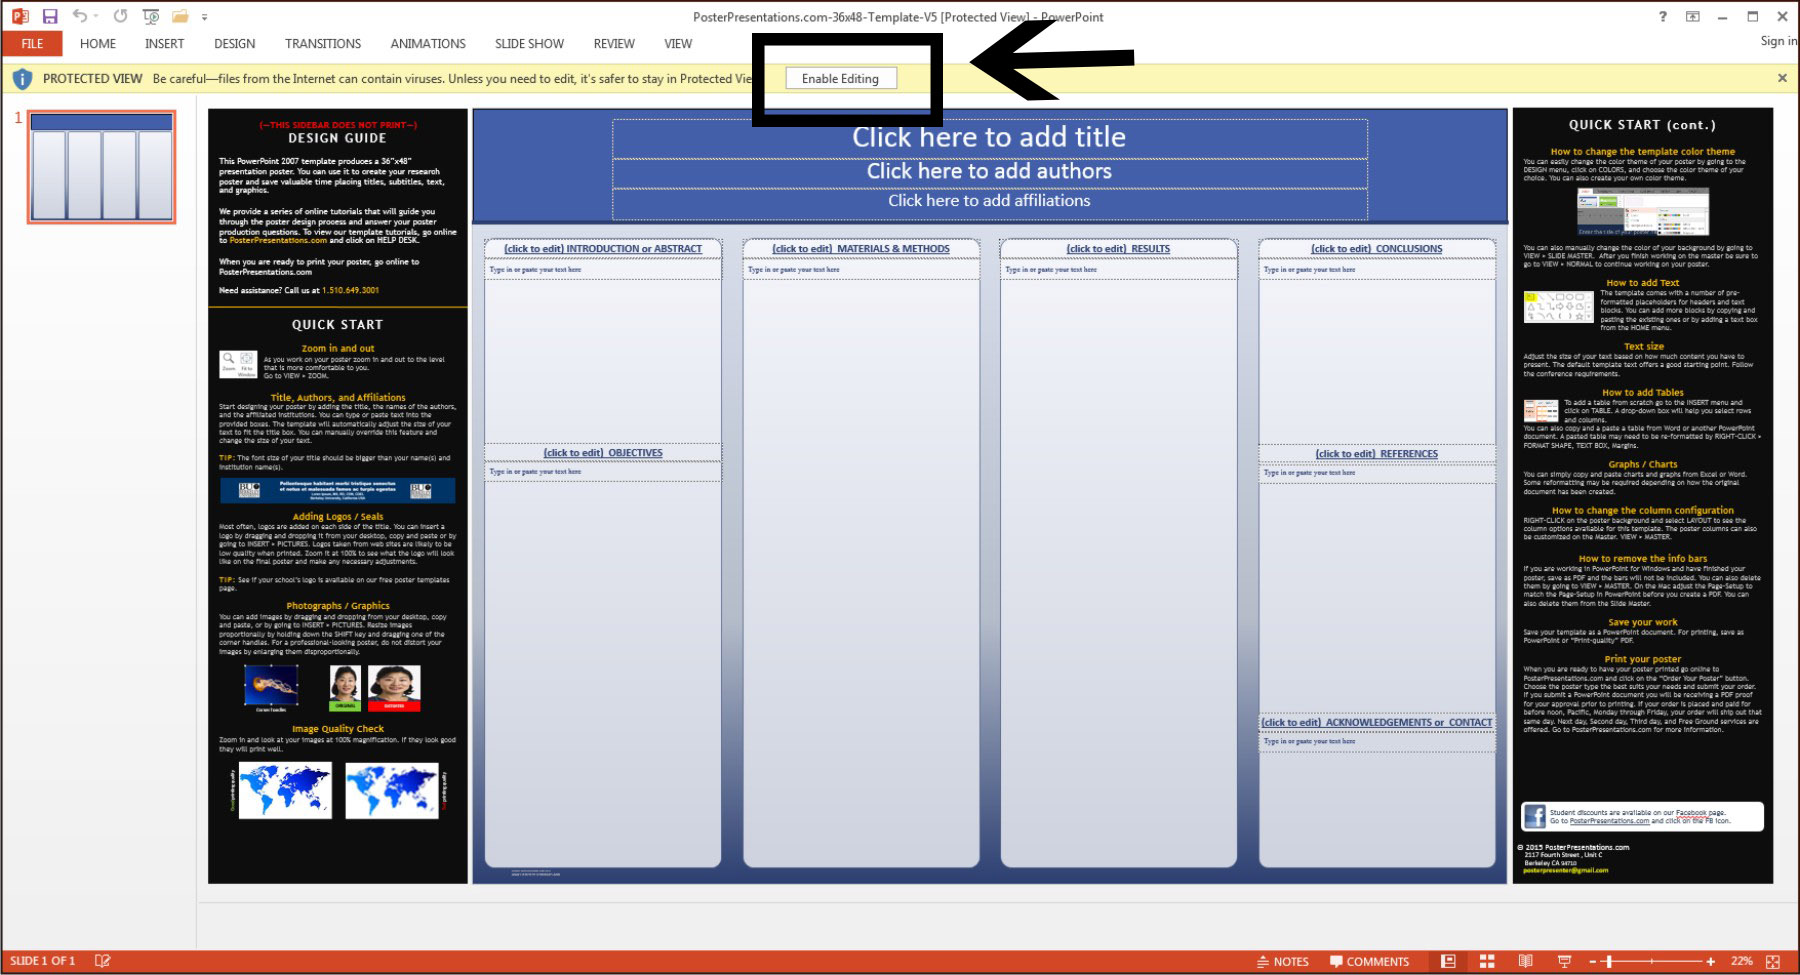
Step 2. Customize your poster
If you want to change the colors/layout/default font/etc., go to the “View” menu in the upper toolbar and select “Slide Master” in the lower tool bar.
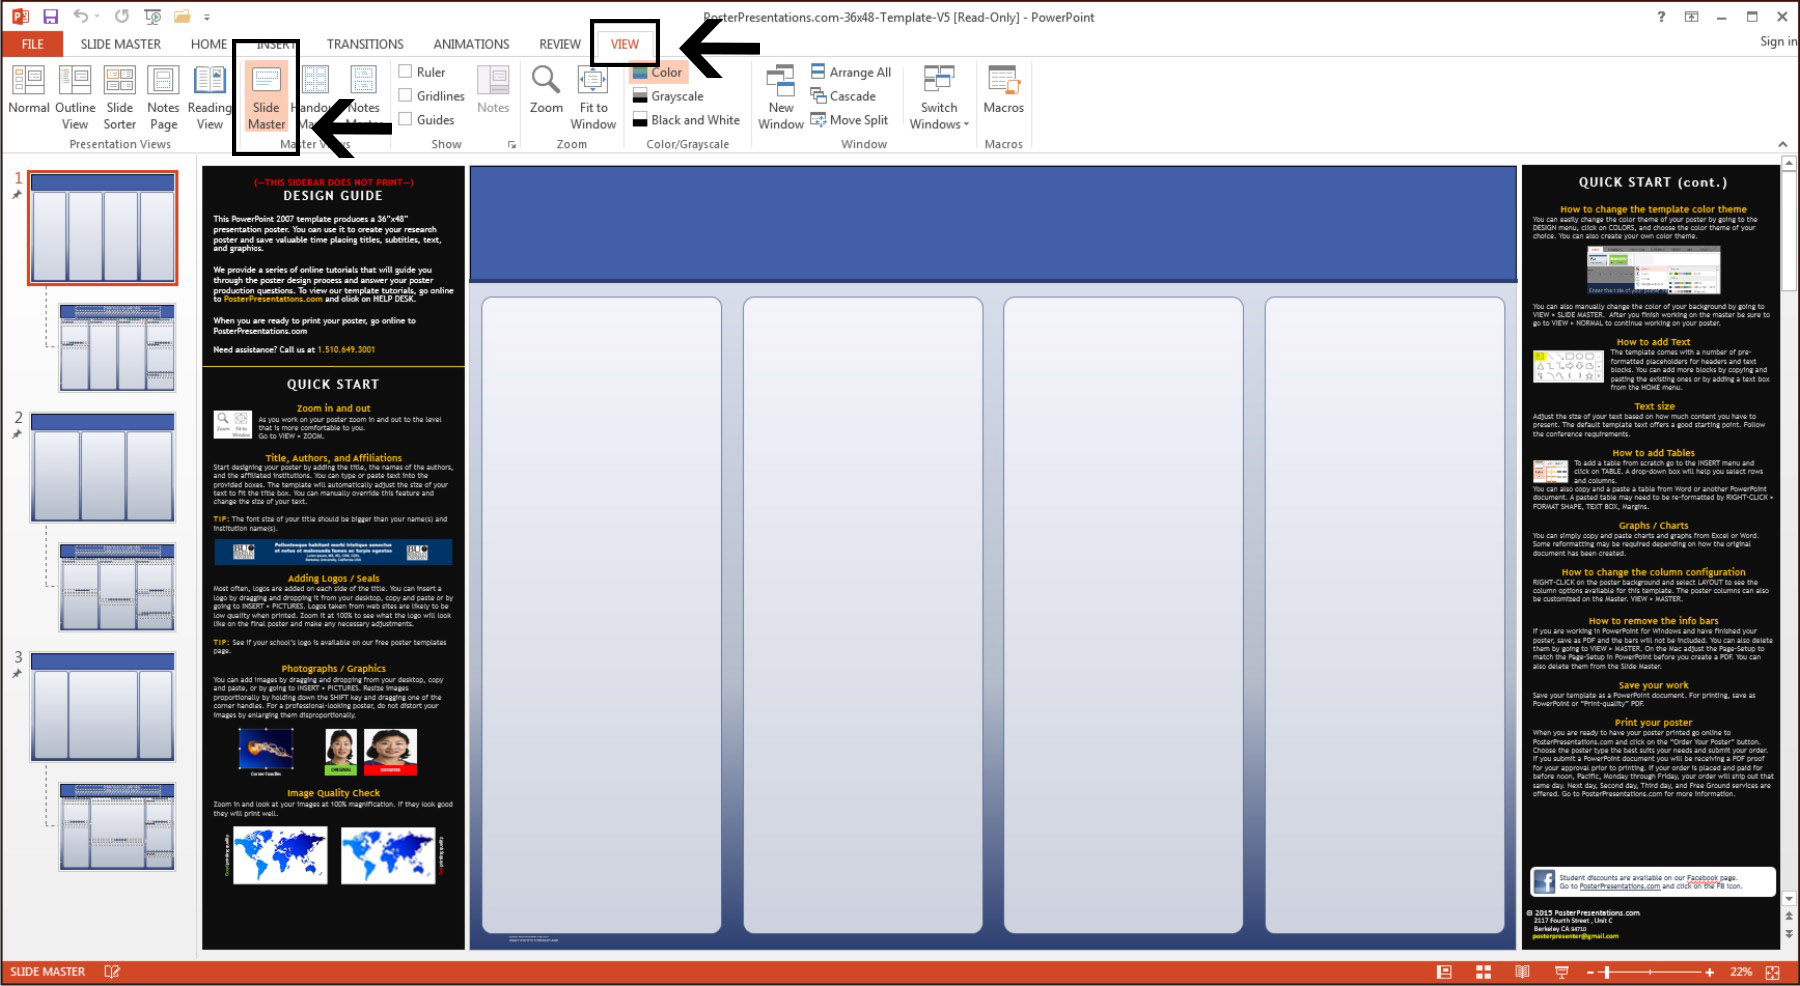
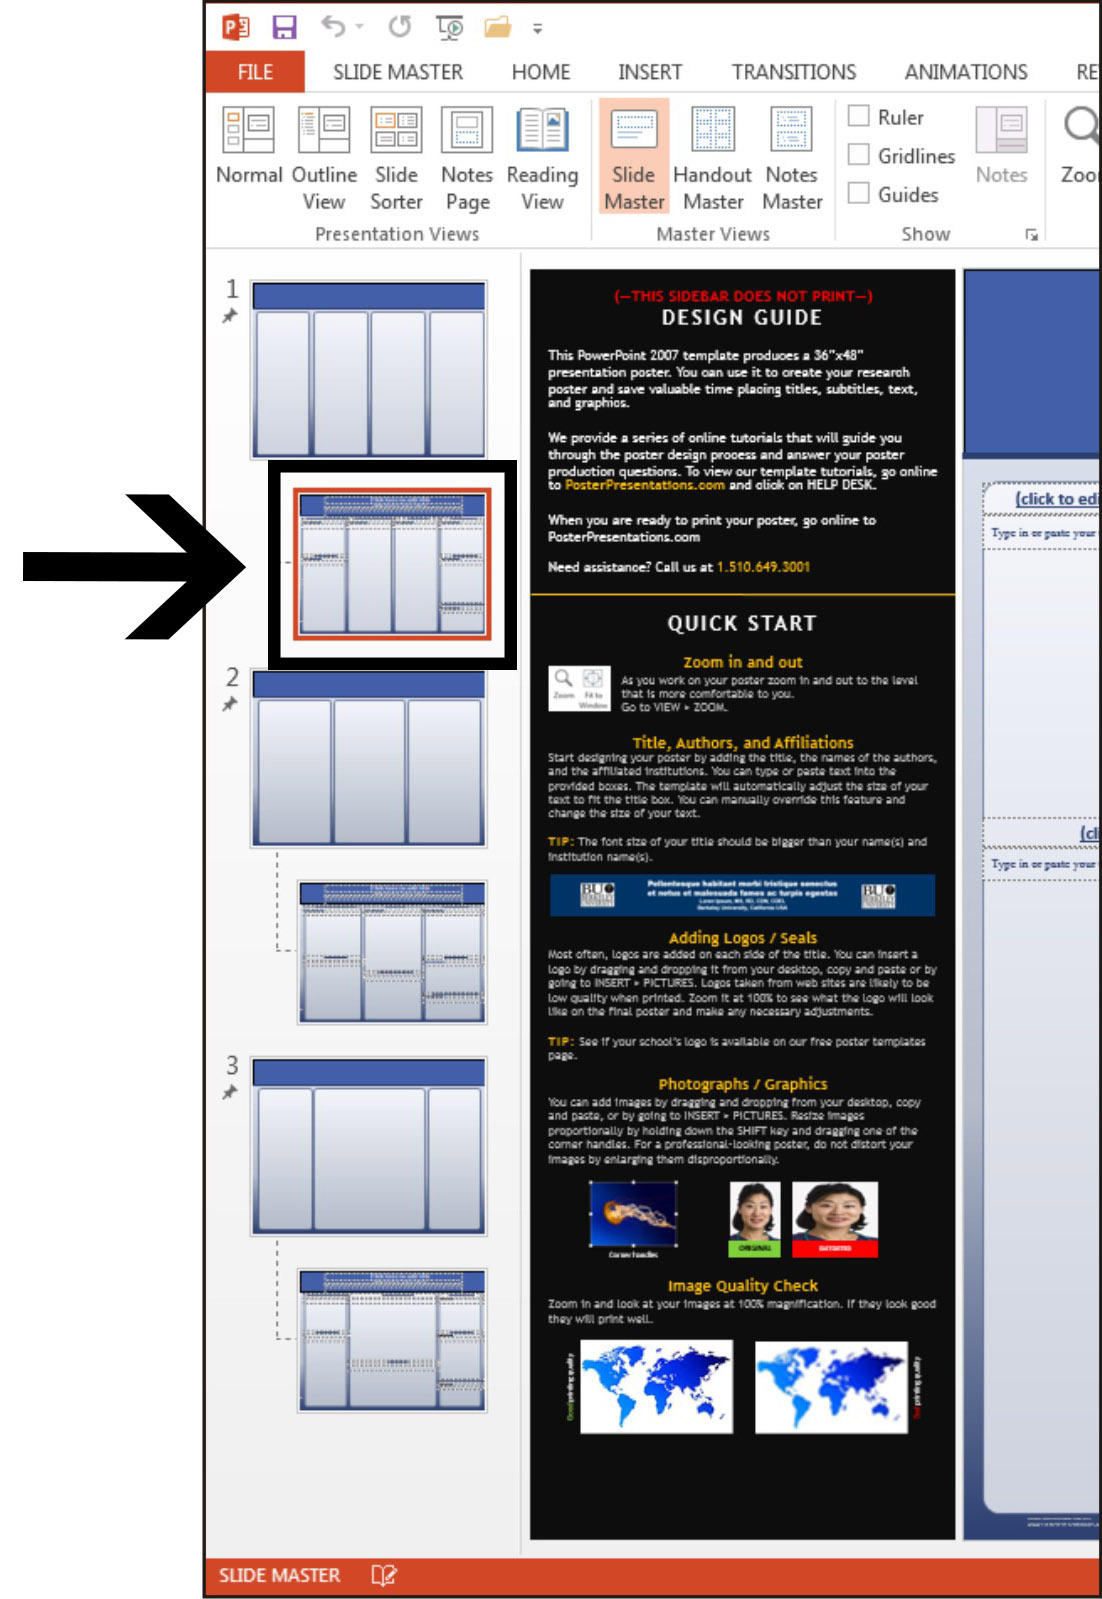
Step 3. Adjust default colors, box sizes and fonts
In the Slide Master window, make sure the #1 slide is selected to change default colors and column size/layout. You can adjust these until they match what you want for your final poster.Ensuing the #1 slide is selected to change default colors and column size/layout in the Slide Master view.
In the Slide Master window, click on the sub-slide below the #1 slide to change the default font size/color/etc.
Showing where to click on the sub-slide below the #1 slide to change the default font size/color/etc in the Slide Master view.
Once you’ve changed the default values to get the framework of the poster you want, create your poster by importing figures, plots, tables, pictures, etc. and design your poster to look how you want it to.
Use high resolution images and figures in this initial design period to ensure that they are not pixelated in the final version. A good way to check this is to look at the poster in the 100% zoom option. This will give you the best idea of what it will look like when printed. Go to the “View” tab and select the “Zoom” option. In the popup window, select “100%” and click the “OK” button to proceed.
To return to the full view of your poster, go to the “View” tab and select the “Fit to Window” option.
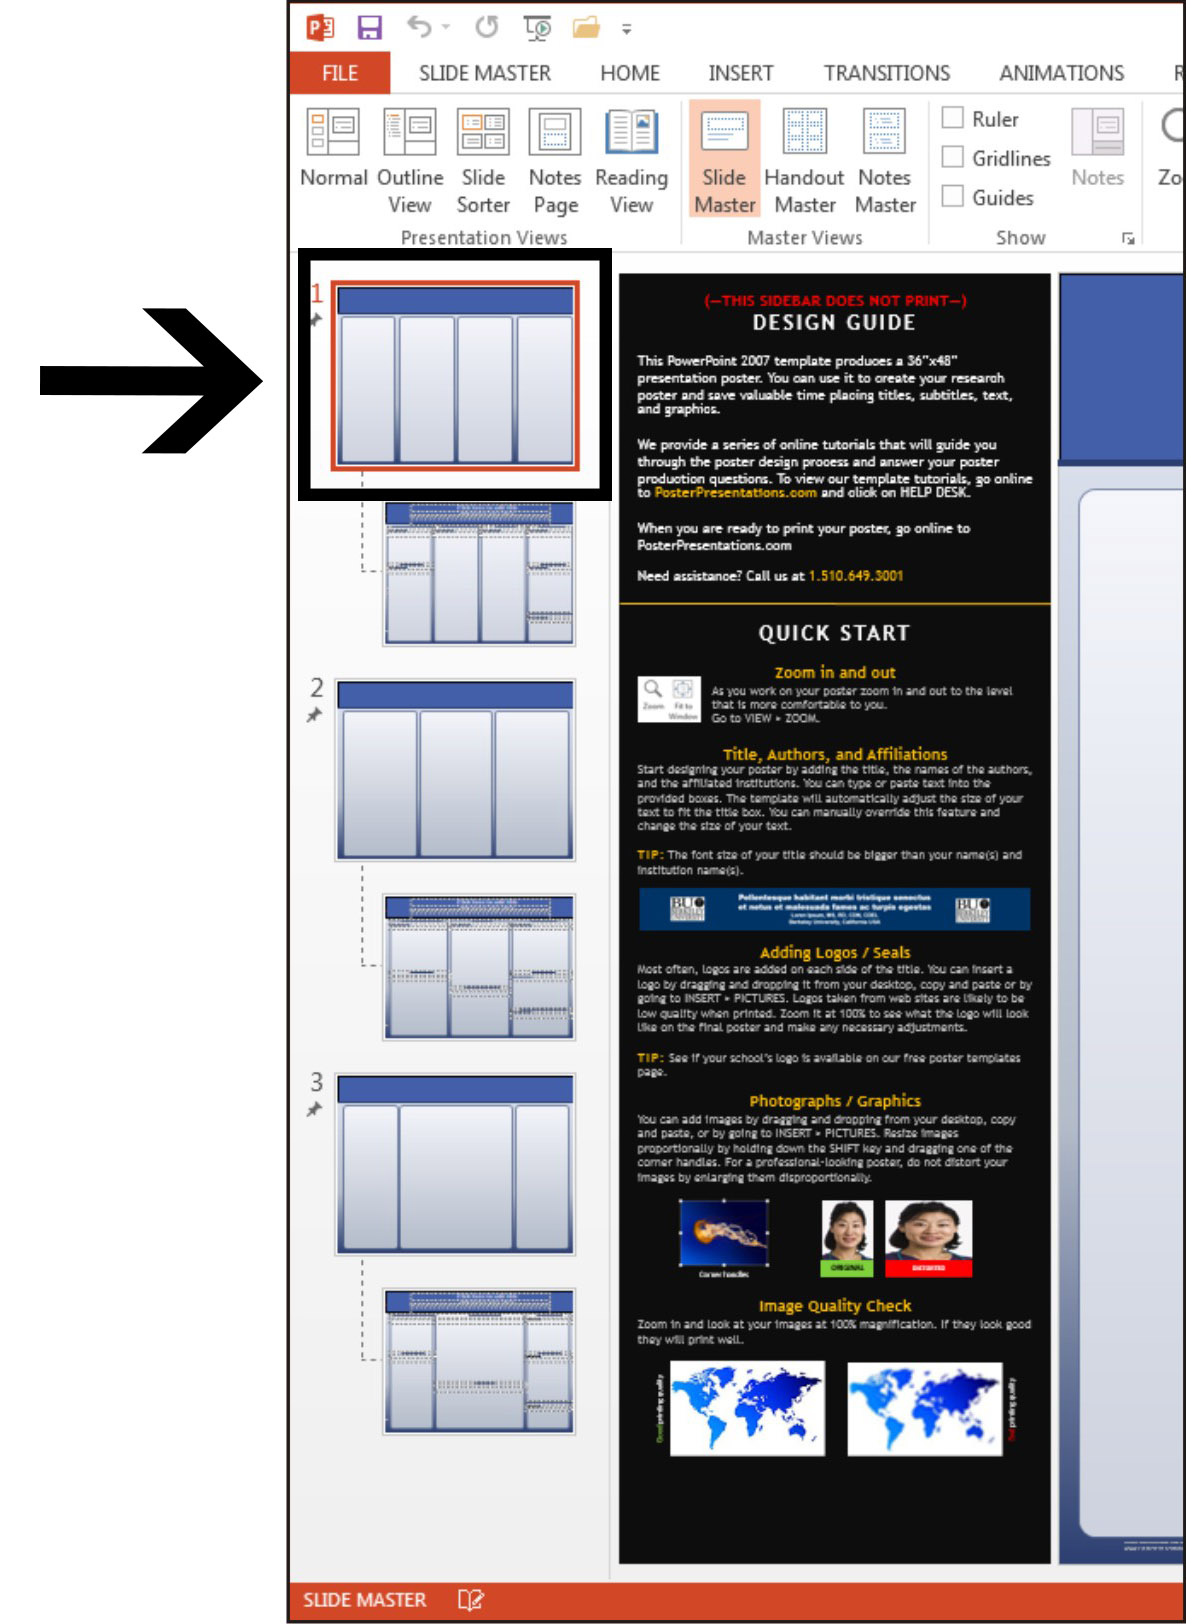
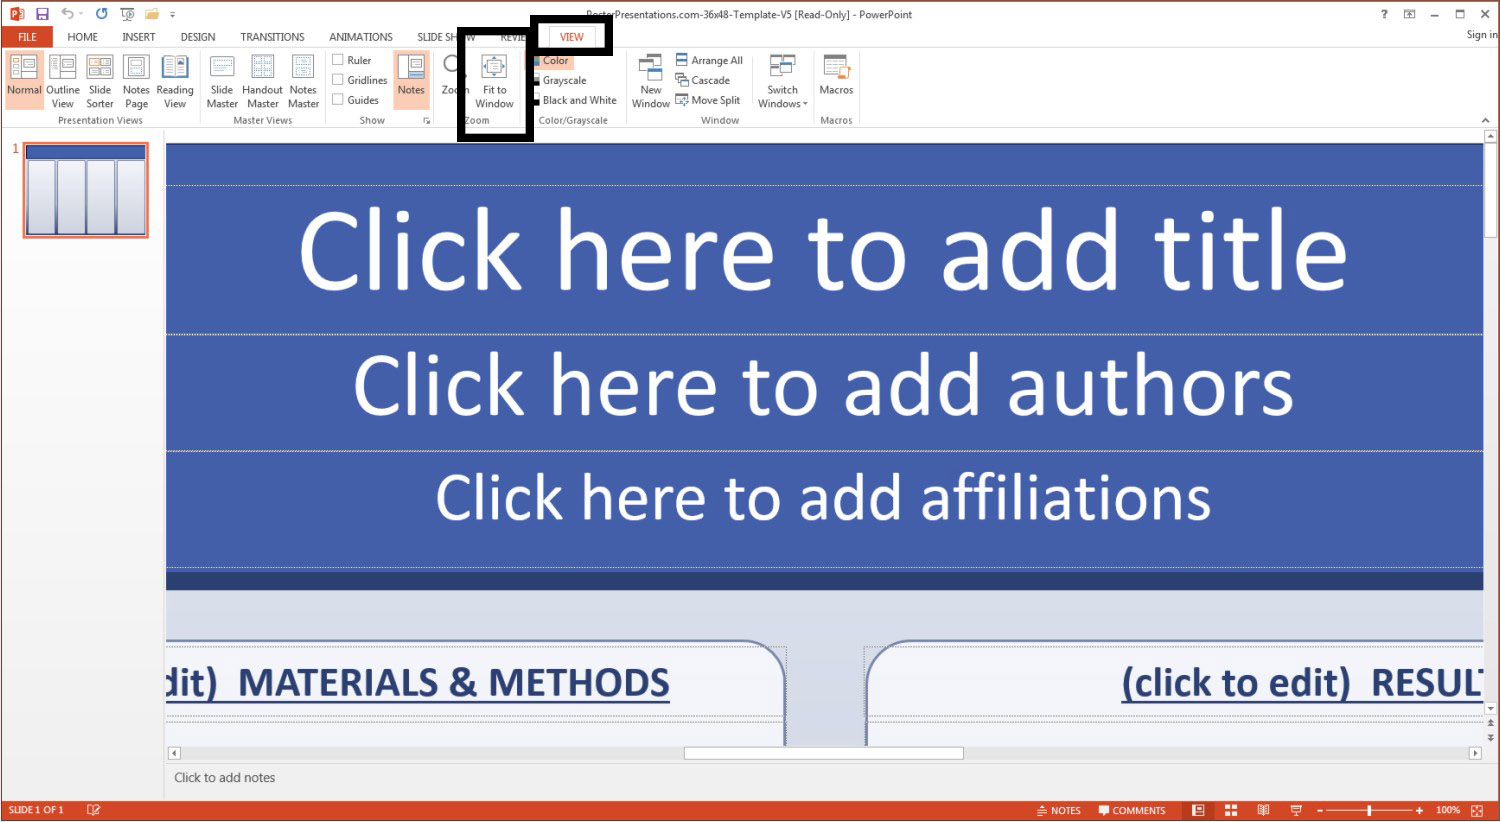
Step 4. Prepare the poster file for printing
Once your poster is completely finished and looks exactly as you want it to, you will need to convert your file first to a PDF and then to a JPG for final uploading to Spoonflower. To convert your file, follow the instructions below.Convert the PowerPoint file to a PDF
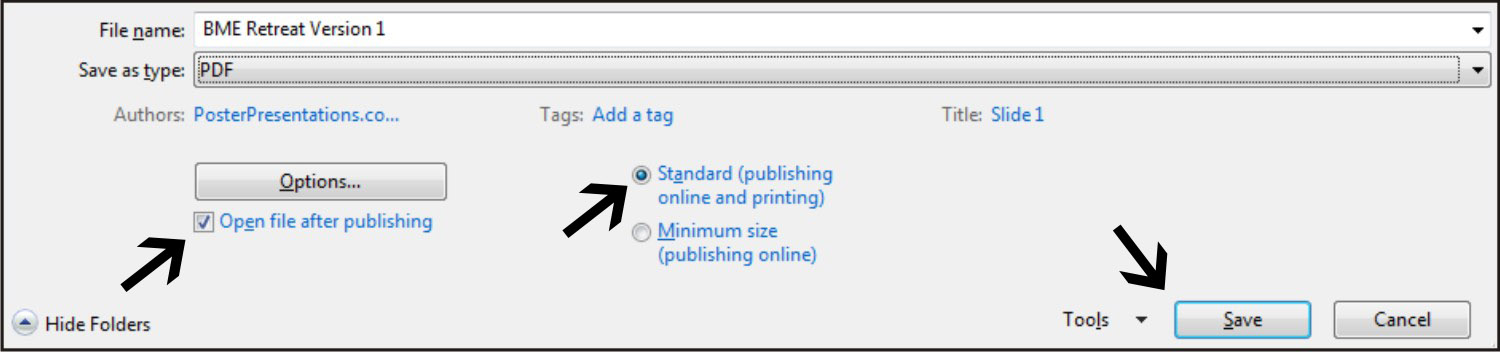
Sometimes PowerPoint has unidentified problems when you go from the PowerPoint file to another file type. To verify that your poster converts to a PDF from PowerPoint, go to the “File” menu and select the “Save As” option. Select a destination location and a file name for your poster. In the popup box, click on the “Save as Type” dropdown menu to select the “PDF” option:Also in the popup box, ensure that the “Open file after publishing” and the “Standard (publishing online and printing)” options are selected. Click the “Save” button to save the file. The PDF version should open when this is completed.
Check this file carefully! This is what your final poster will look like. If there are any conversion issues with PowerPoint, you will need to go back into the PowerPoint file to correct the changes. The black side panels should NOT be present in the PDF version of your poster.
Important Note! We do not advise downloading your PowerPoint presentation as a JPG. While there is an option to save the file as a JPG on a PC, there is no option to specify the quality of the newly created image. As a result, you are unable to verify the image quality of the JPG.
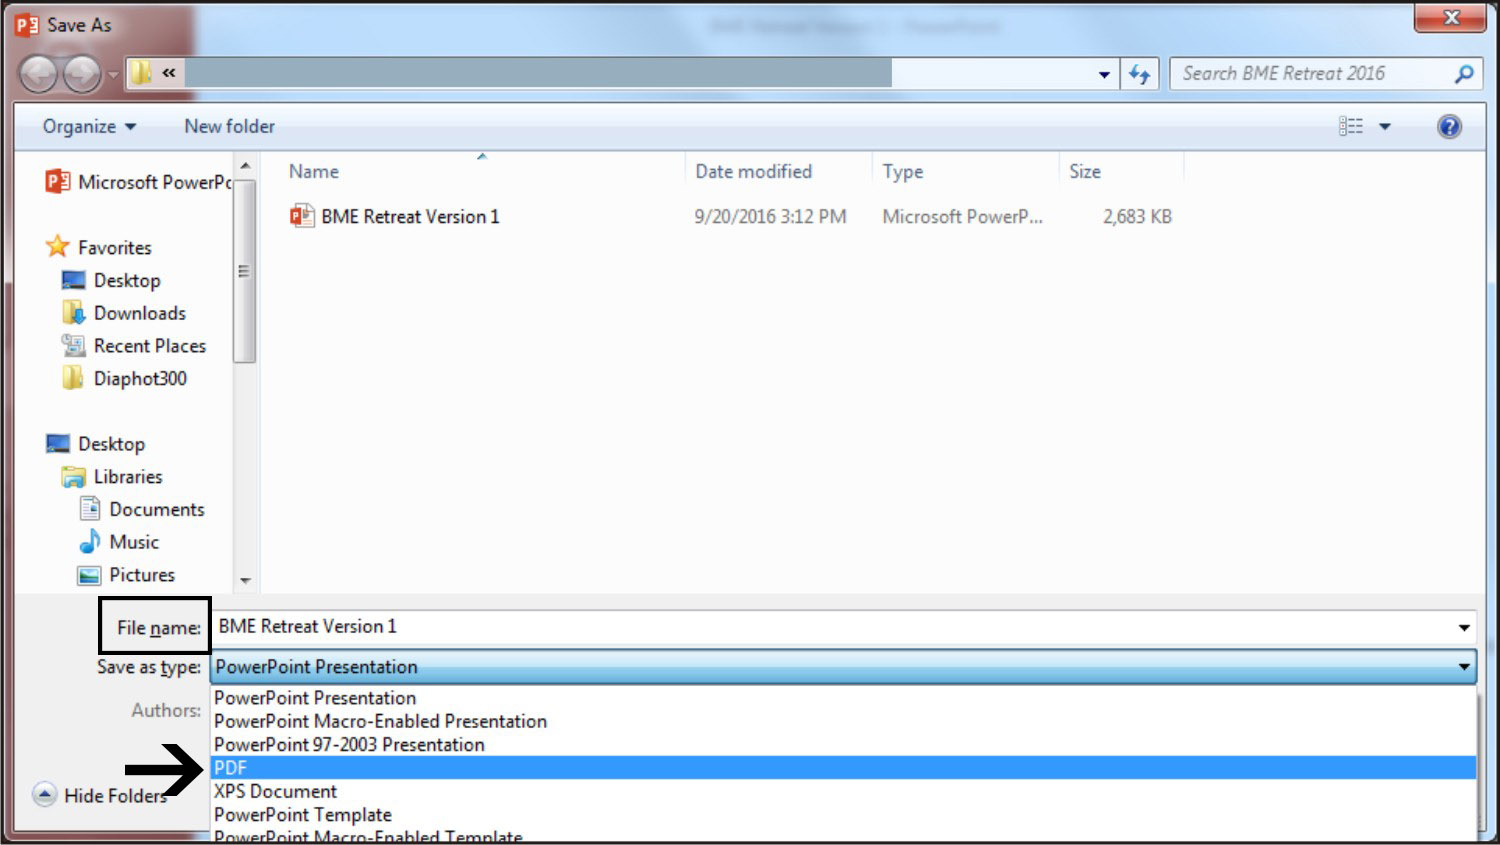
Convert the PDF File to a JPG File
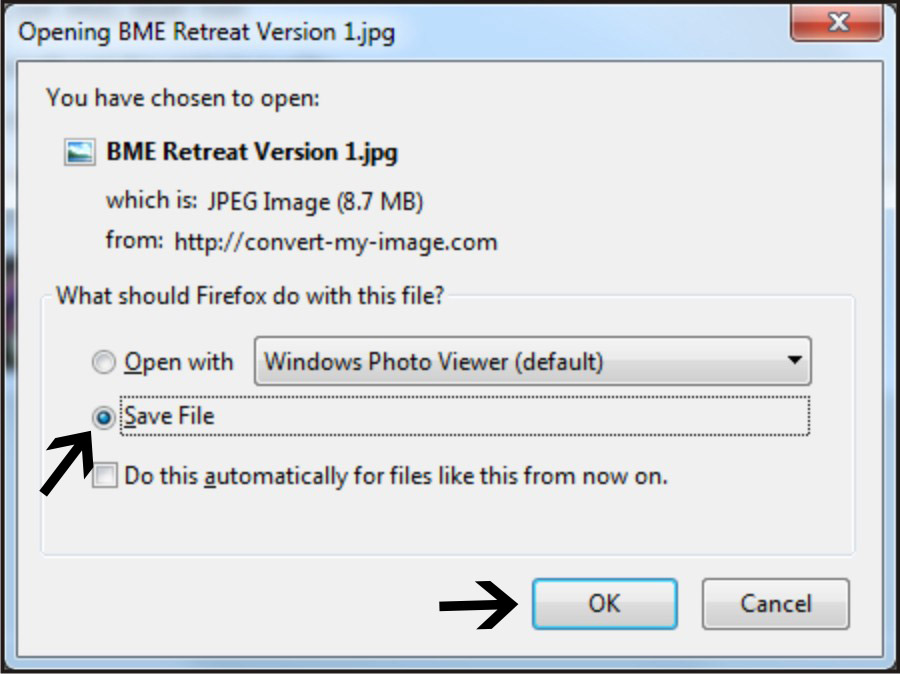
Spoonflower does not accept PDFs for printing. After you convert the PowerPoint file to a PDF above, you’ll need to convert your PDF to a JPG file that has at least 150 pixels per inch (dpi) for printing. All of my posters are set at 300 dpi which I’ll use in this example. The easiest way to do this is with an online file converter. A good online site to convert your file from PDF to JPG is convert-my-image.com. Once on this site, select the “PDF to JPG” option on the lefthand menu.In the gray box in the center of the page, select the following settings: “Choose image format” as “JPG”; “Quality (DPI)” as “300 – Above Medium”; and “Image Color” as “Colored”. Once you have selected all of these, click on the “Choose File” button to select your PDF poster.
Once the conversion is complete, a popup box will appear. Click on the “Save File” option and the “OK” button to save your JPG to the correct location.
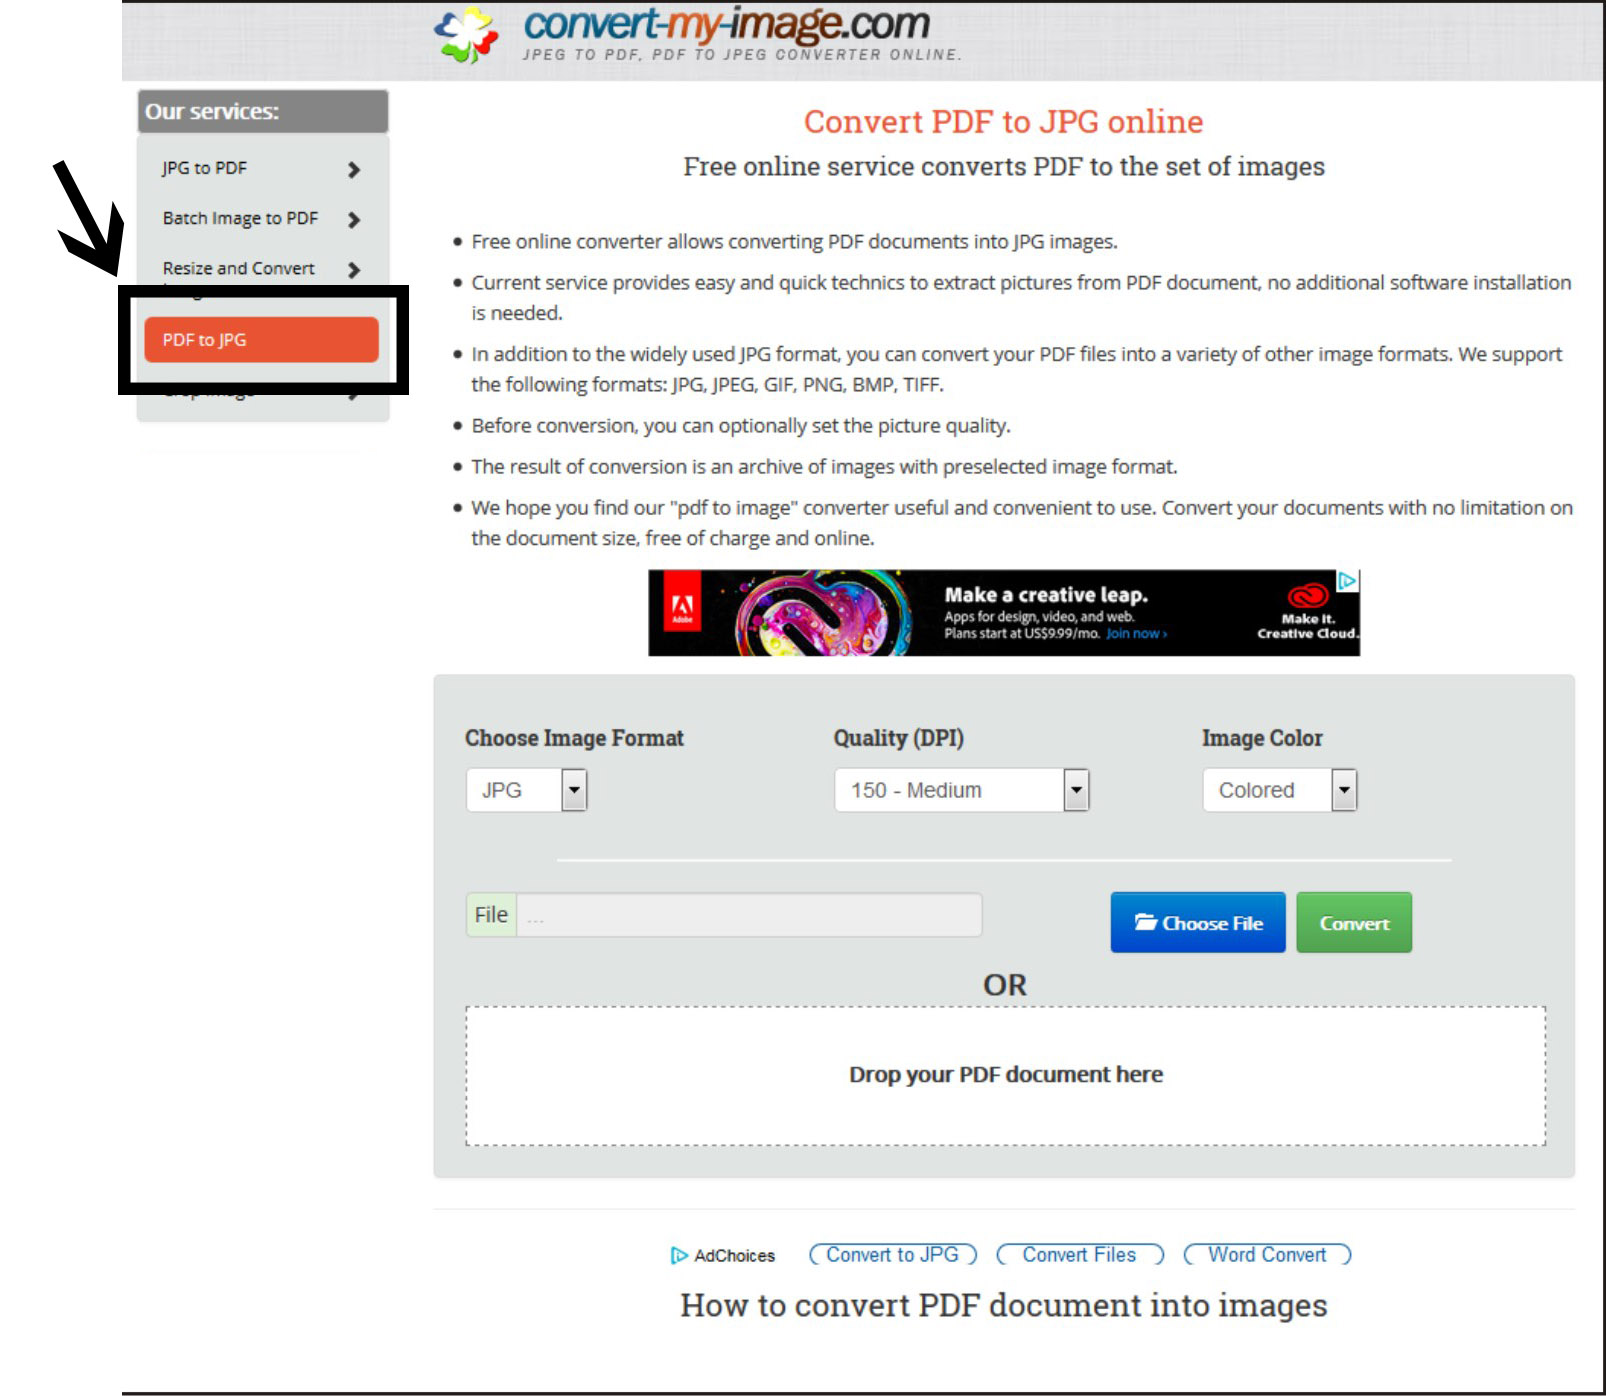
Step 5. Upload your poster file to Spoonflower for printing
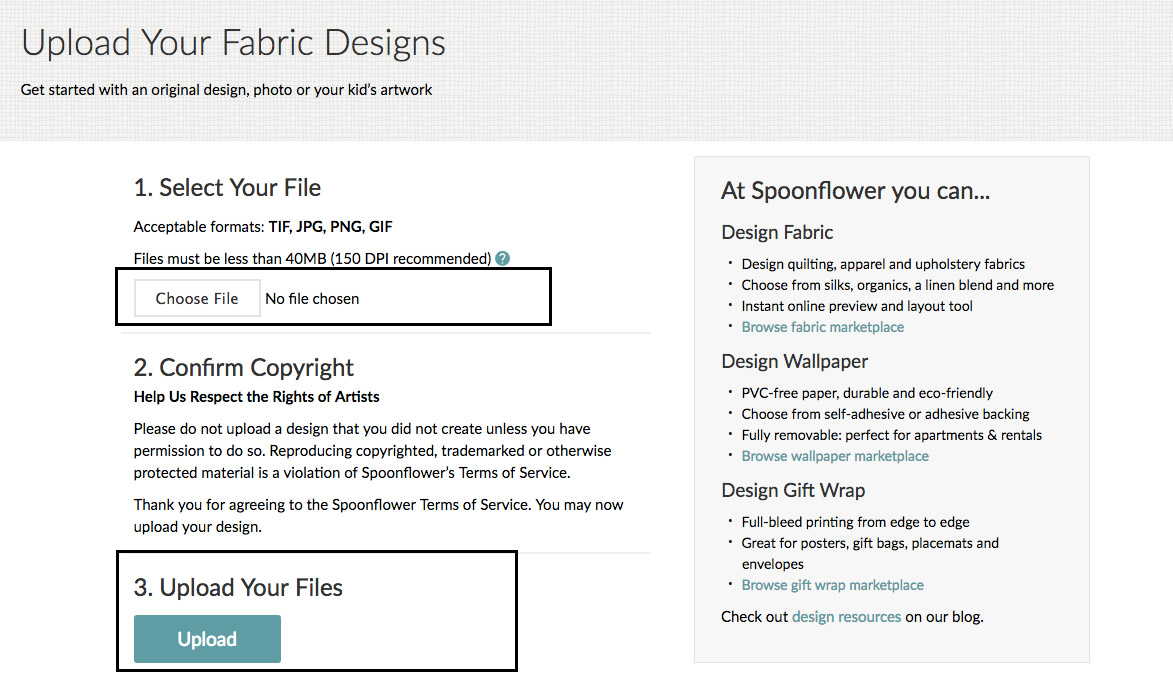
Once you have the JPG of your poster, you are ready to upload it to Spoonflower for printing. Go to www.spoonflower.com and log in to your account to begin the upload process. If you don’t have an account, create one by selecting the “Join” option in the upper right corner and then select “Create an Account” to enter your information. Once logged in, go to the “Design” menu and select “Upload”.On the “Upload Your Designs” page, follow the instructions for Steps 1-3. First, use the “Browse” button to select your JPG file of your poster. Second, confirm that your poster is your original design and that you have the right to print the file. Lastly, click on the “Upload” button (this will not become active until you confirm the copyright).
The Upload Your Fabric Designs screen on Spoonflower where you can select your file, confirm copyright and upload your files.
Once your file has been uploaded, it will direct you to a new page, showing your poster as a design preview on the left and several options on the right. There are multiple items to select on this page to ensure your poster will print correctly.
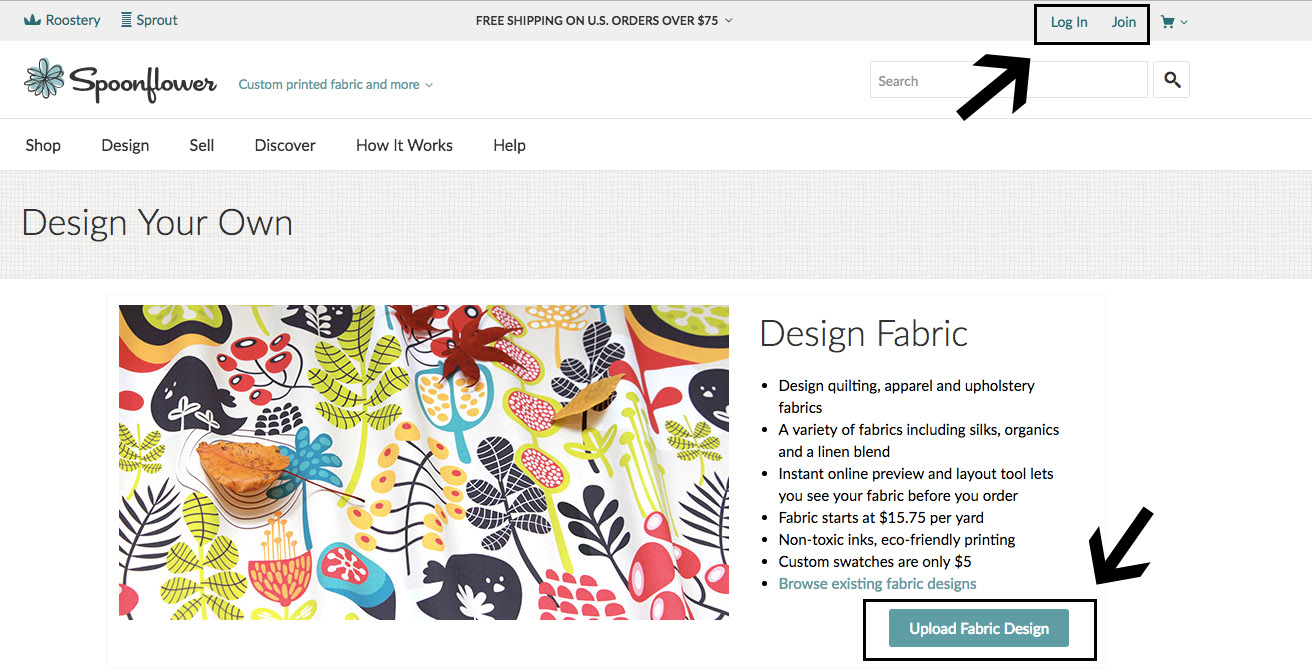
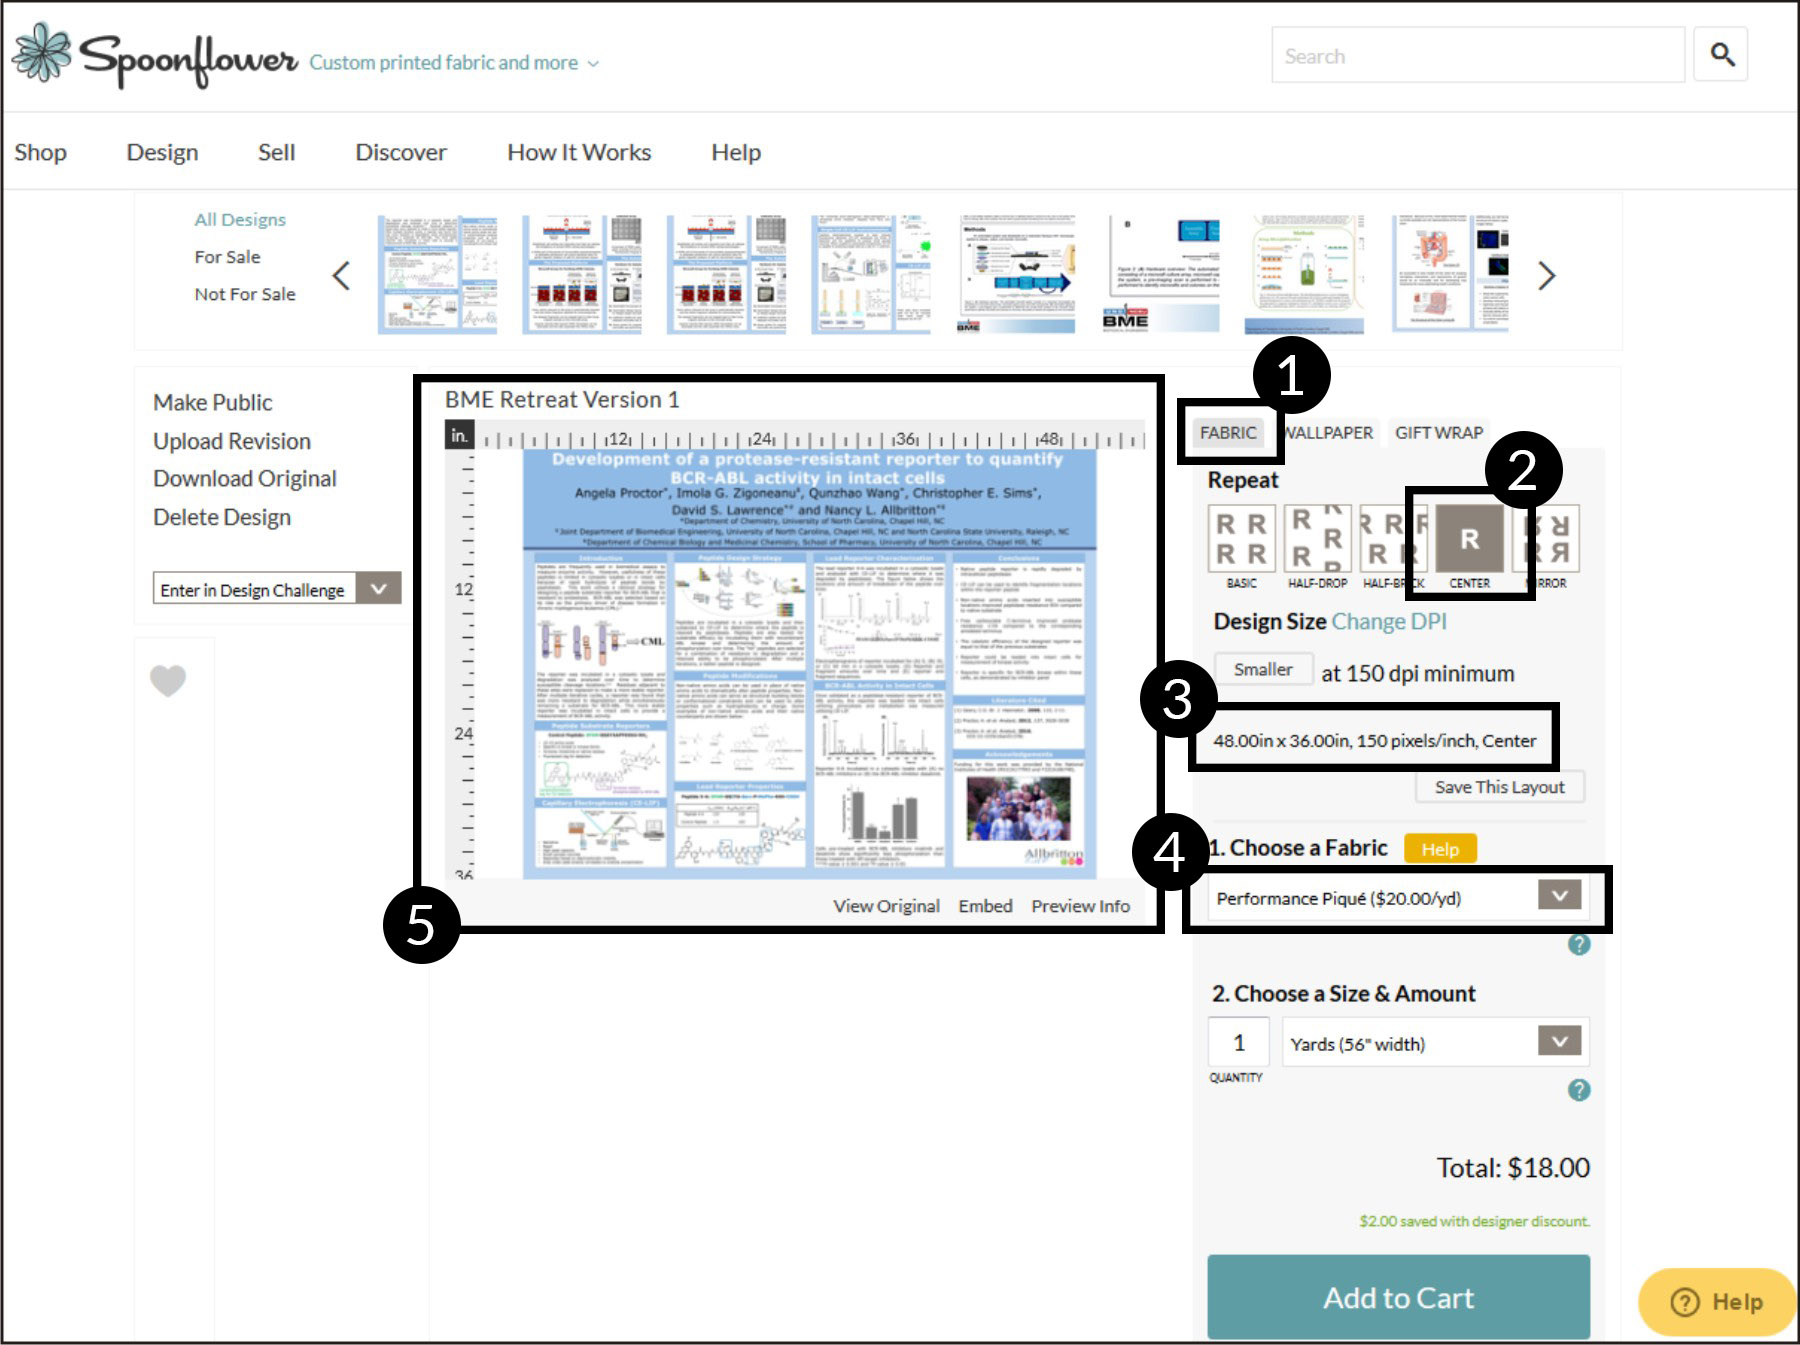
- Select the Fabric tab on the right.
- Choose the “Center” option so your design is centered in the middle of the fabric.
- Verify that the sizing of your poster is what you expect it to be (in this case, 48” x 36”).
- Choose the “Performance Pique” fabric selection. Name change note: Performance Piqué has been changed to Sport Piqué! Exact same fabric, different name, so you’ll need to select Sport Piqué in the drop-down menu! Sport Piqué is wrinkle free, doesn’t require ironing and the edges will not fray, so there is no need for hemming.
- Verify that your poster fits in the design area and is the appropriate size based on the rulers on the left and top of your poster.
Your fabric poster can be folded up to easily fit in carry-on luggage and is a cinch to pin up on a poster board for your presentation. Whether you create your own template or use one from online, I hope you enjoy your fabric posters as much as I do!
Pro tip: If you’ll eventually be using clips to mount this to foamcore, be sure you pack enough clips to allow for the poster to be viewed clearly!
Have you used Spoonflower for printing an academic presentation poster? We’ve love to know! Share your poster pictures on social media with #spoonflower or leave a comment below.
About the Guest Blogger
Angie Proctor is a UNC-Chapel Hill research scientist and avid quilt designer and sewist. Her first introduction to Spoonflower was in 2014 when she was making a dinosaur quilt and found the perfect fabric. Since then, she has collaborated with Spoonflower at multiple charity sew-in and community sewing events.
During a tour of our facilities, she learned about the scientific poster printing and has been exclusively printing her posters at Spoonflower ever since. When not working in the lab, you can find Angie attempting to garden or creating quilts in her dedicated sewing room.
WHY SPOONFLOWER?


