August 19, 2025 • Updated December 30, 2025
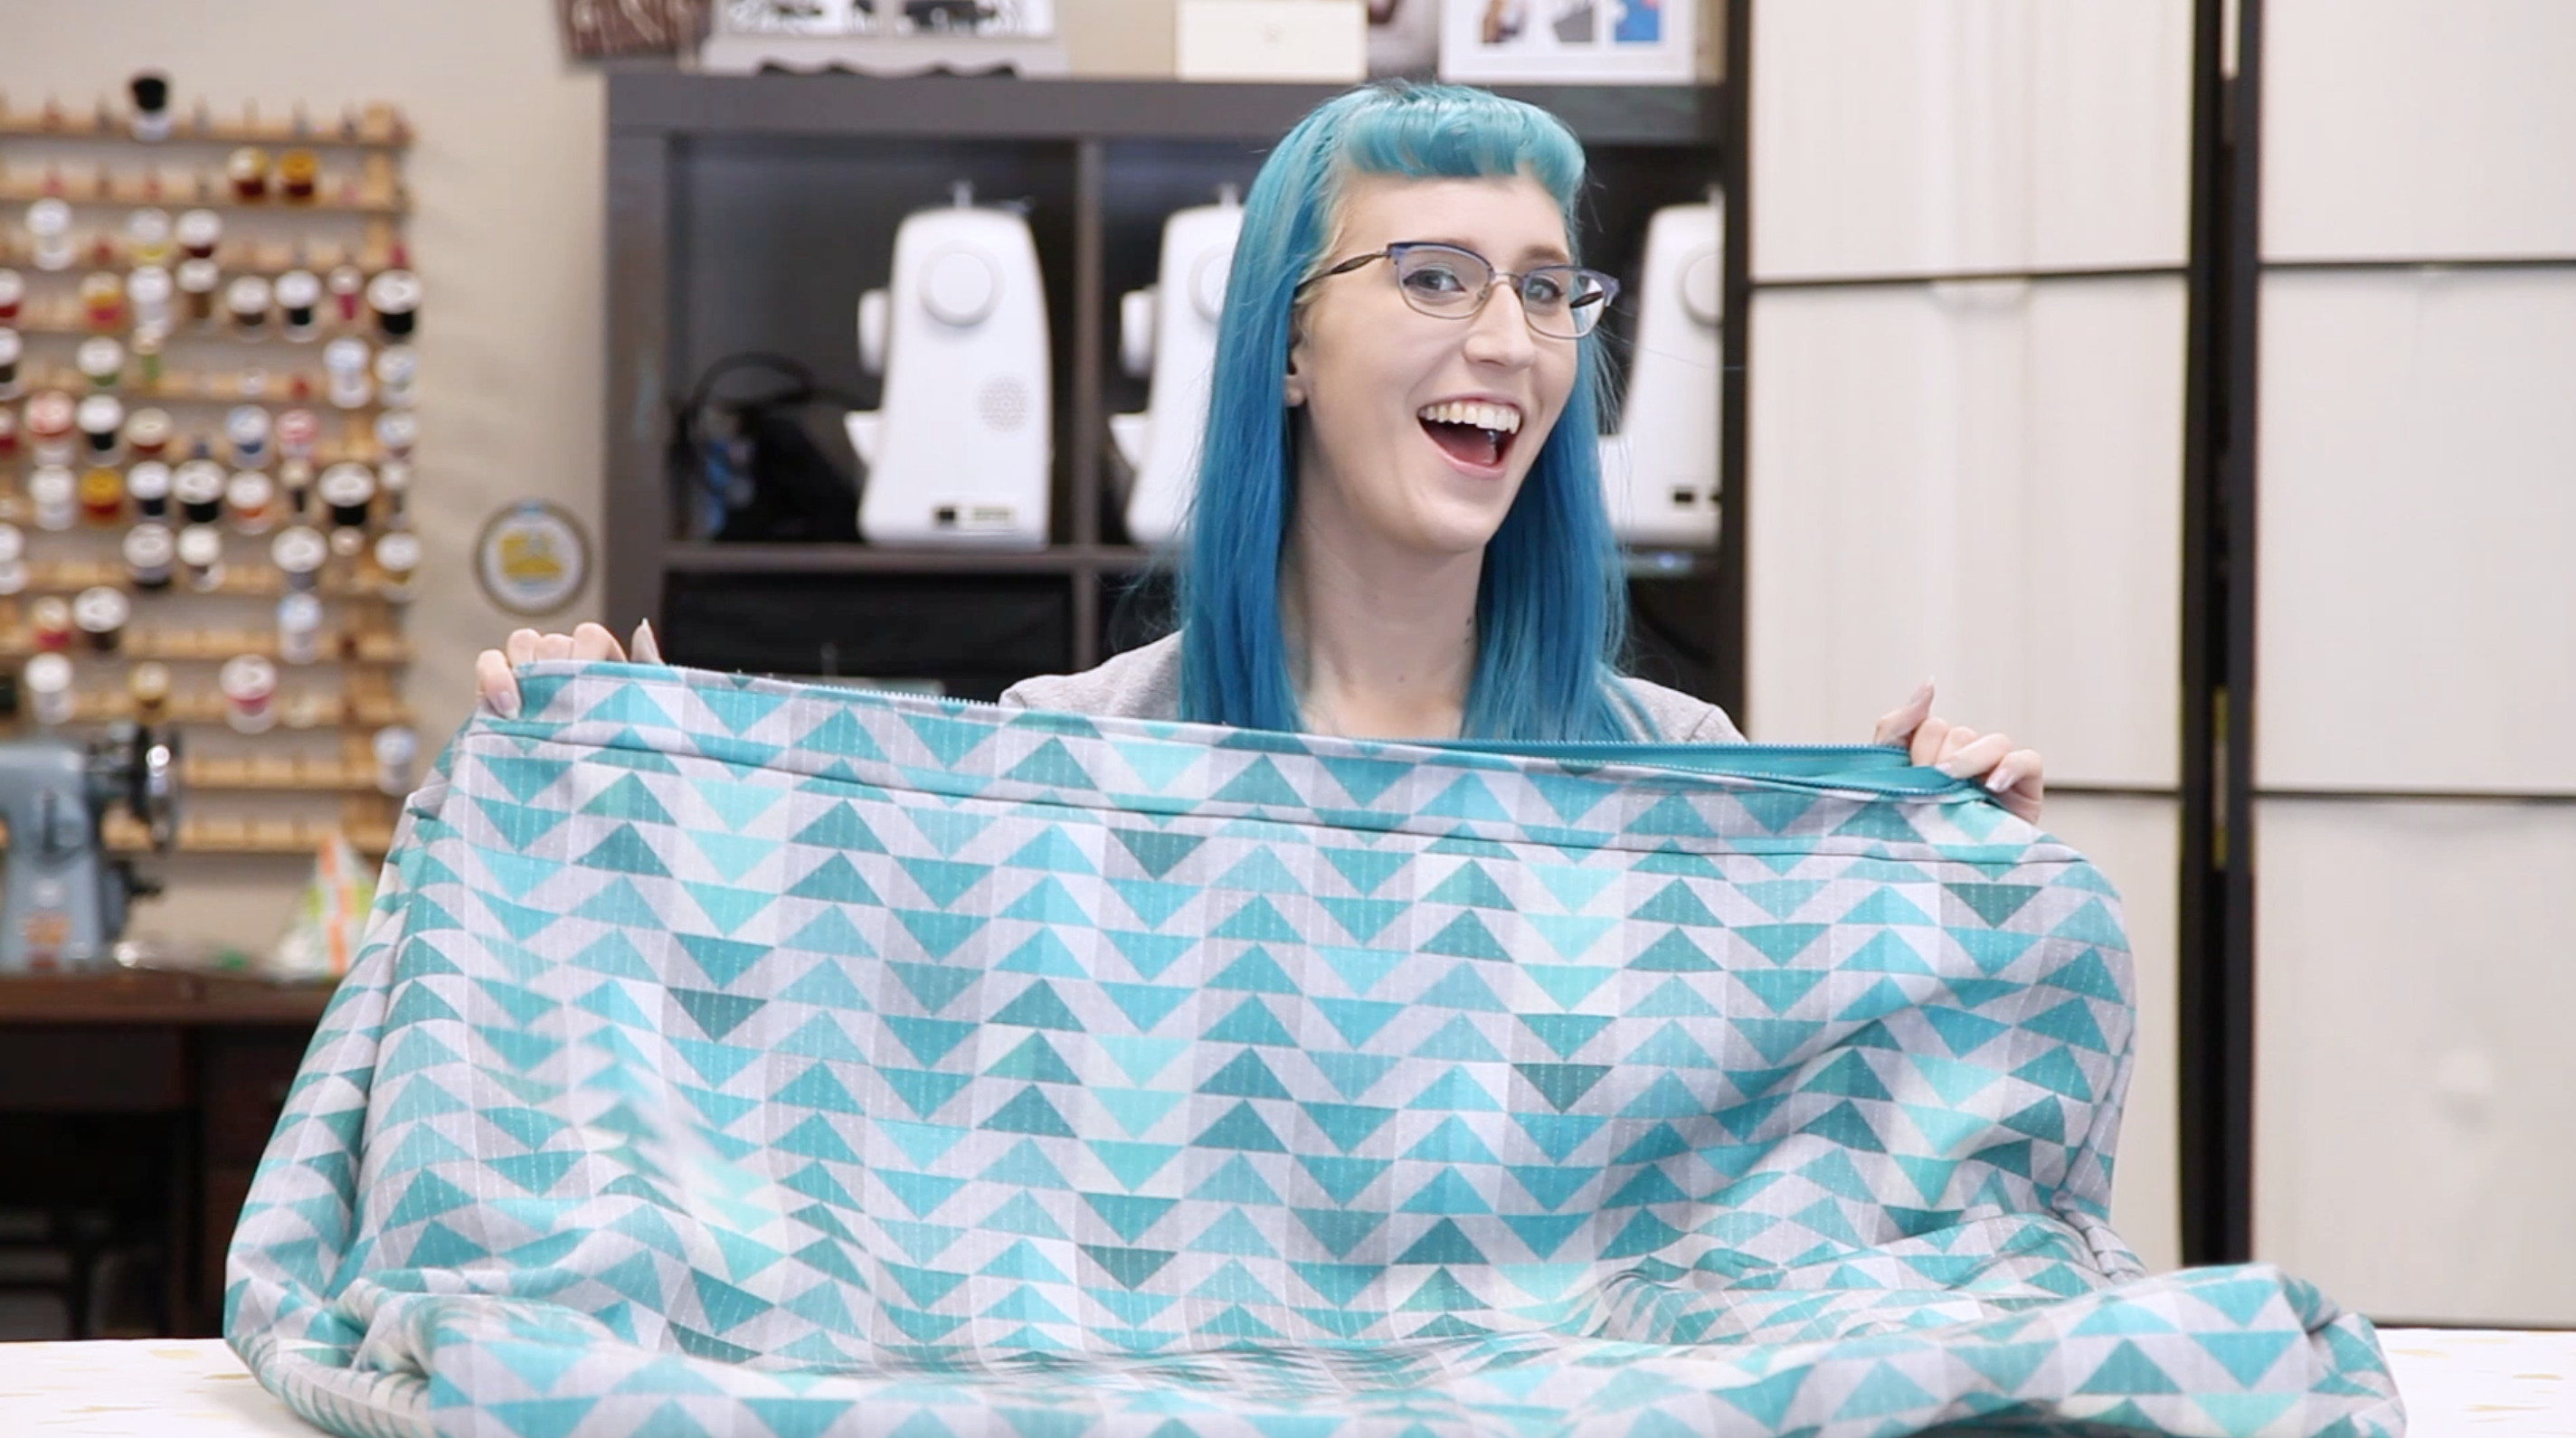
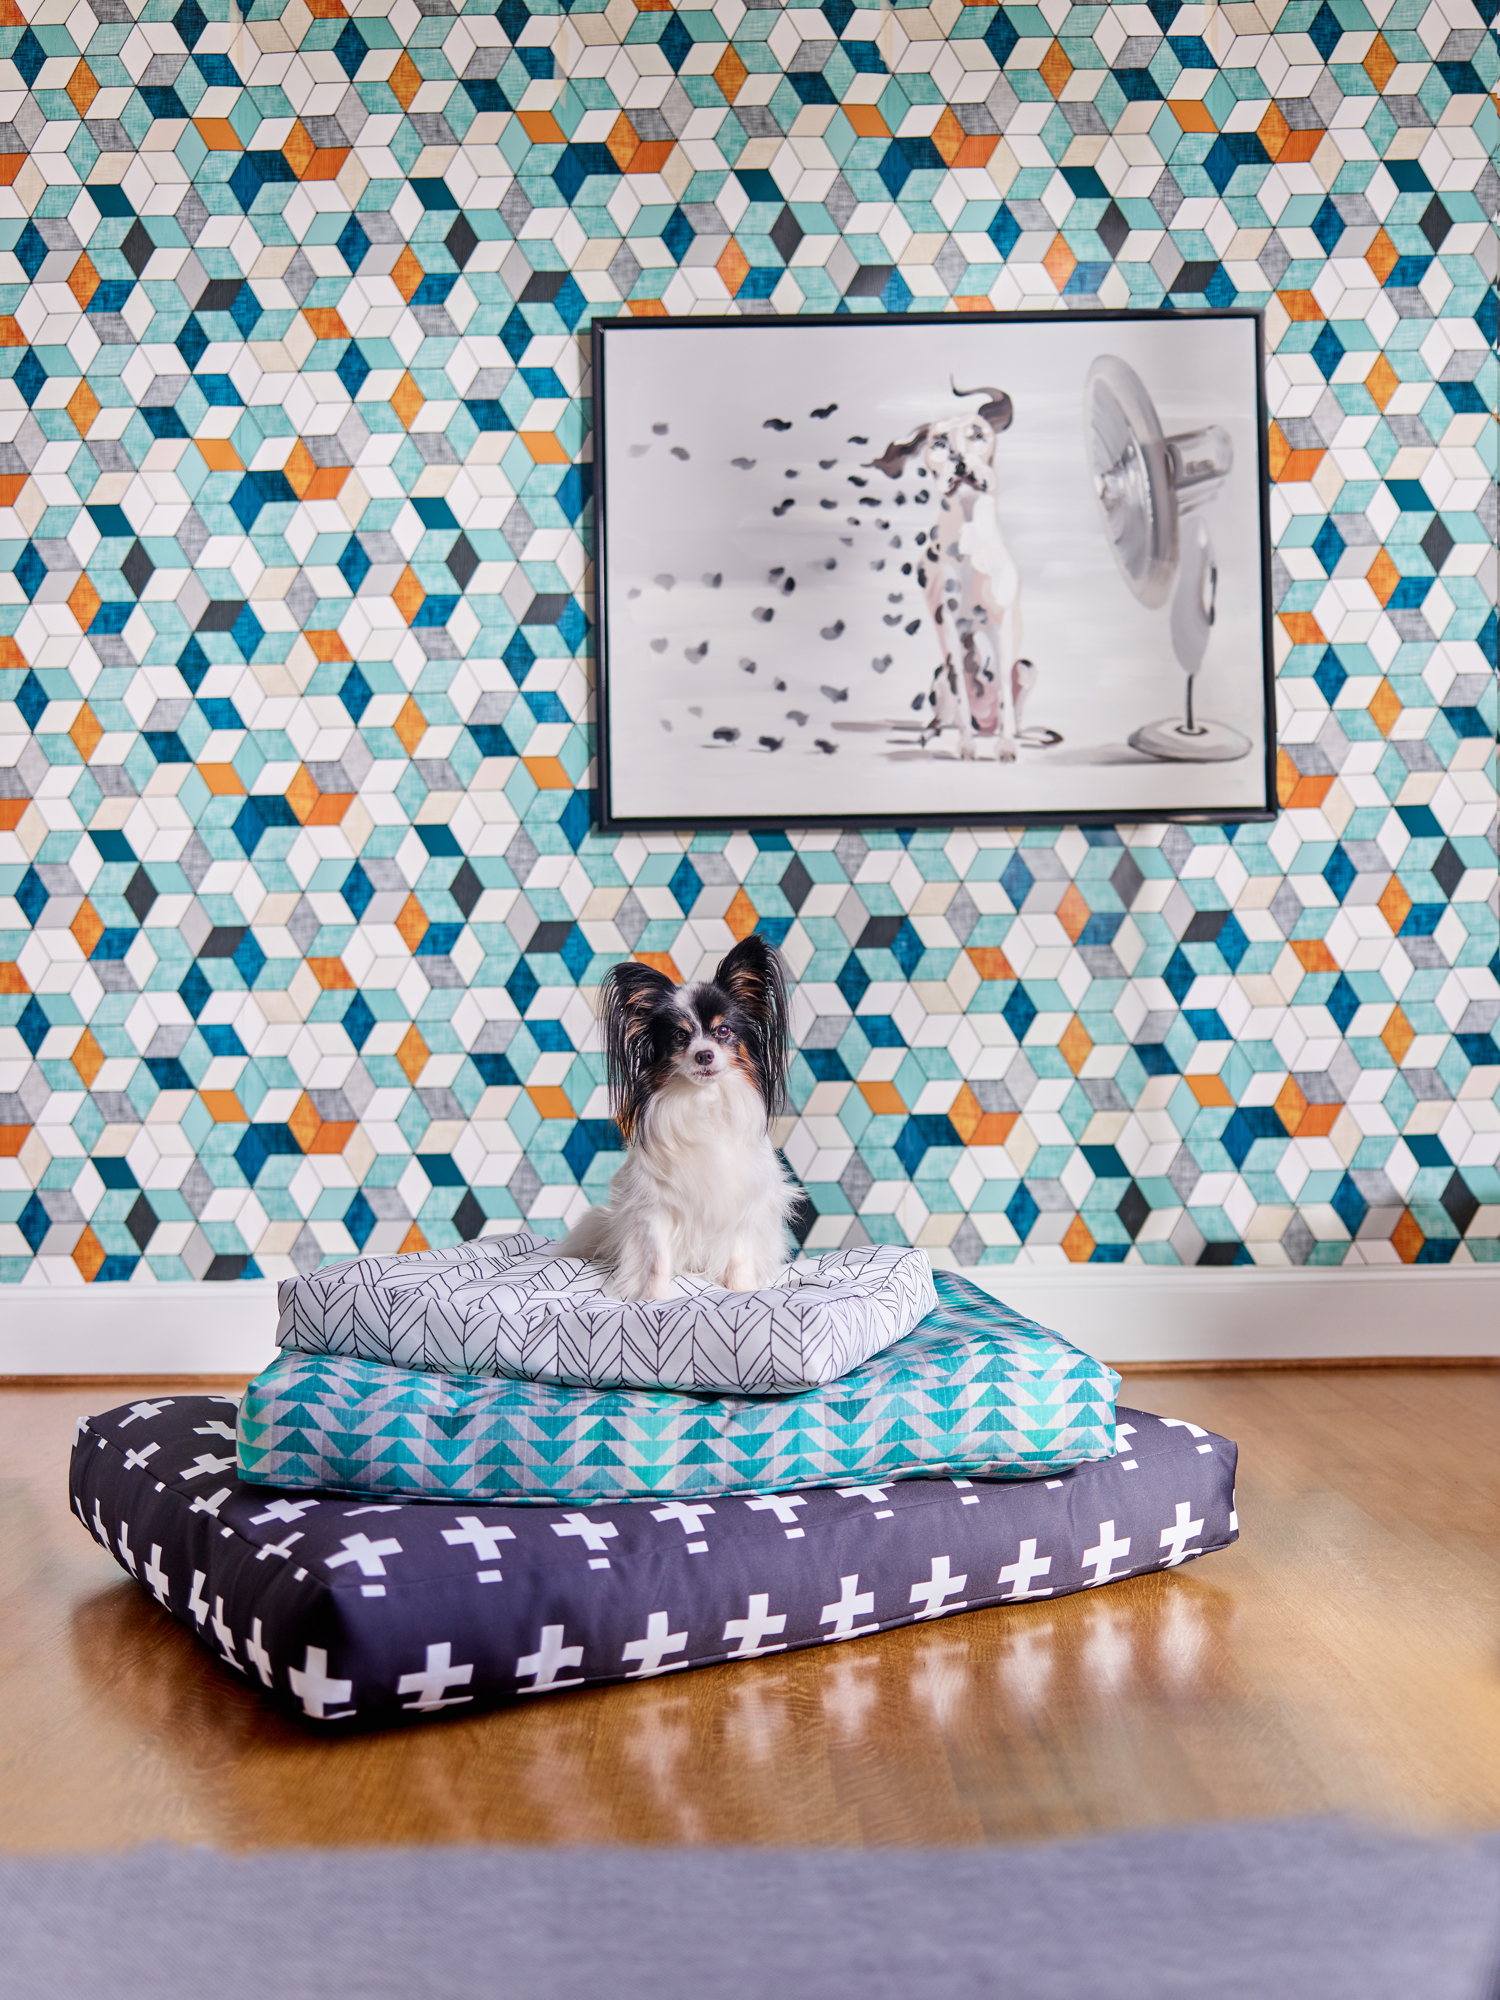
Customizable DIY Dog Bed Cover
Ever see pet beds with really cool covers and incredibly expensive price tags? So do we. What if we told you that you could totally customize a removable cover and even save a few bucks in the process? All you’ll need is a few yards of a sturdy fabric like Recycled Canvas, your (or your dog’s) favorite design, a pet bed insert and basic sewing tools. Keep reading for a DIY dog bed sewing tutorial or watch the video below. If you’re ready to whip up a pet bed to please your pup, grab your materials and let’s get started!

Want more tutorials and DIY projects like this? Make sure to subscribe to our Youtube channel!
Here’s the written tutorial, if that’s more your cup of tea!
**Materials Needed **
- 2 yards of Recycled Canvas
- 30”-34” zipper
- 90/14 heavy duty needle
- Pet bed insert
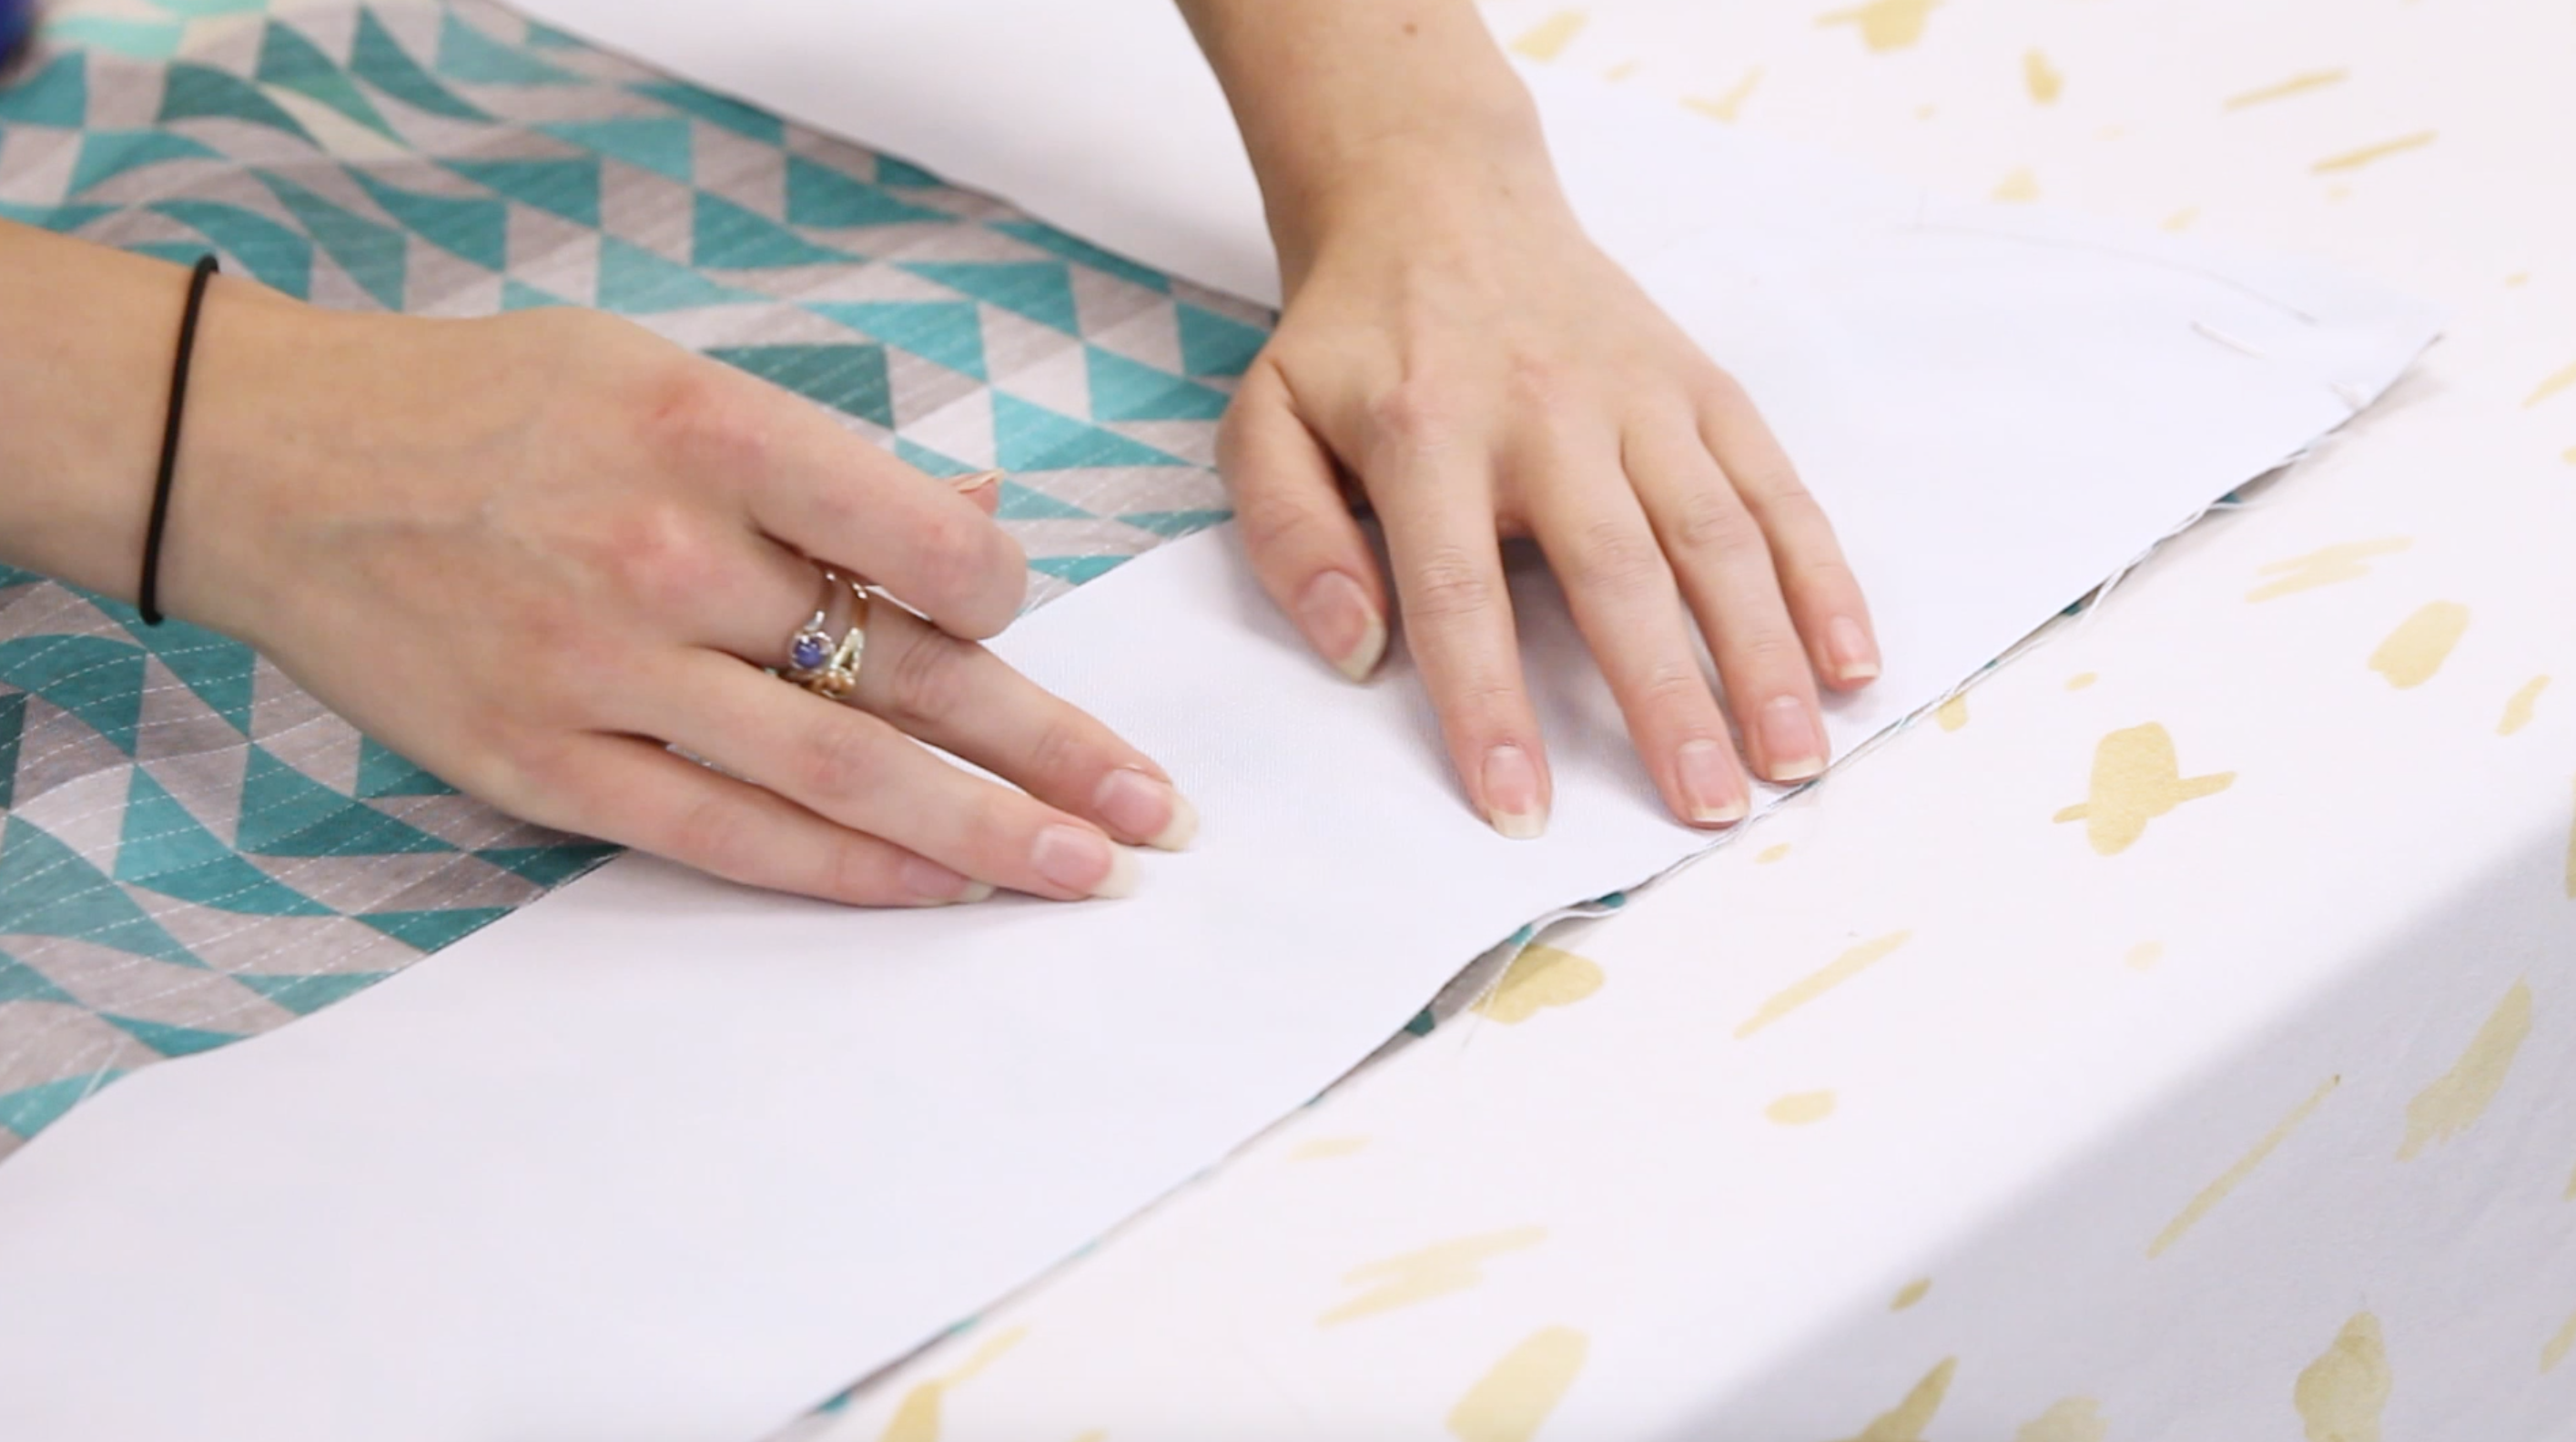
Step 1: Prep your fabric
Start by cutting out your fabric. Determine the size you want your bed to be. Cut two pieces of fabric for the top and bottom of the bed and four pieces for the sides, being sure to add a 1″ measurement to each piece for seam allowance. In our example, we are making a rectangular bed (28″ x 36″ x 4″), so our sides are two different lengths. Your side pieces will need to be the same length as the sides of the top/bottom and in our example, about 5″ in height. One of our long side pieces will be 6″ in height to accommodate the zipper.
We’re making a rectangle, since that’s what our insert is shaped like. You could follow the same process for a circle or square bed!
Here are our fabric piece measurements:
- 2 pieces: 29″x 37″
- 2 pieces: 29″x 5″
- 1 piece: 37″x 5″
- 1 piece*: 37″x 6″
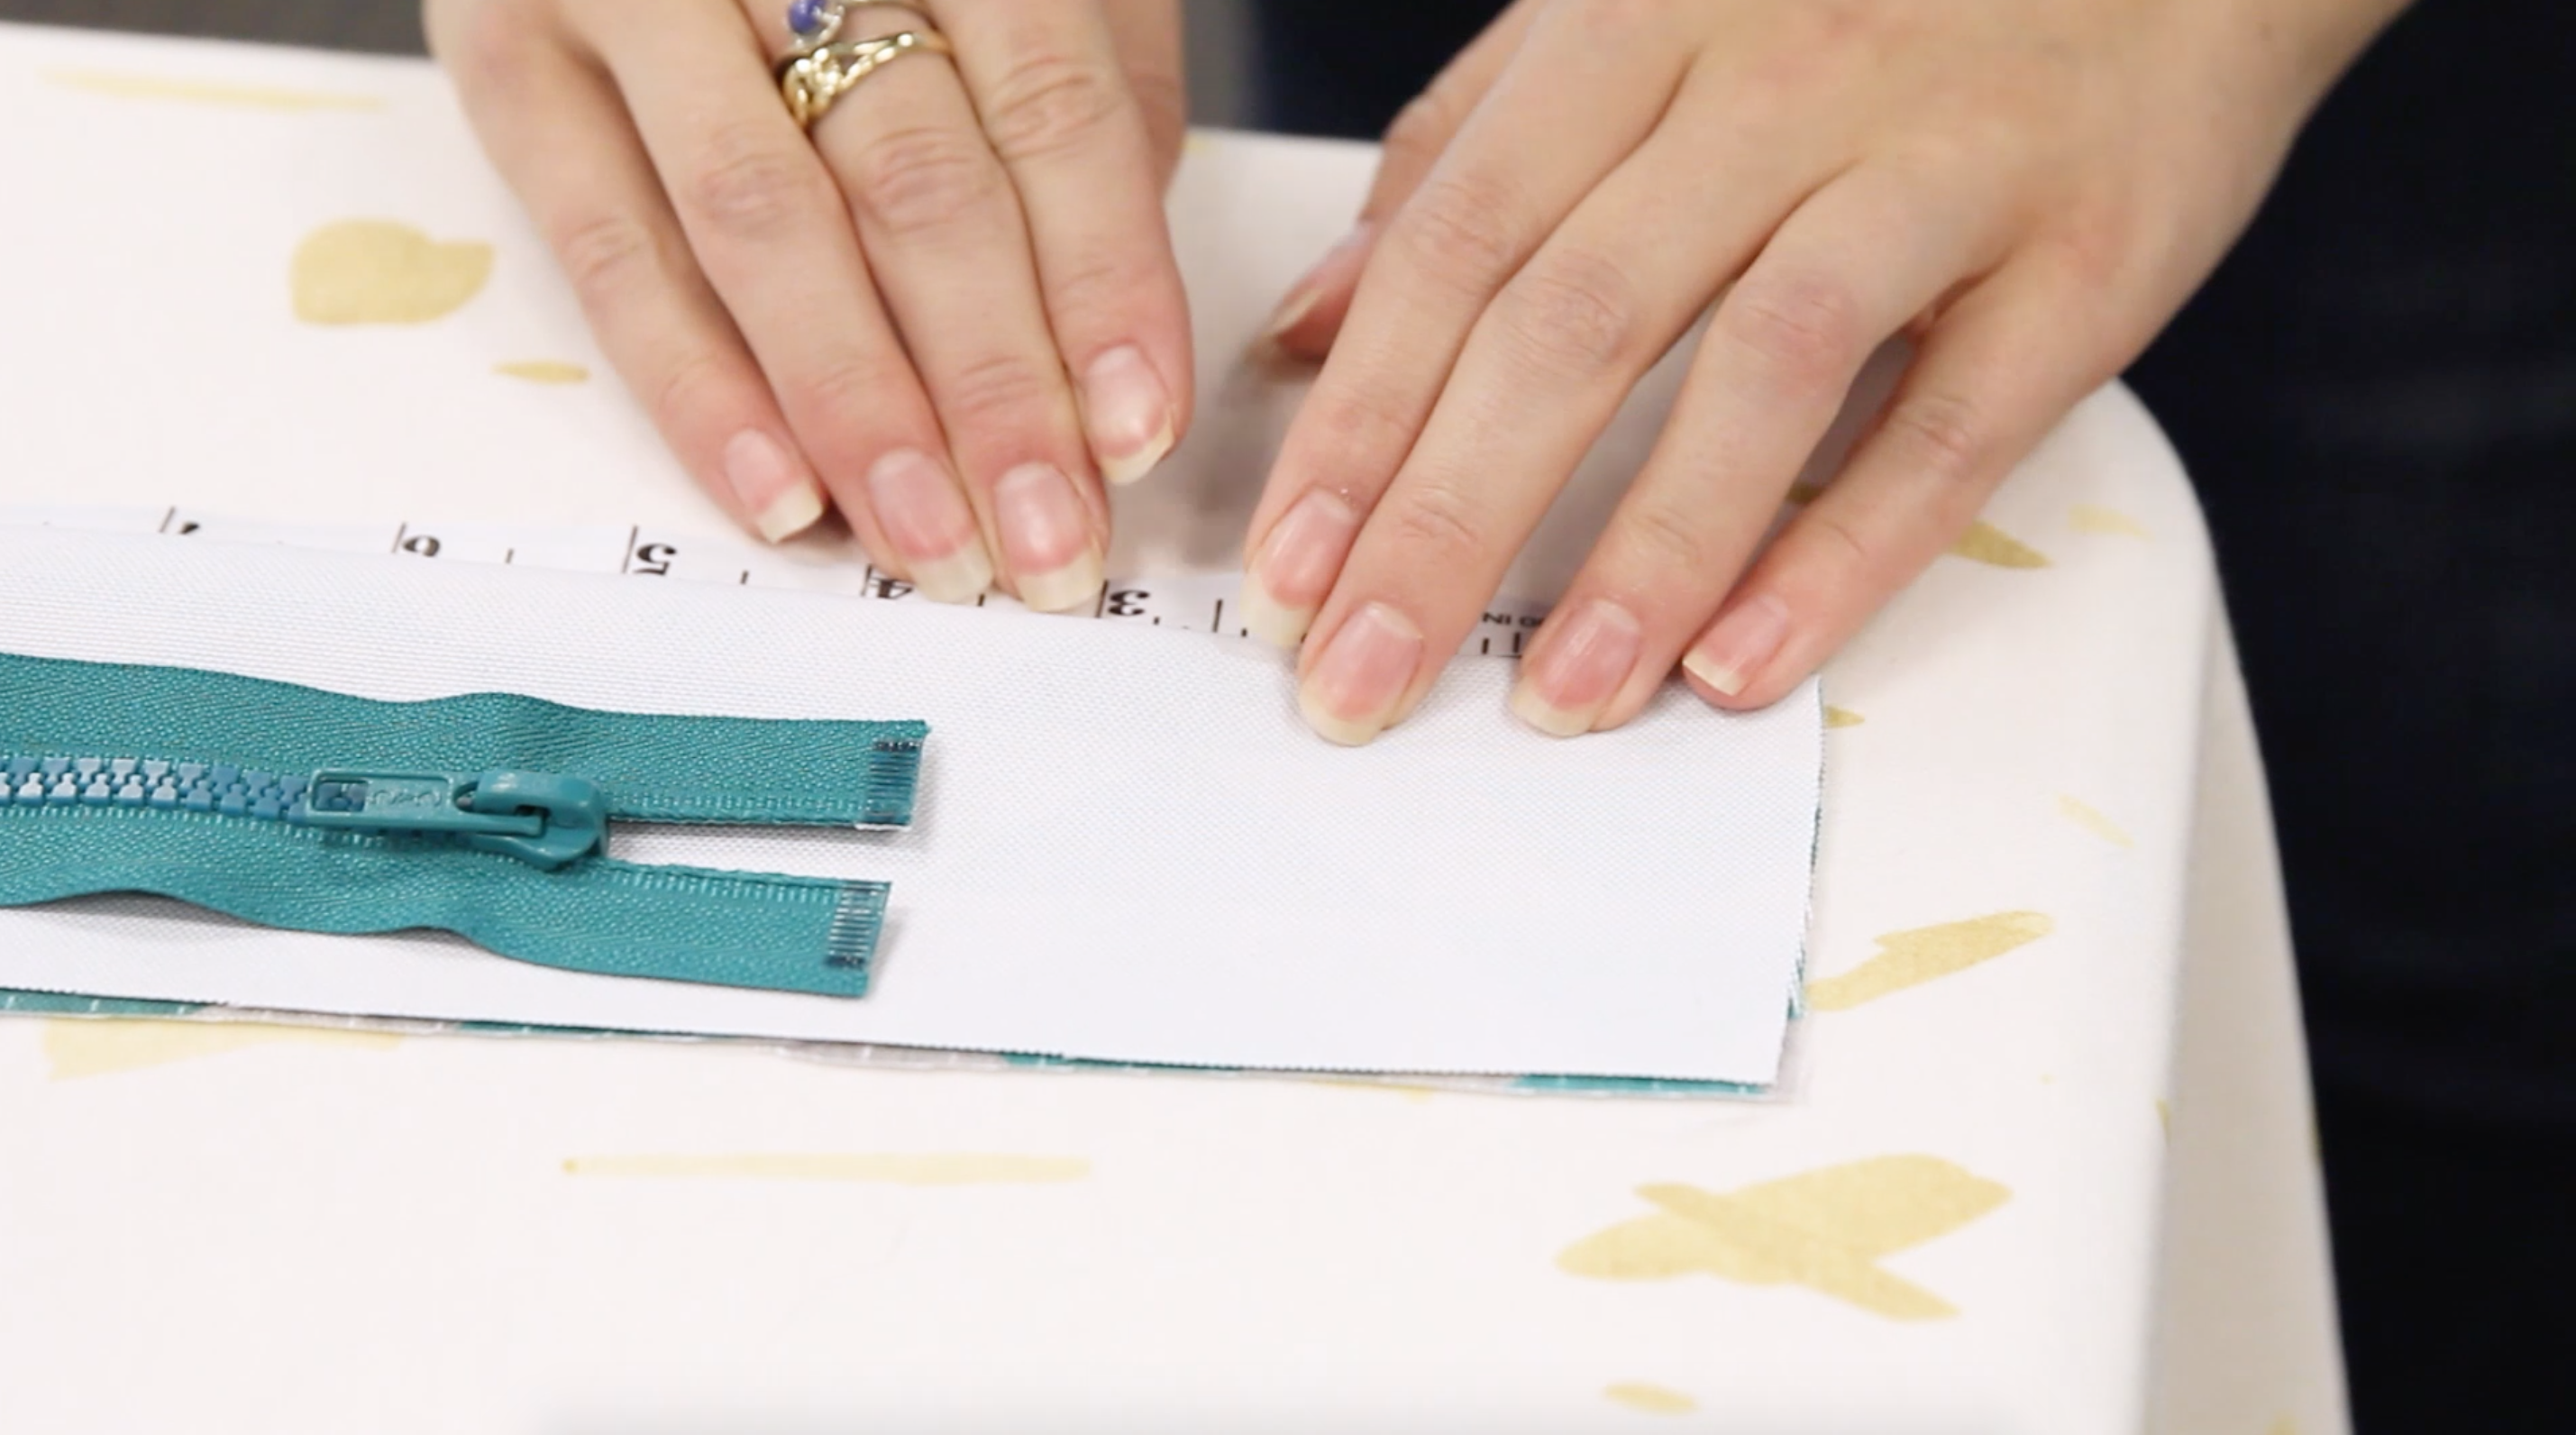
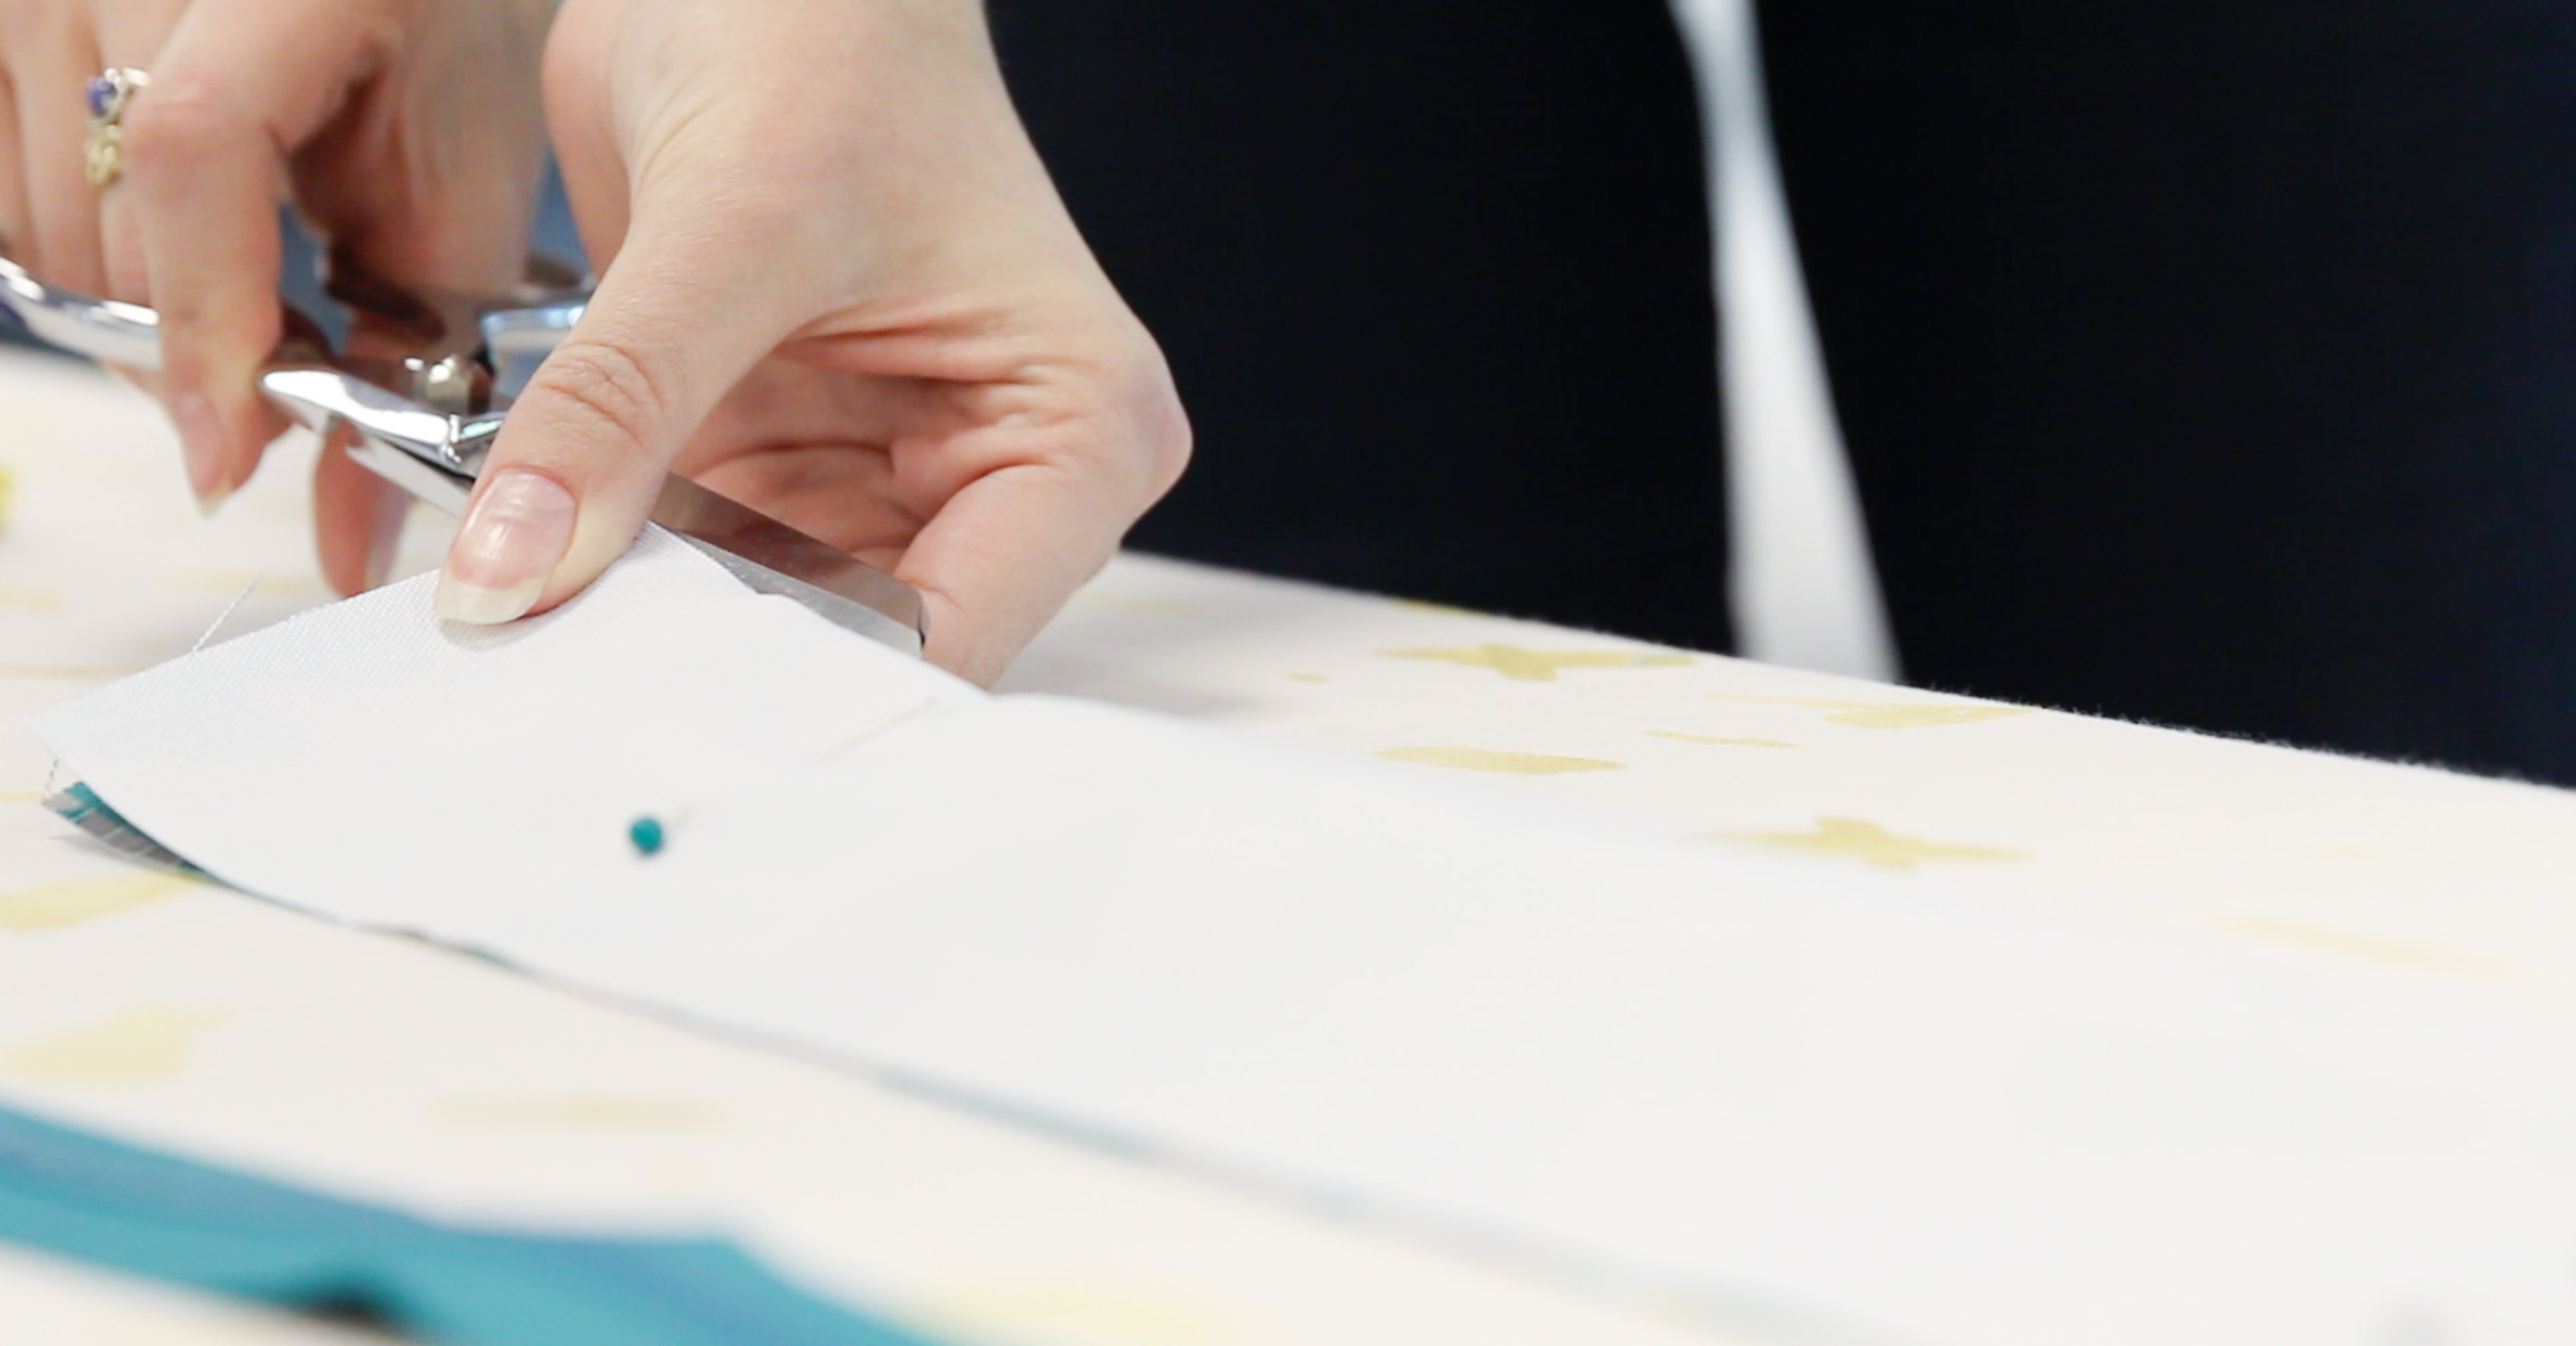
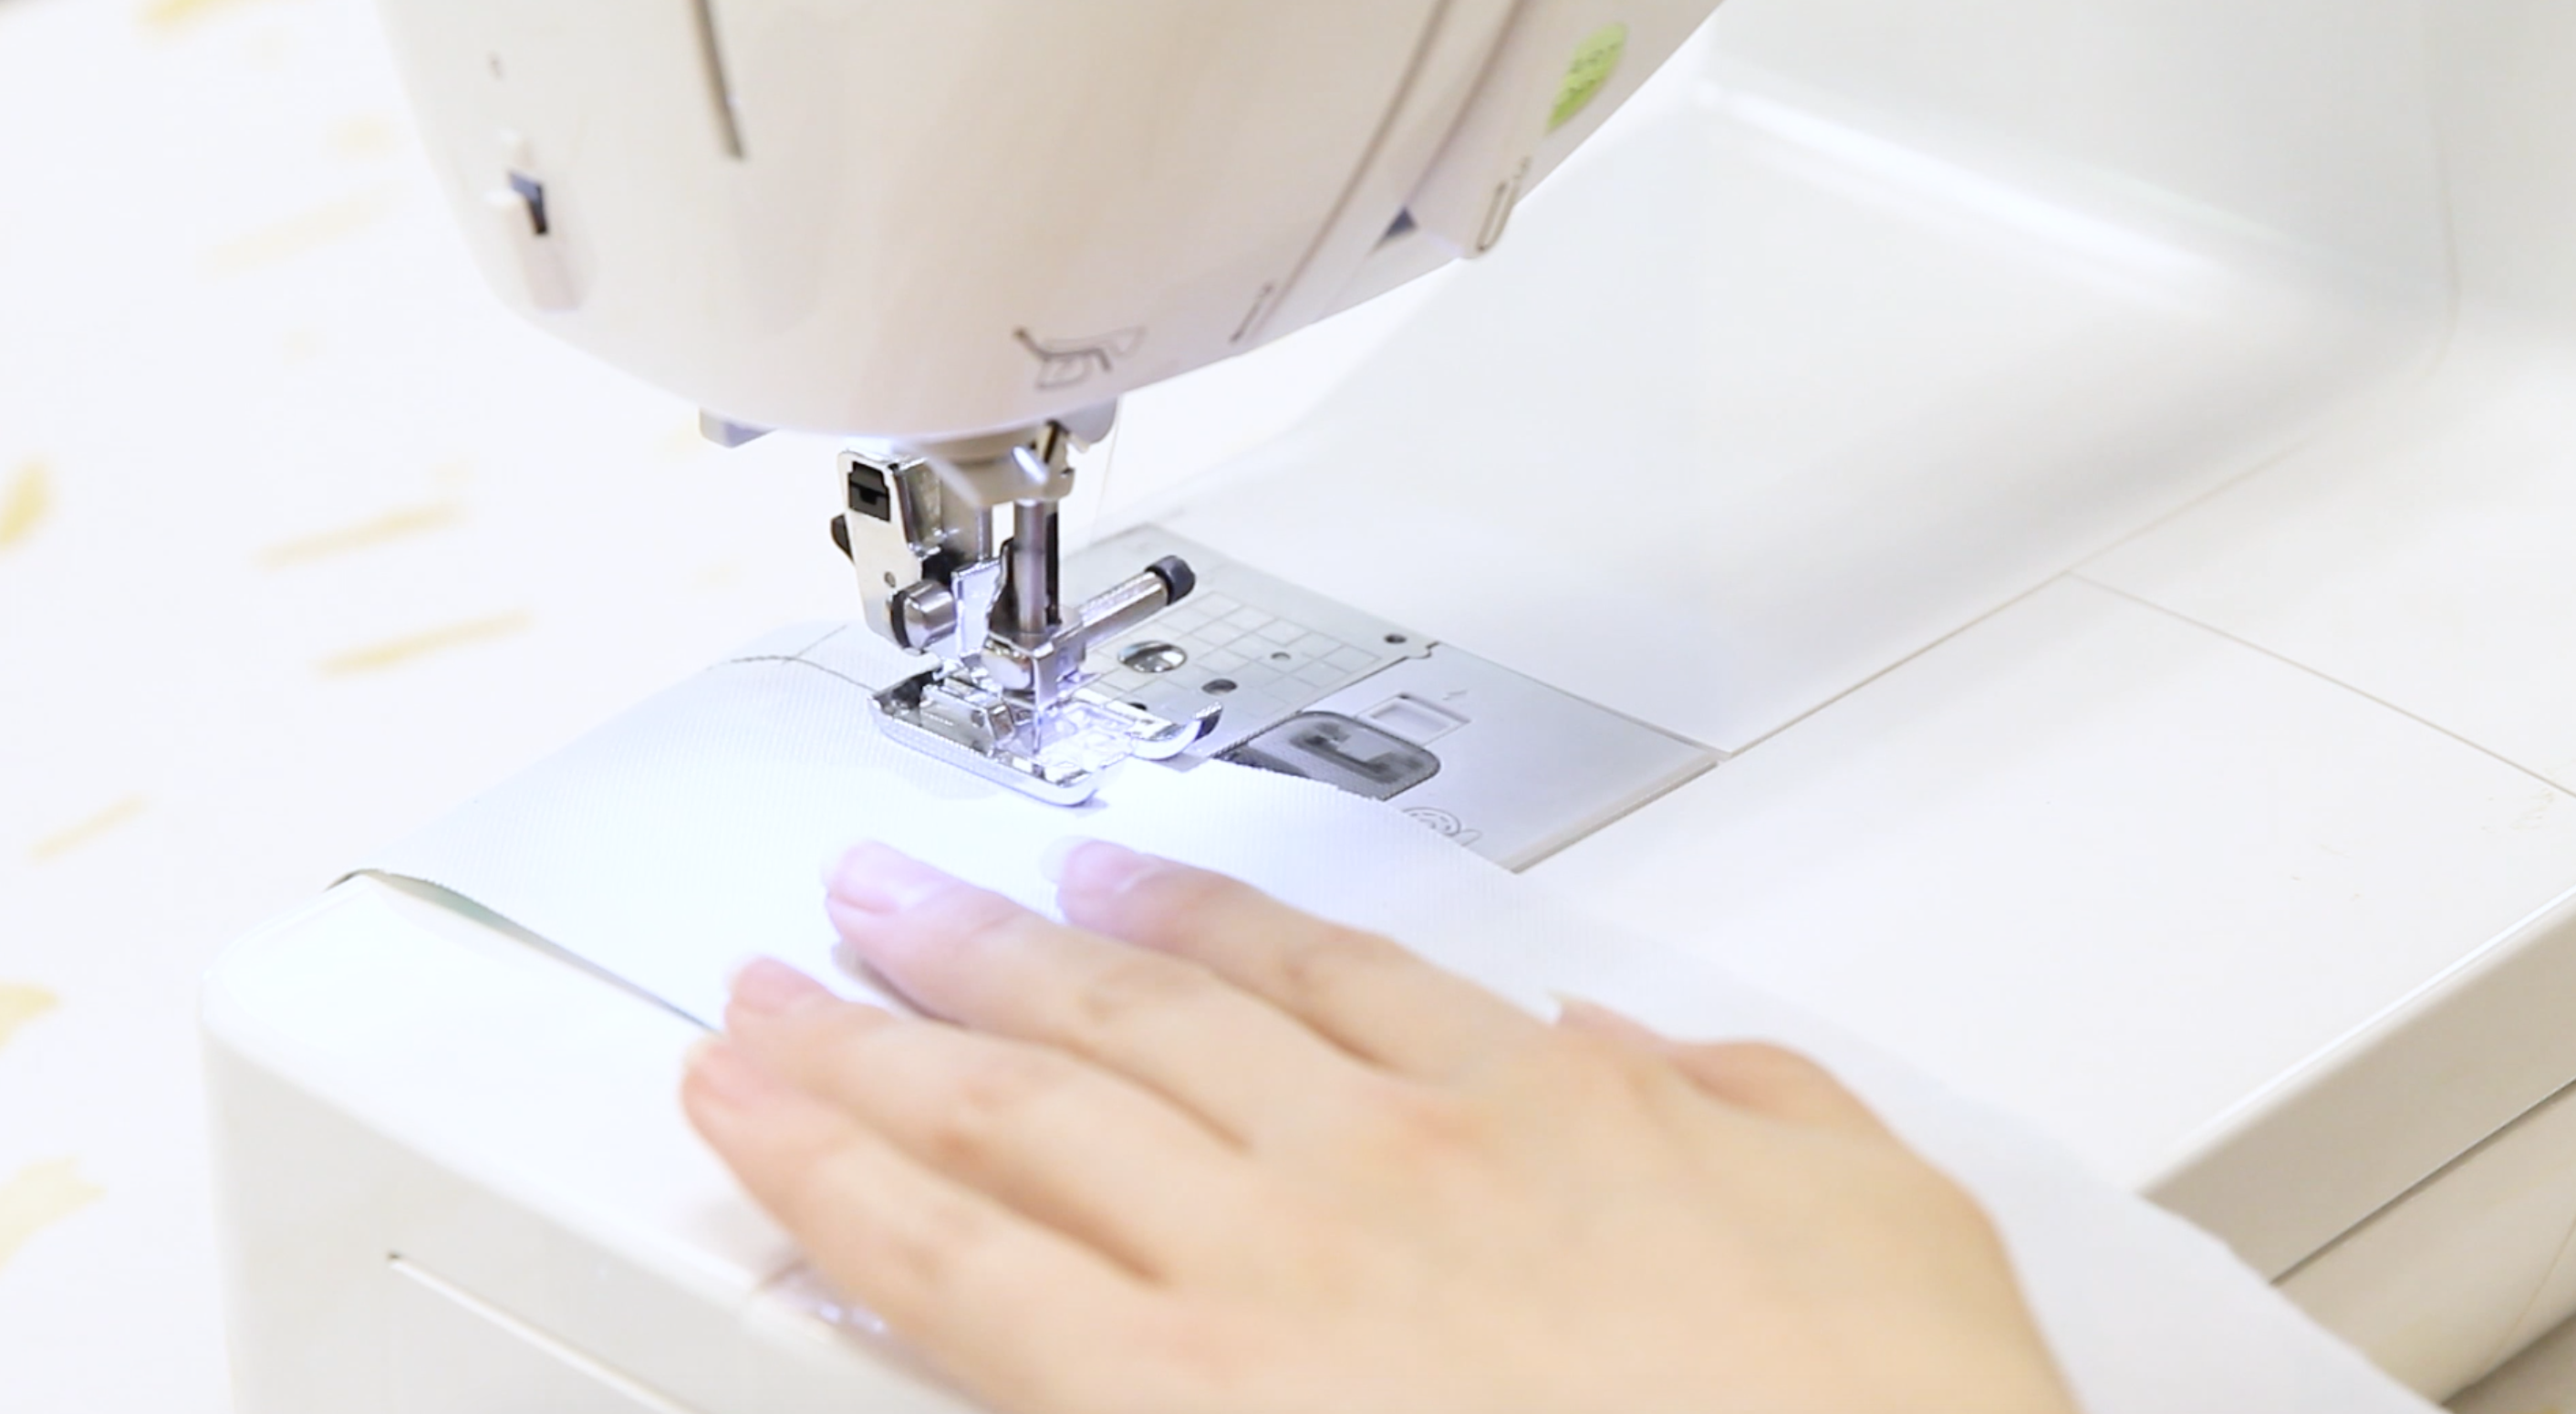
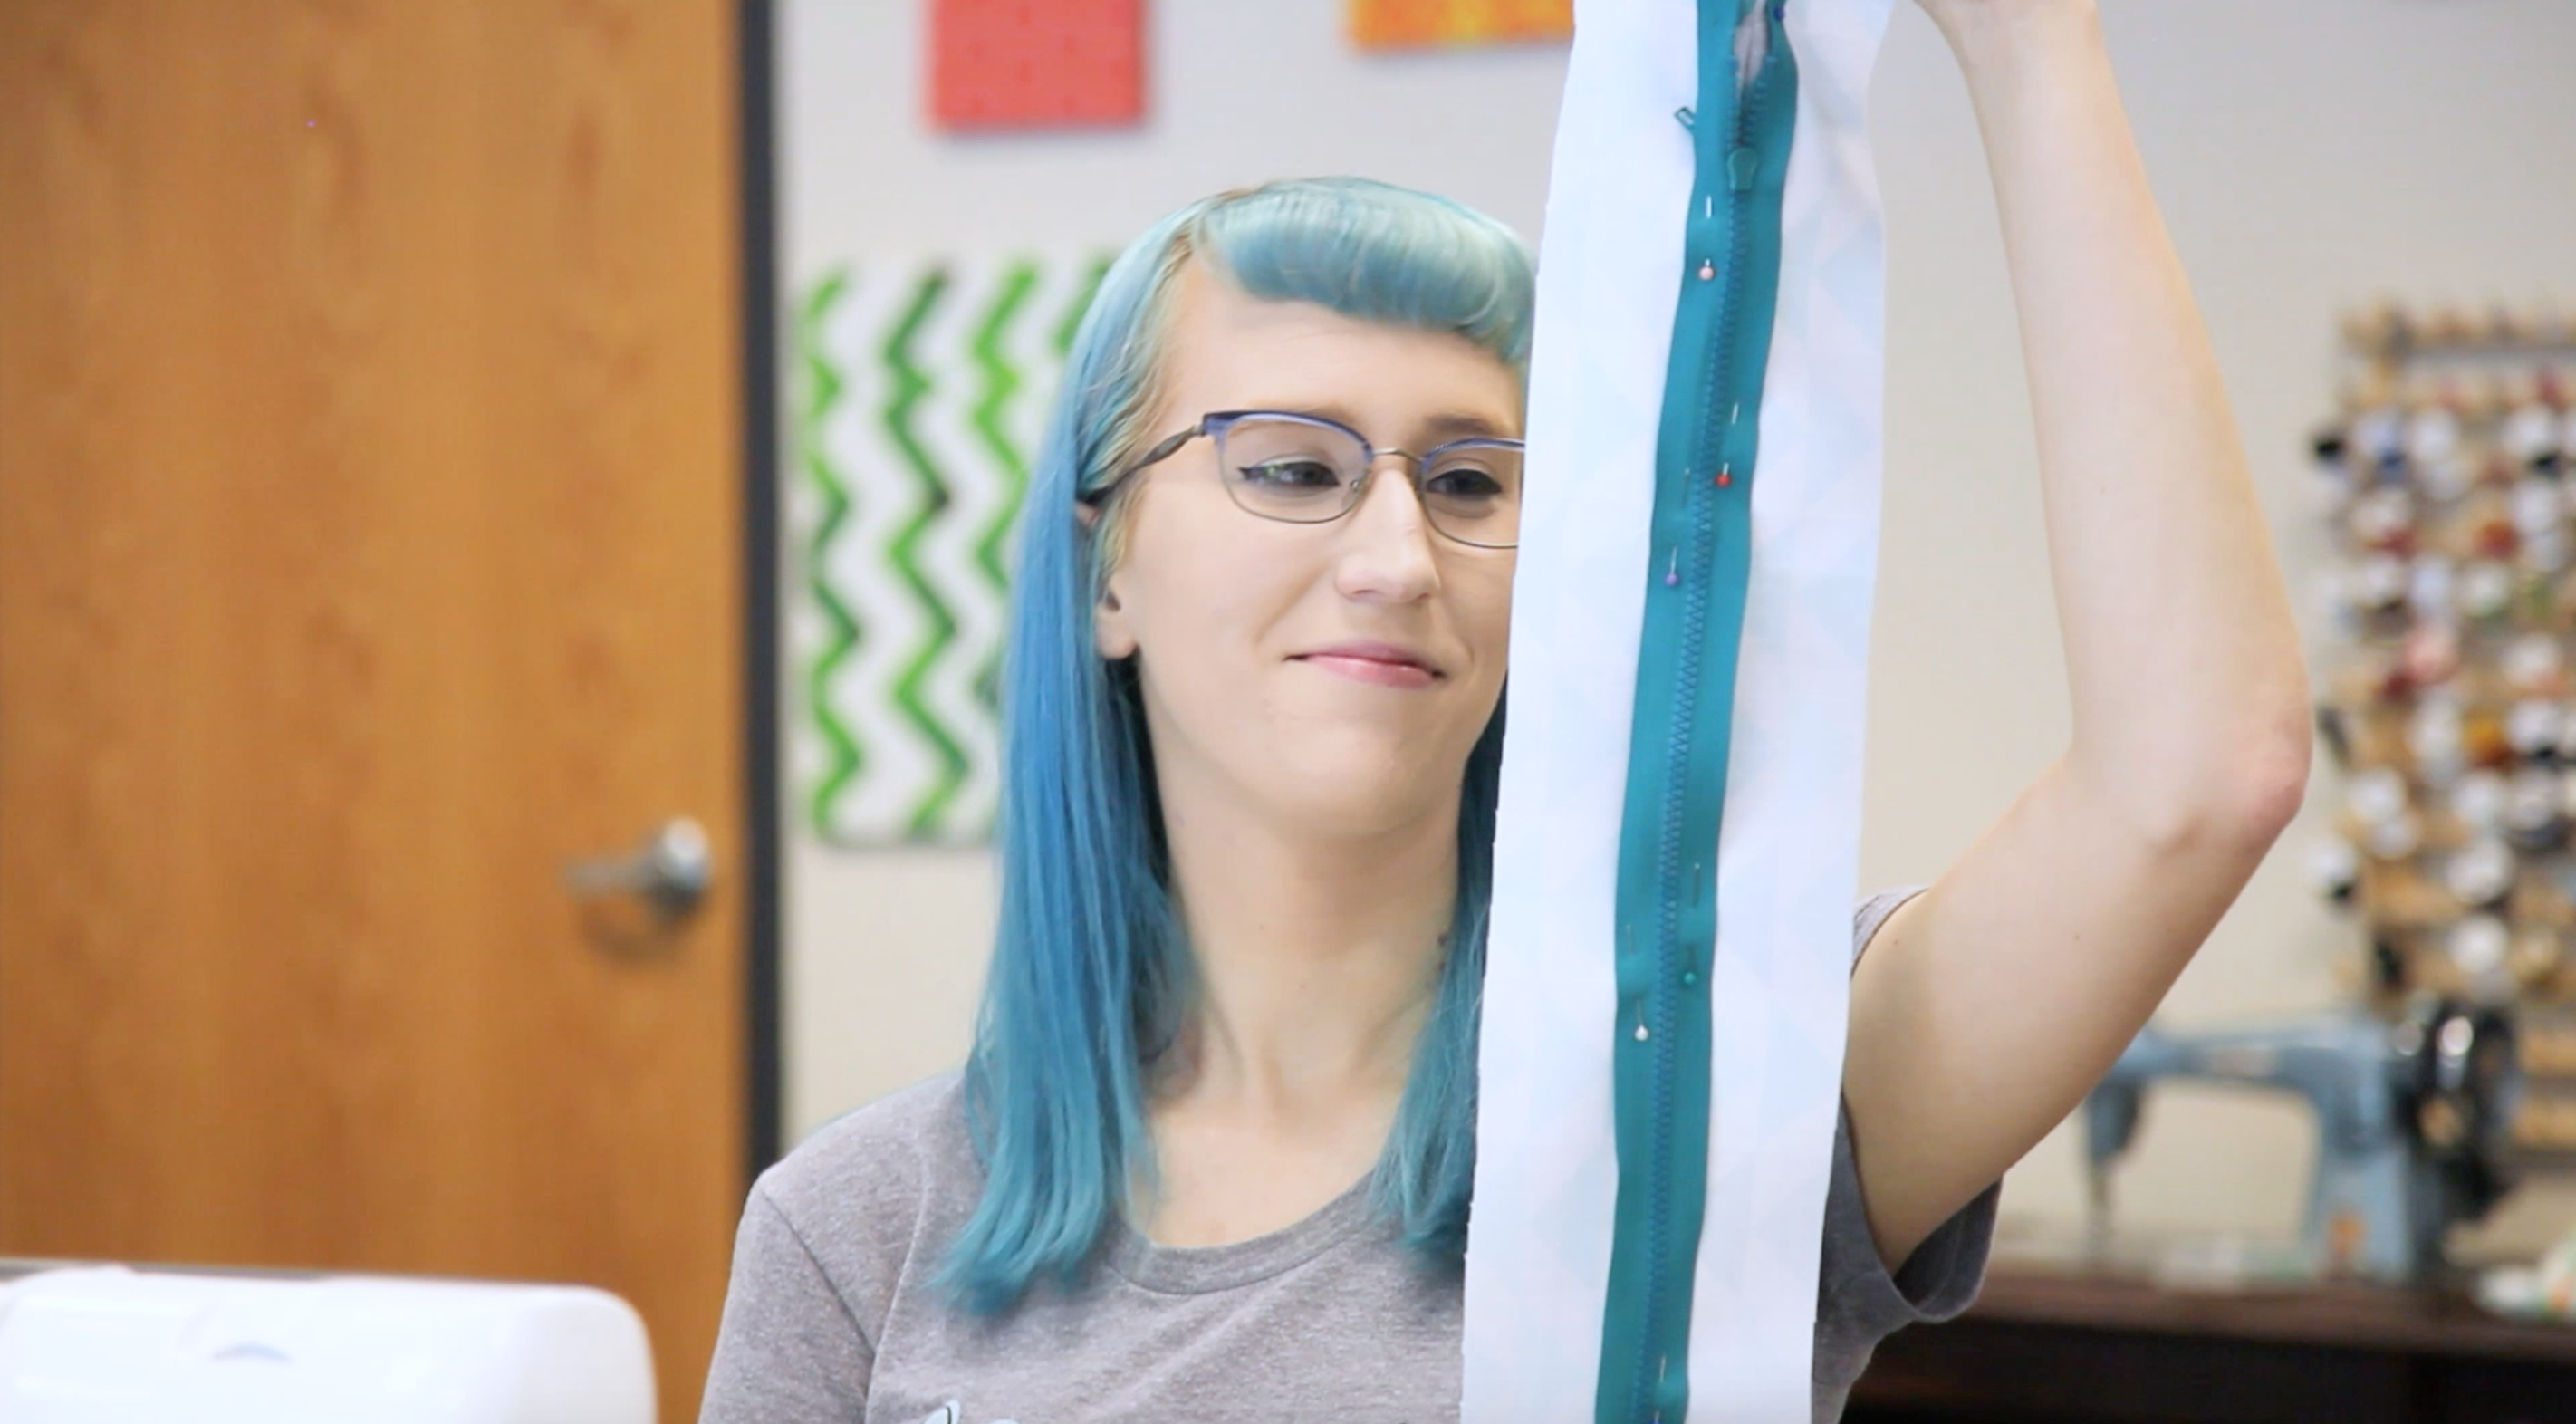
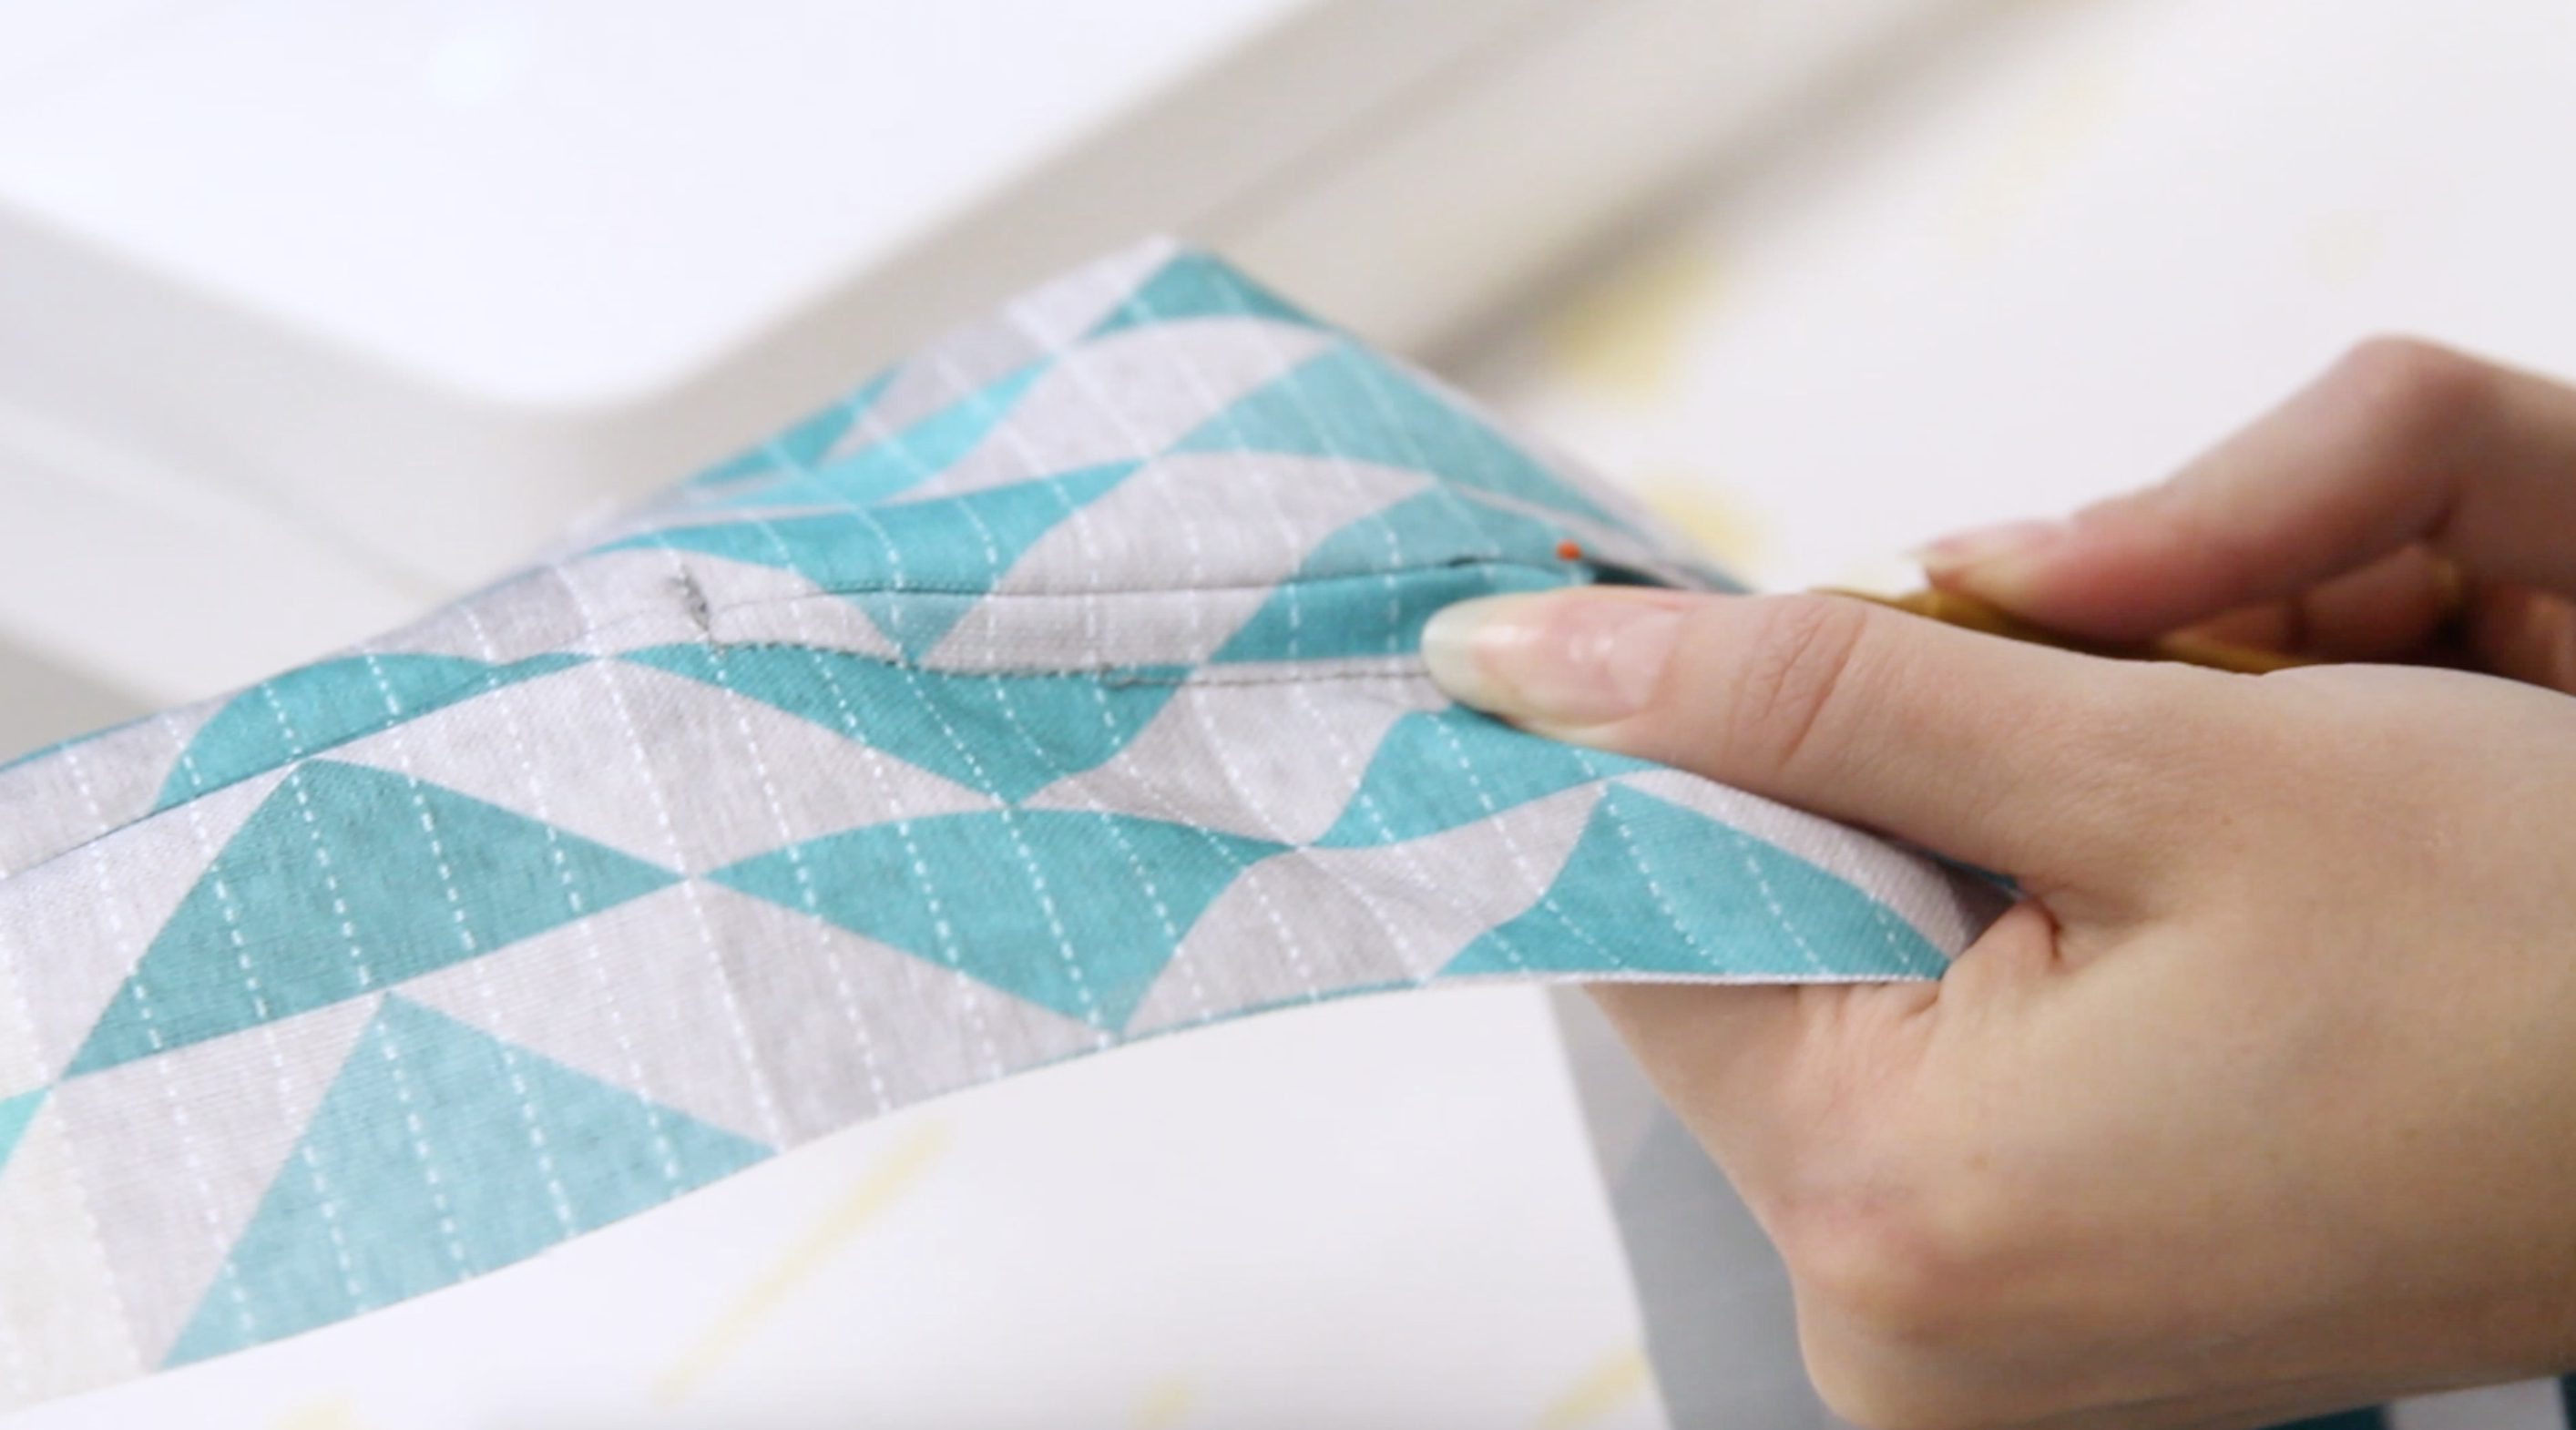
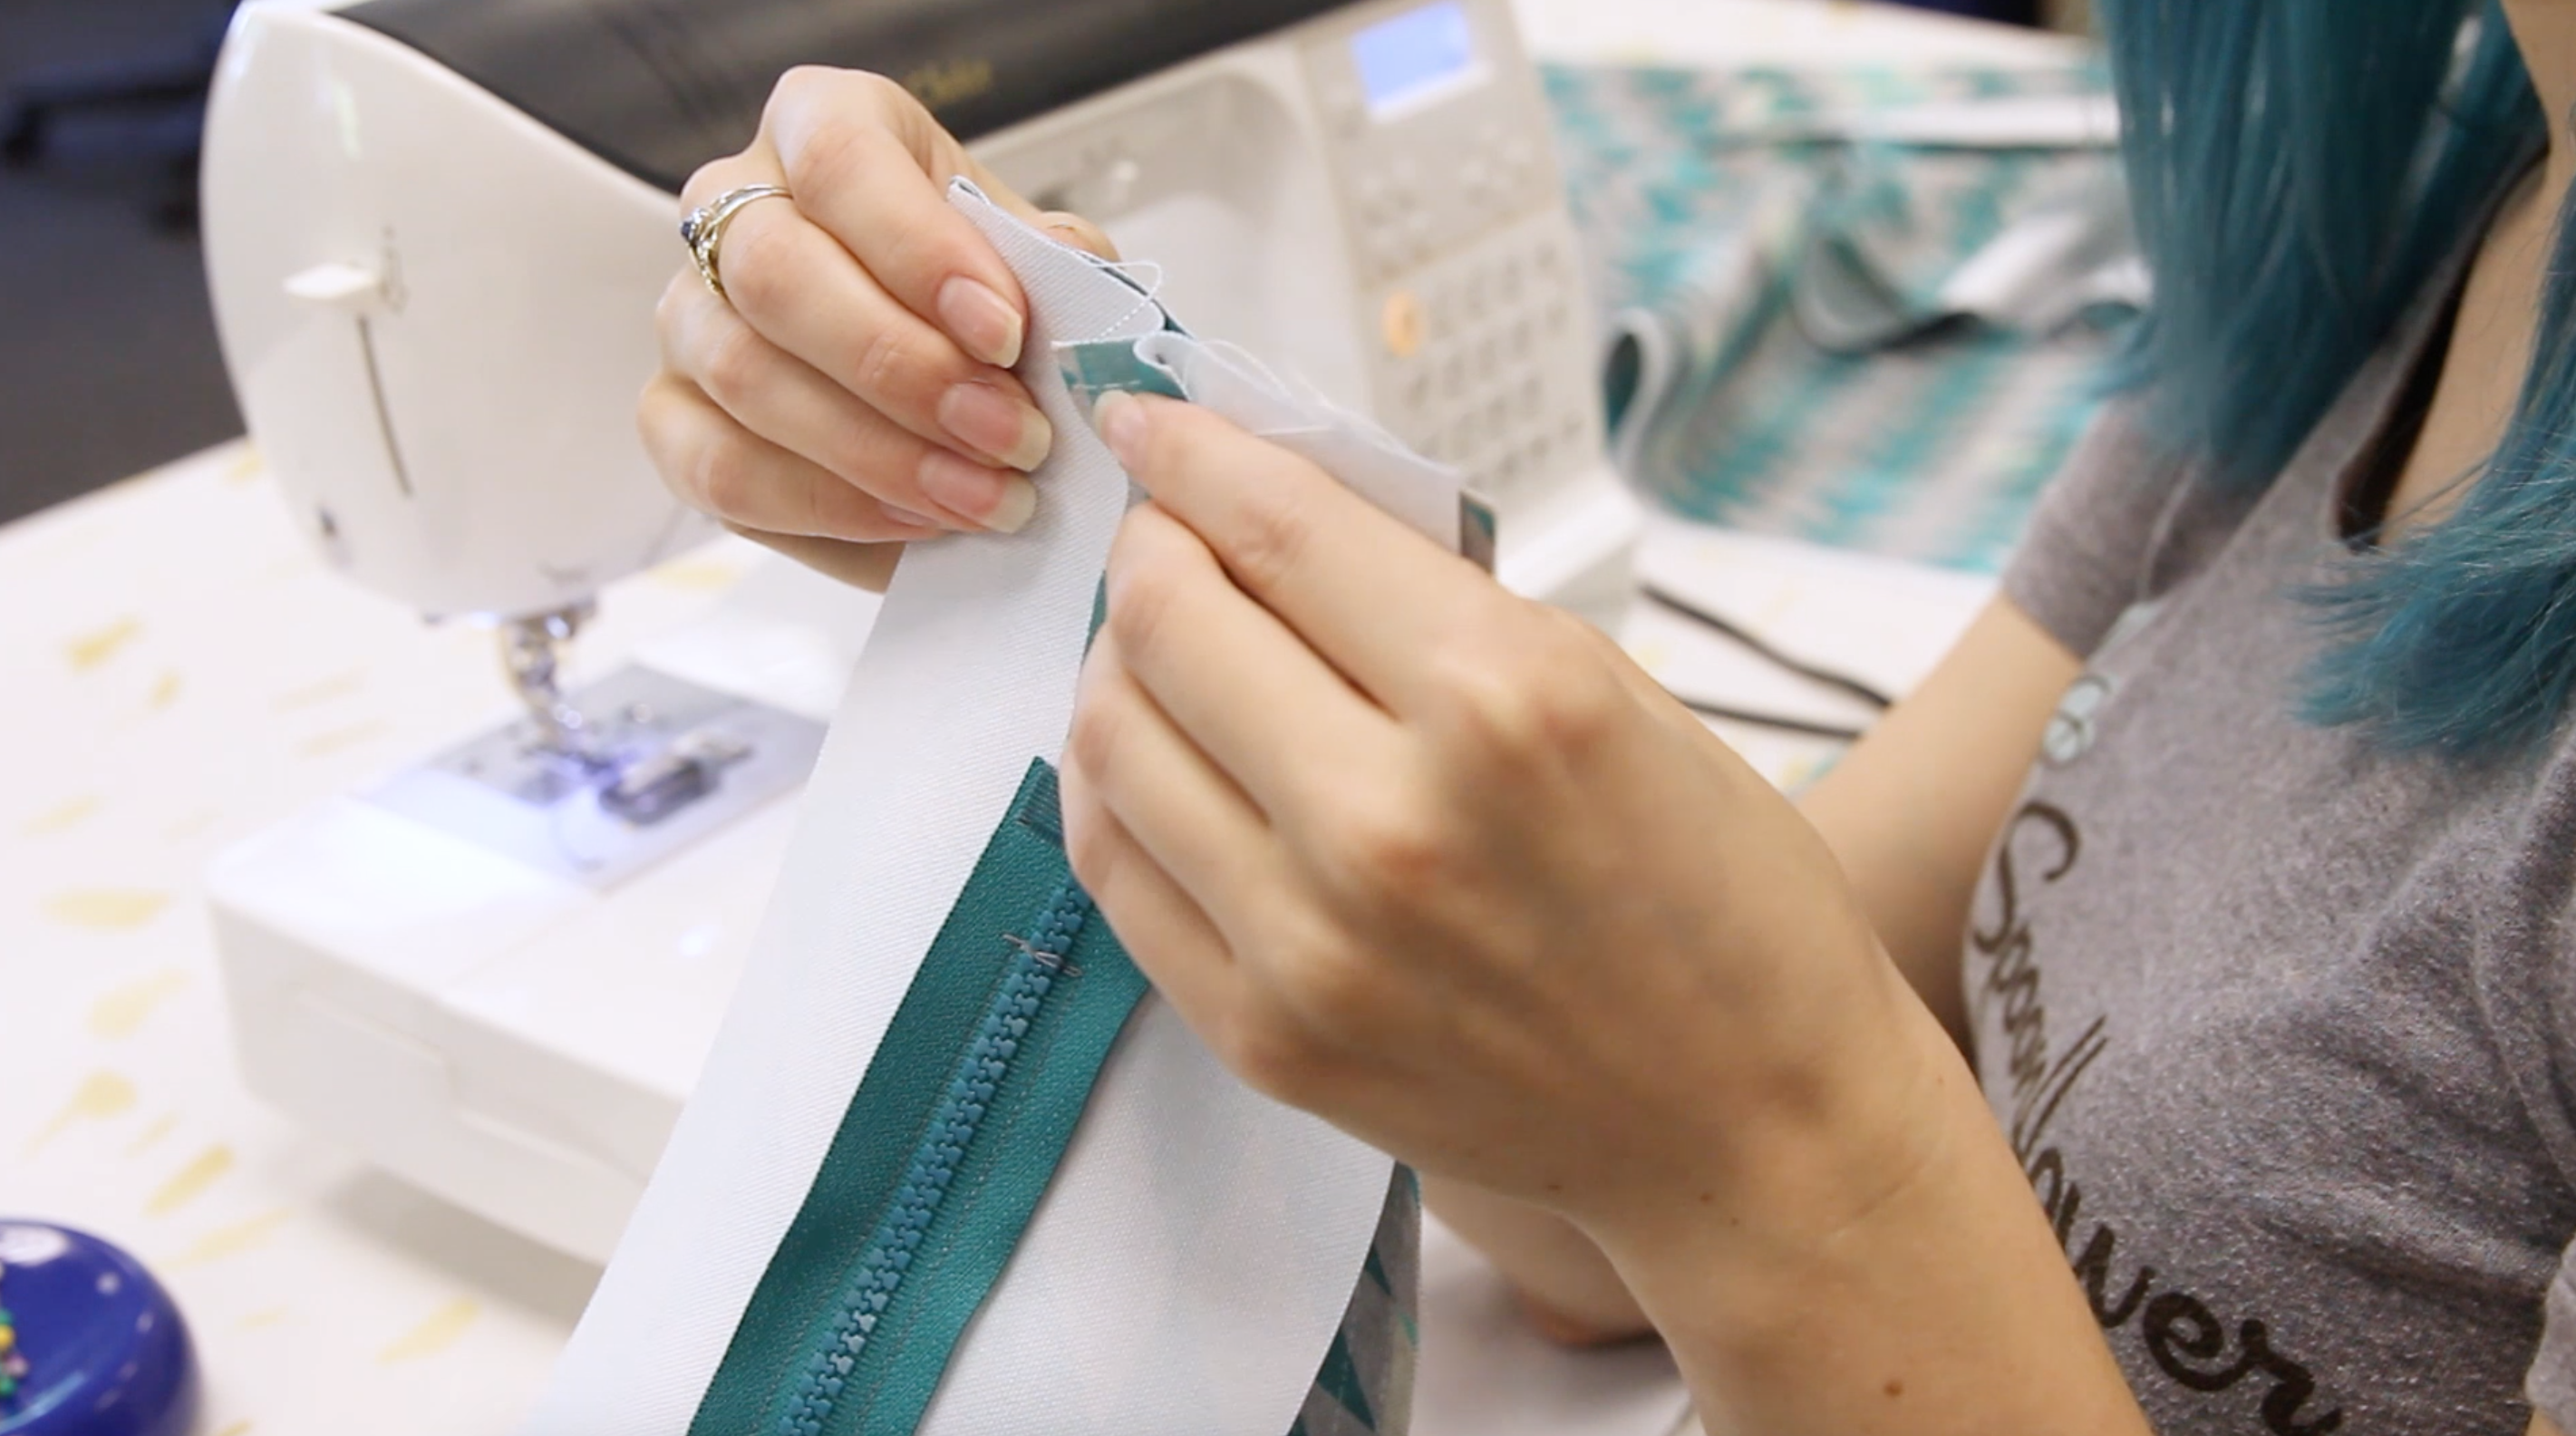
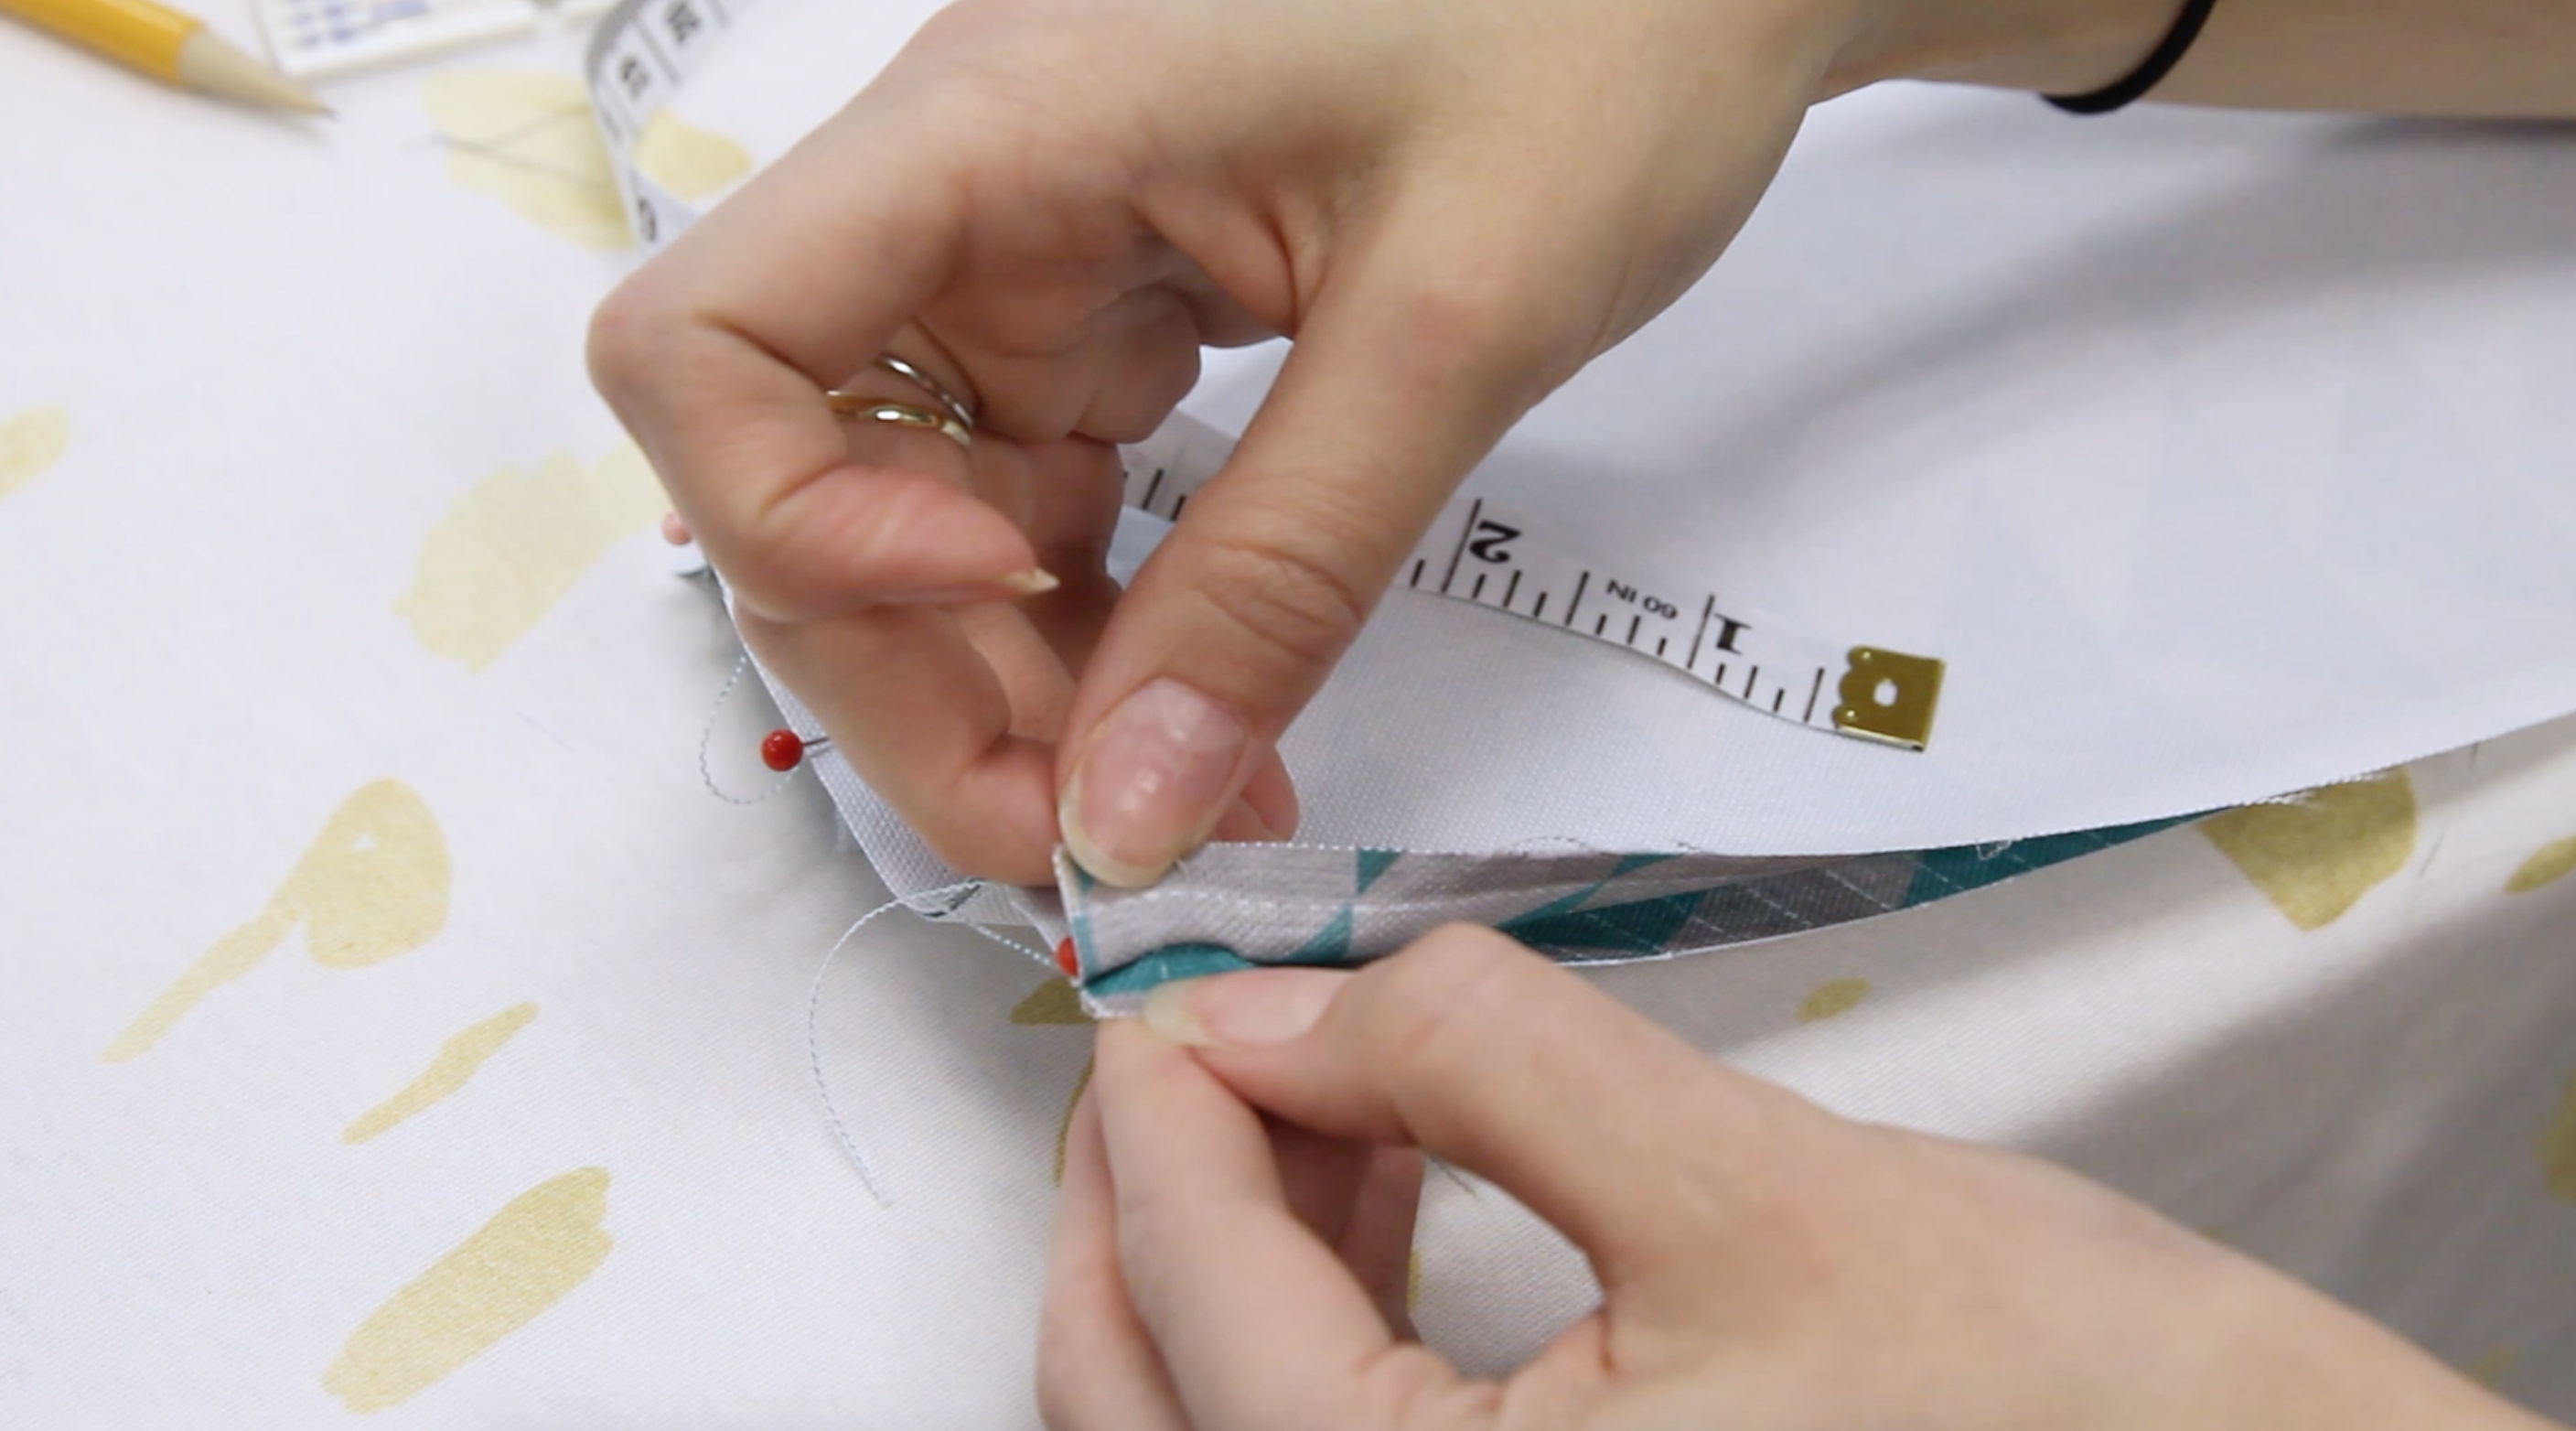
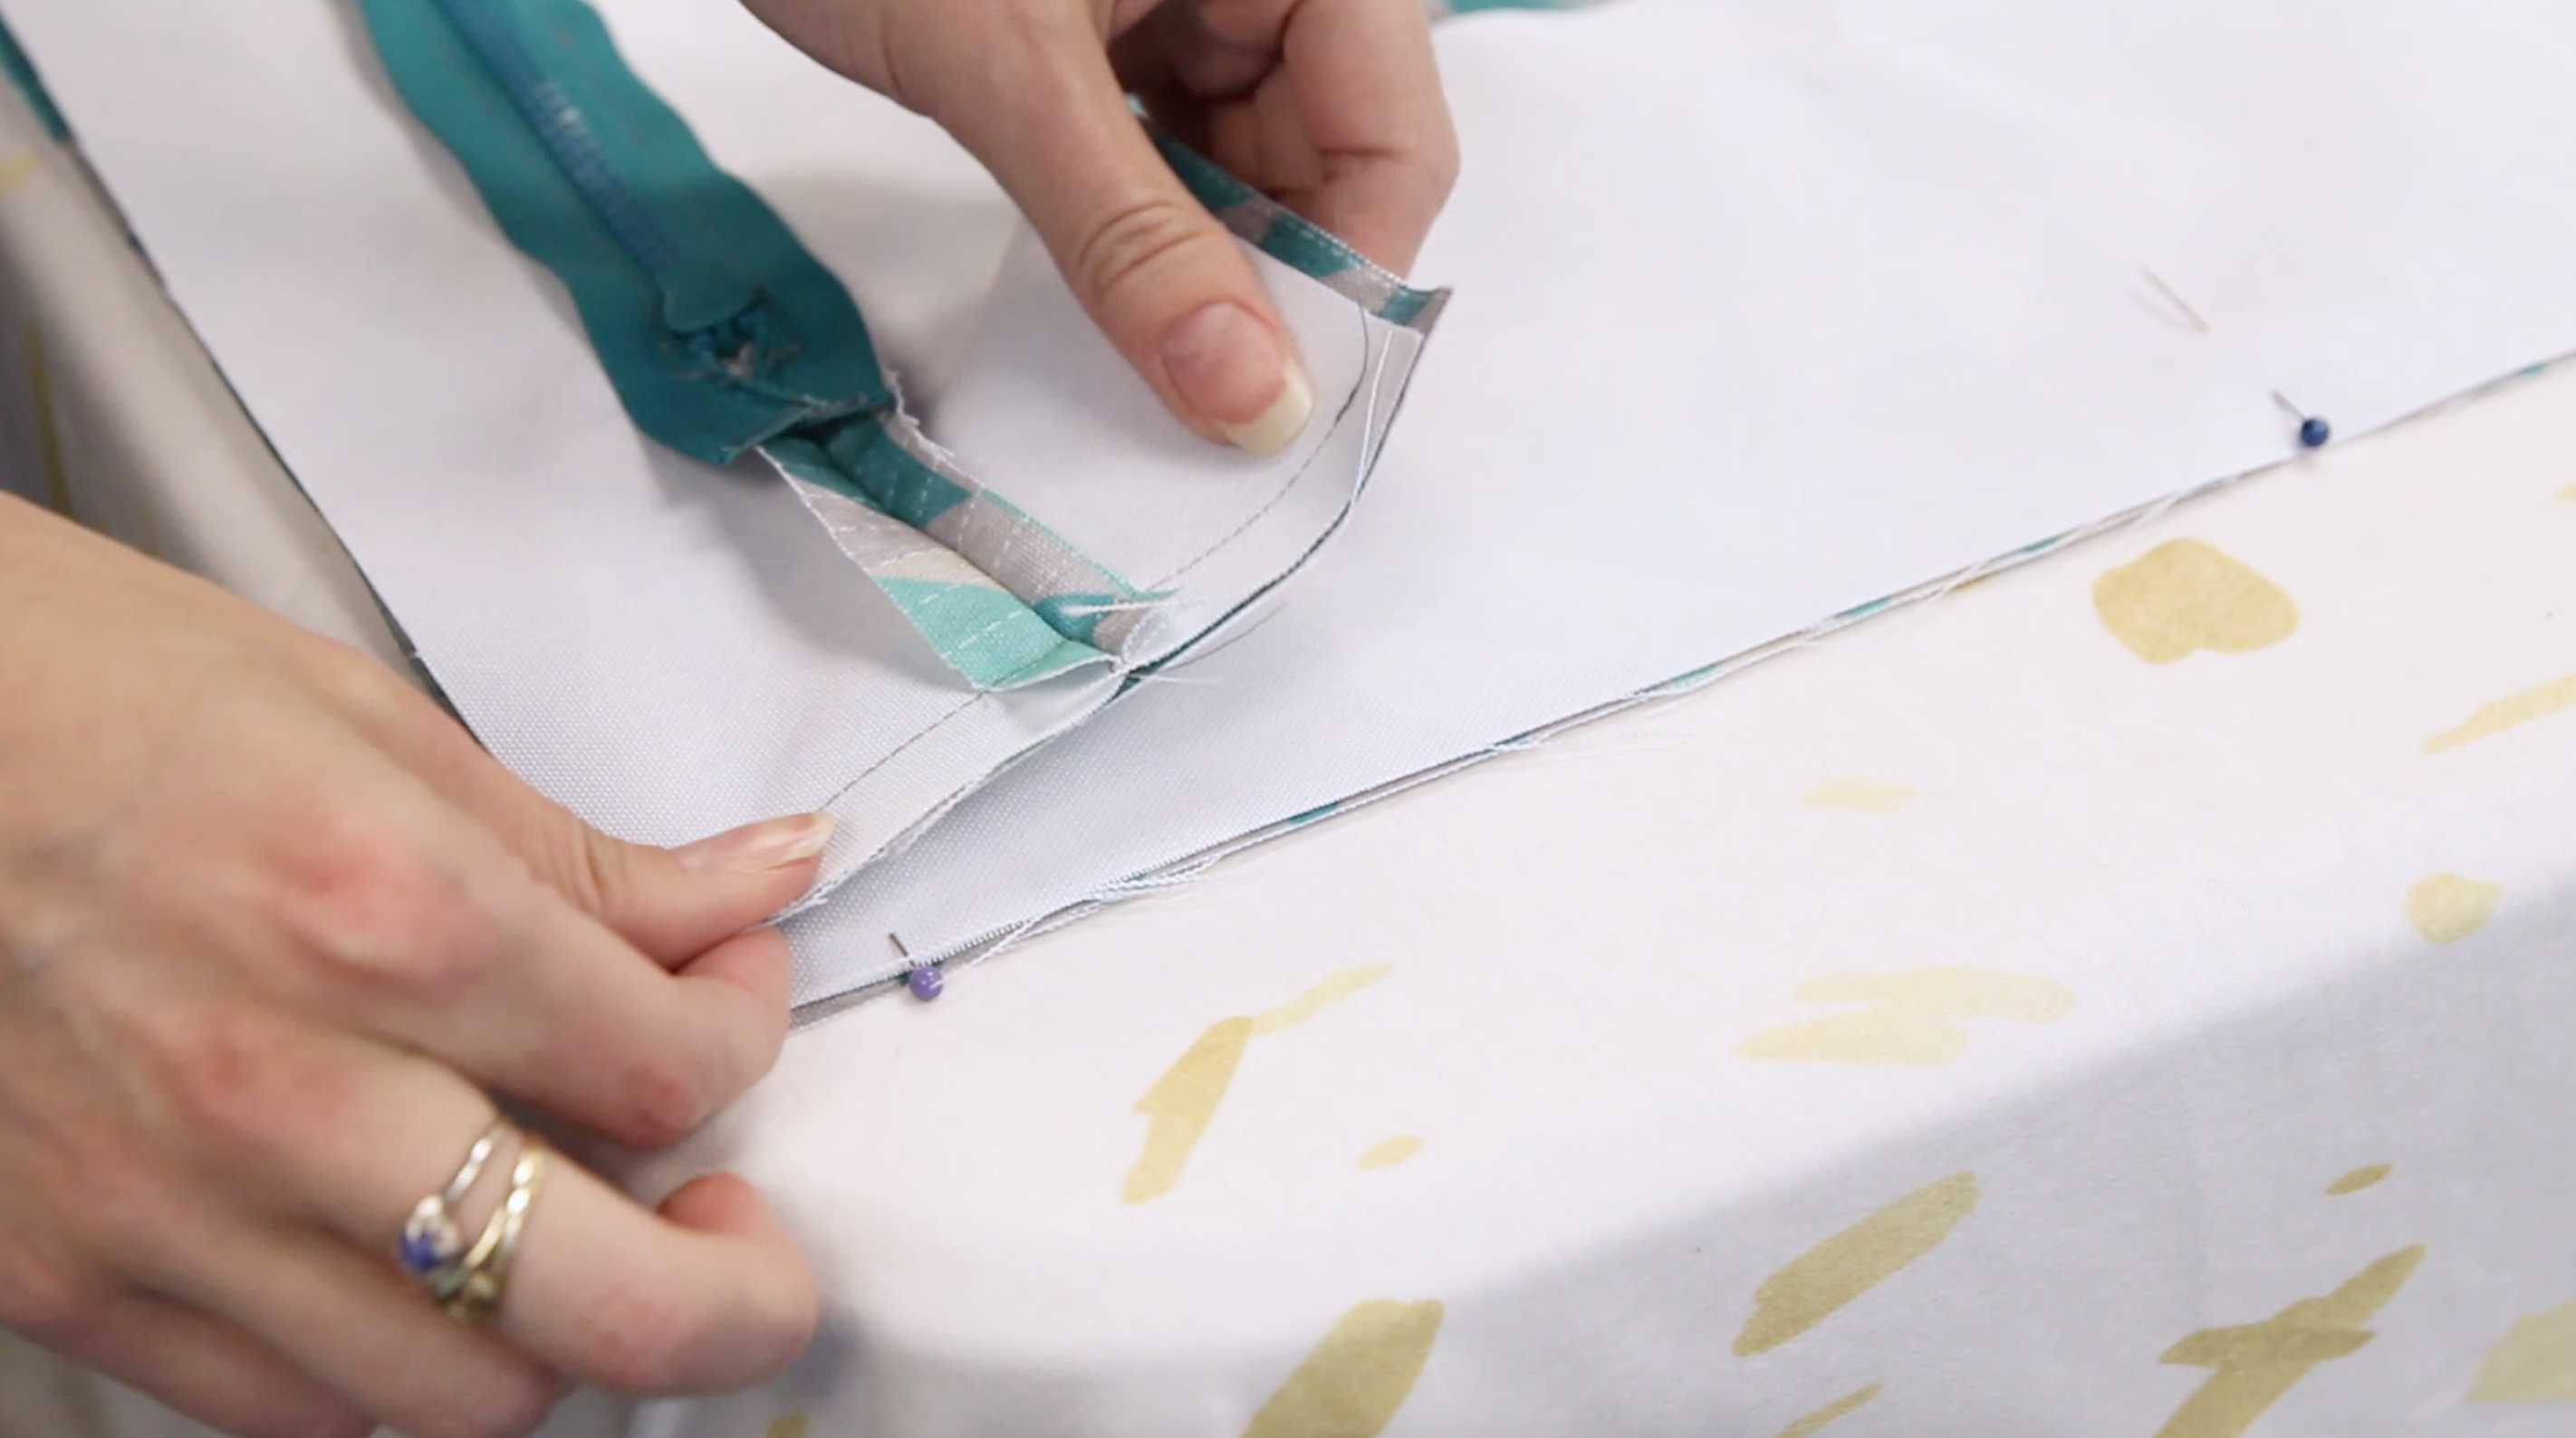
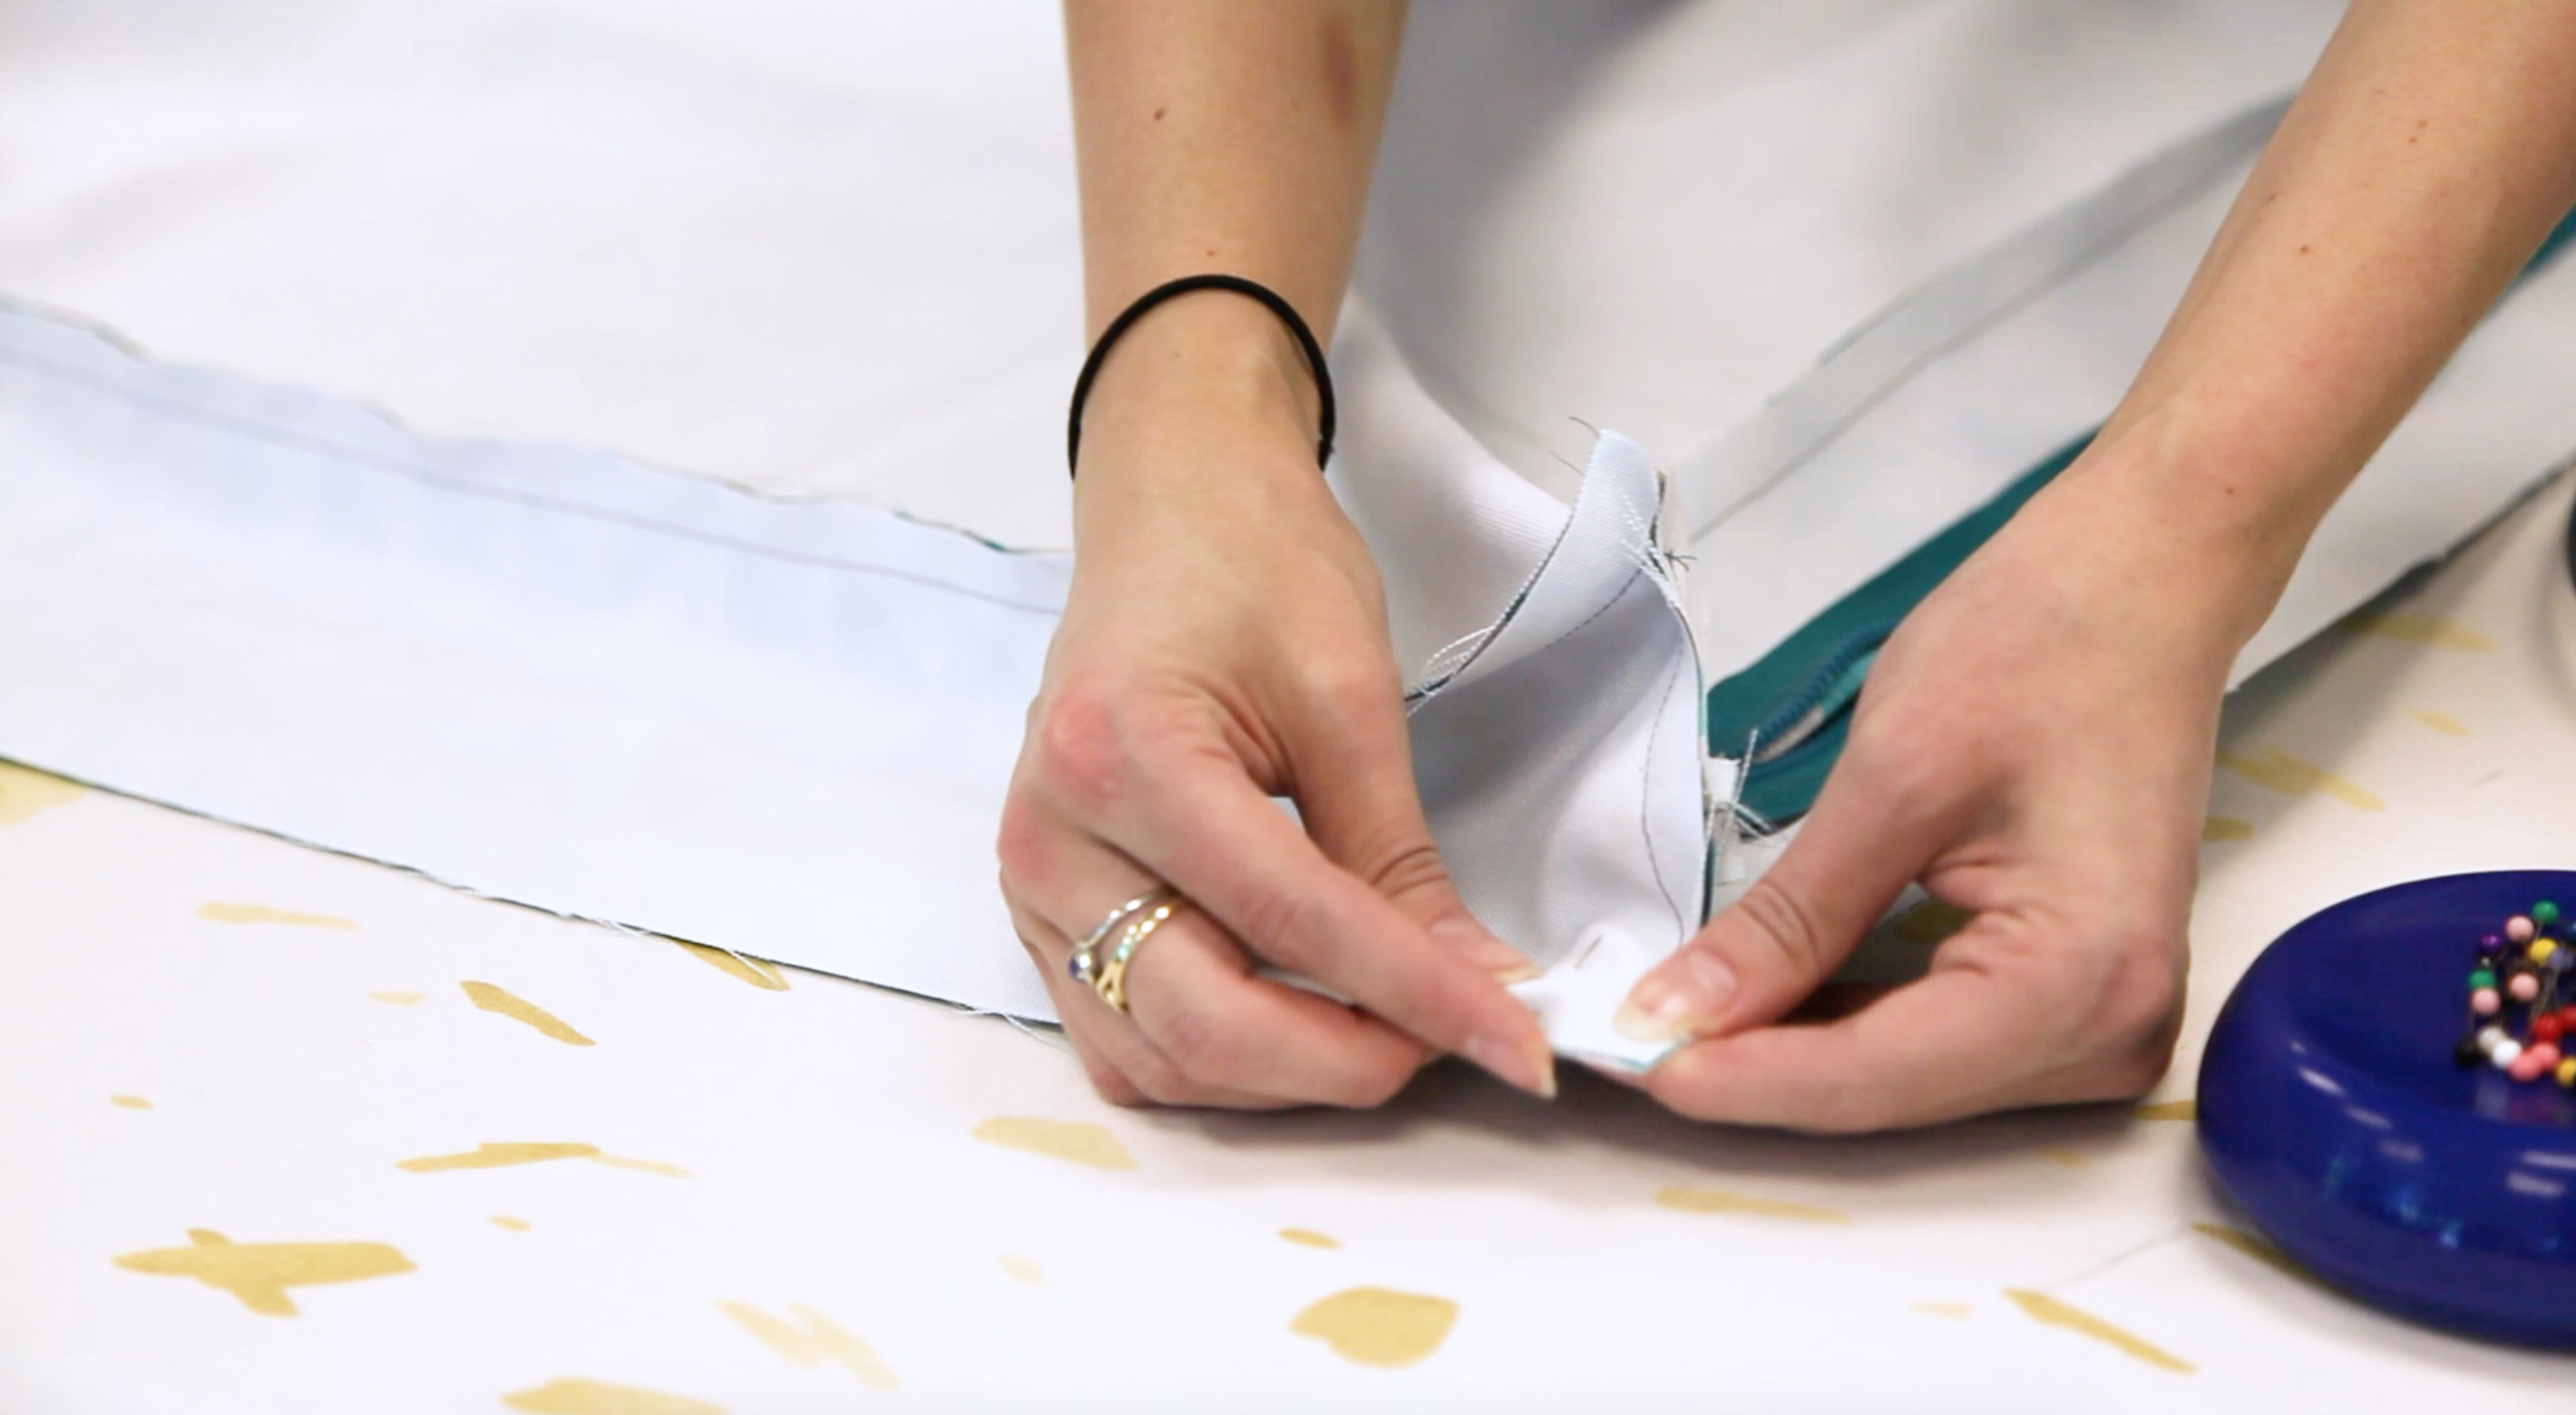
Step 2: Insert the zipper
Choose a zipper a few inches shorter than the longest side of the dog bed. For our 36″ dog bed we will be using a 30″ zipper. This allows you to have room on either side of the zipper for ease of sewing and a nicer fit.
With the print side facing in, fold the 37″ x 6″ piece in half lengthwise, then cut along the fold line to create two pieces. Lay your zipper centered on the fabric so you have an equal amount of space on each end and mark where your zipper pull starts and stops. Set the zipper aside.
Sew the two cut pieces together with a 1/2″ seam, using a standard stitch length. When you get to the zipper mark, backstitch a few times, then change to a basting stitch to sew the area where your zipper will be inserted. At the second mark, backstitch again. Then finish the remainder with a normal stitch length.
Switch to a zipper foot, and insert the zipper facedown into the seam you just sewed.
Remove the basting stitch using a seam ripper, being careful not to rip out your back stitching.
You now have a centered zipper! Let’s make the rest of the bed.
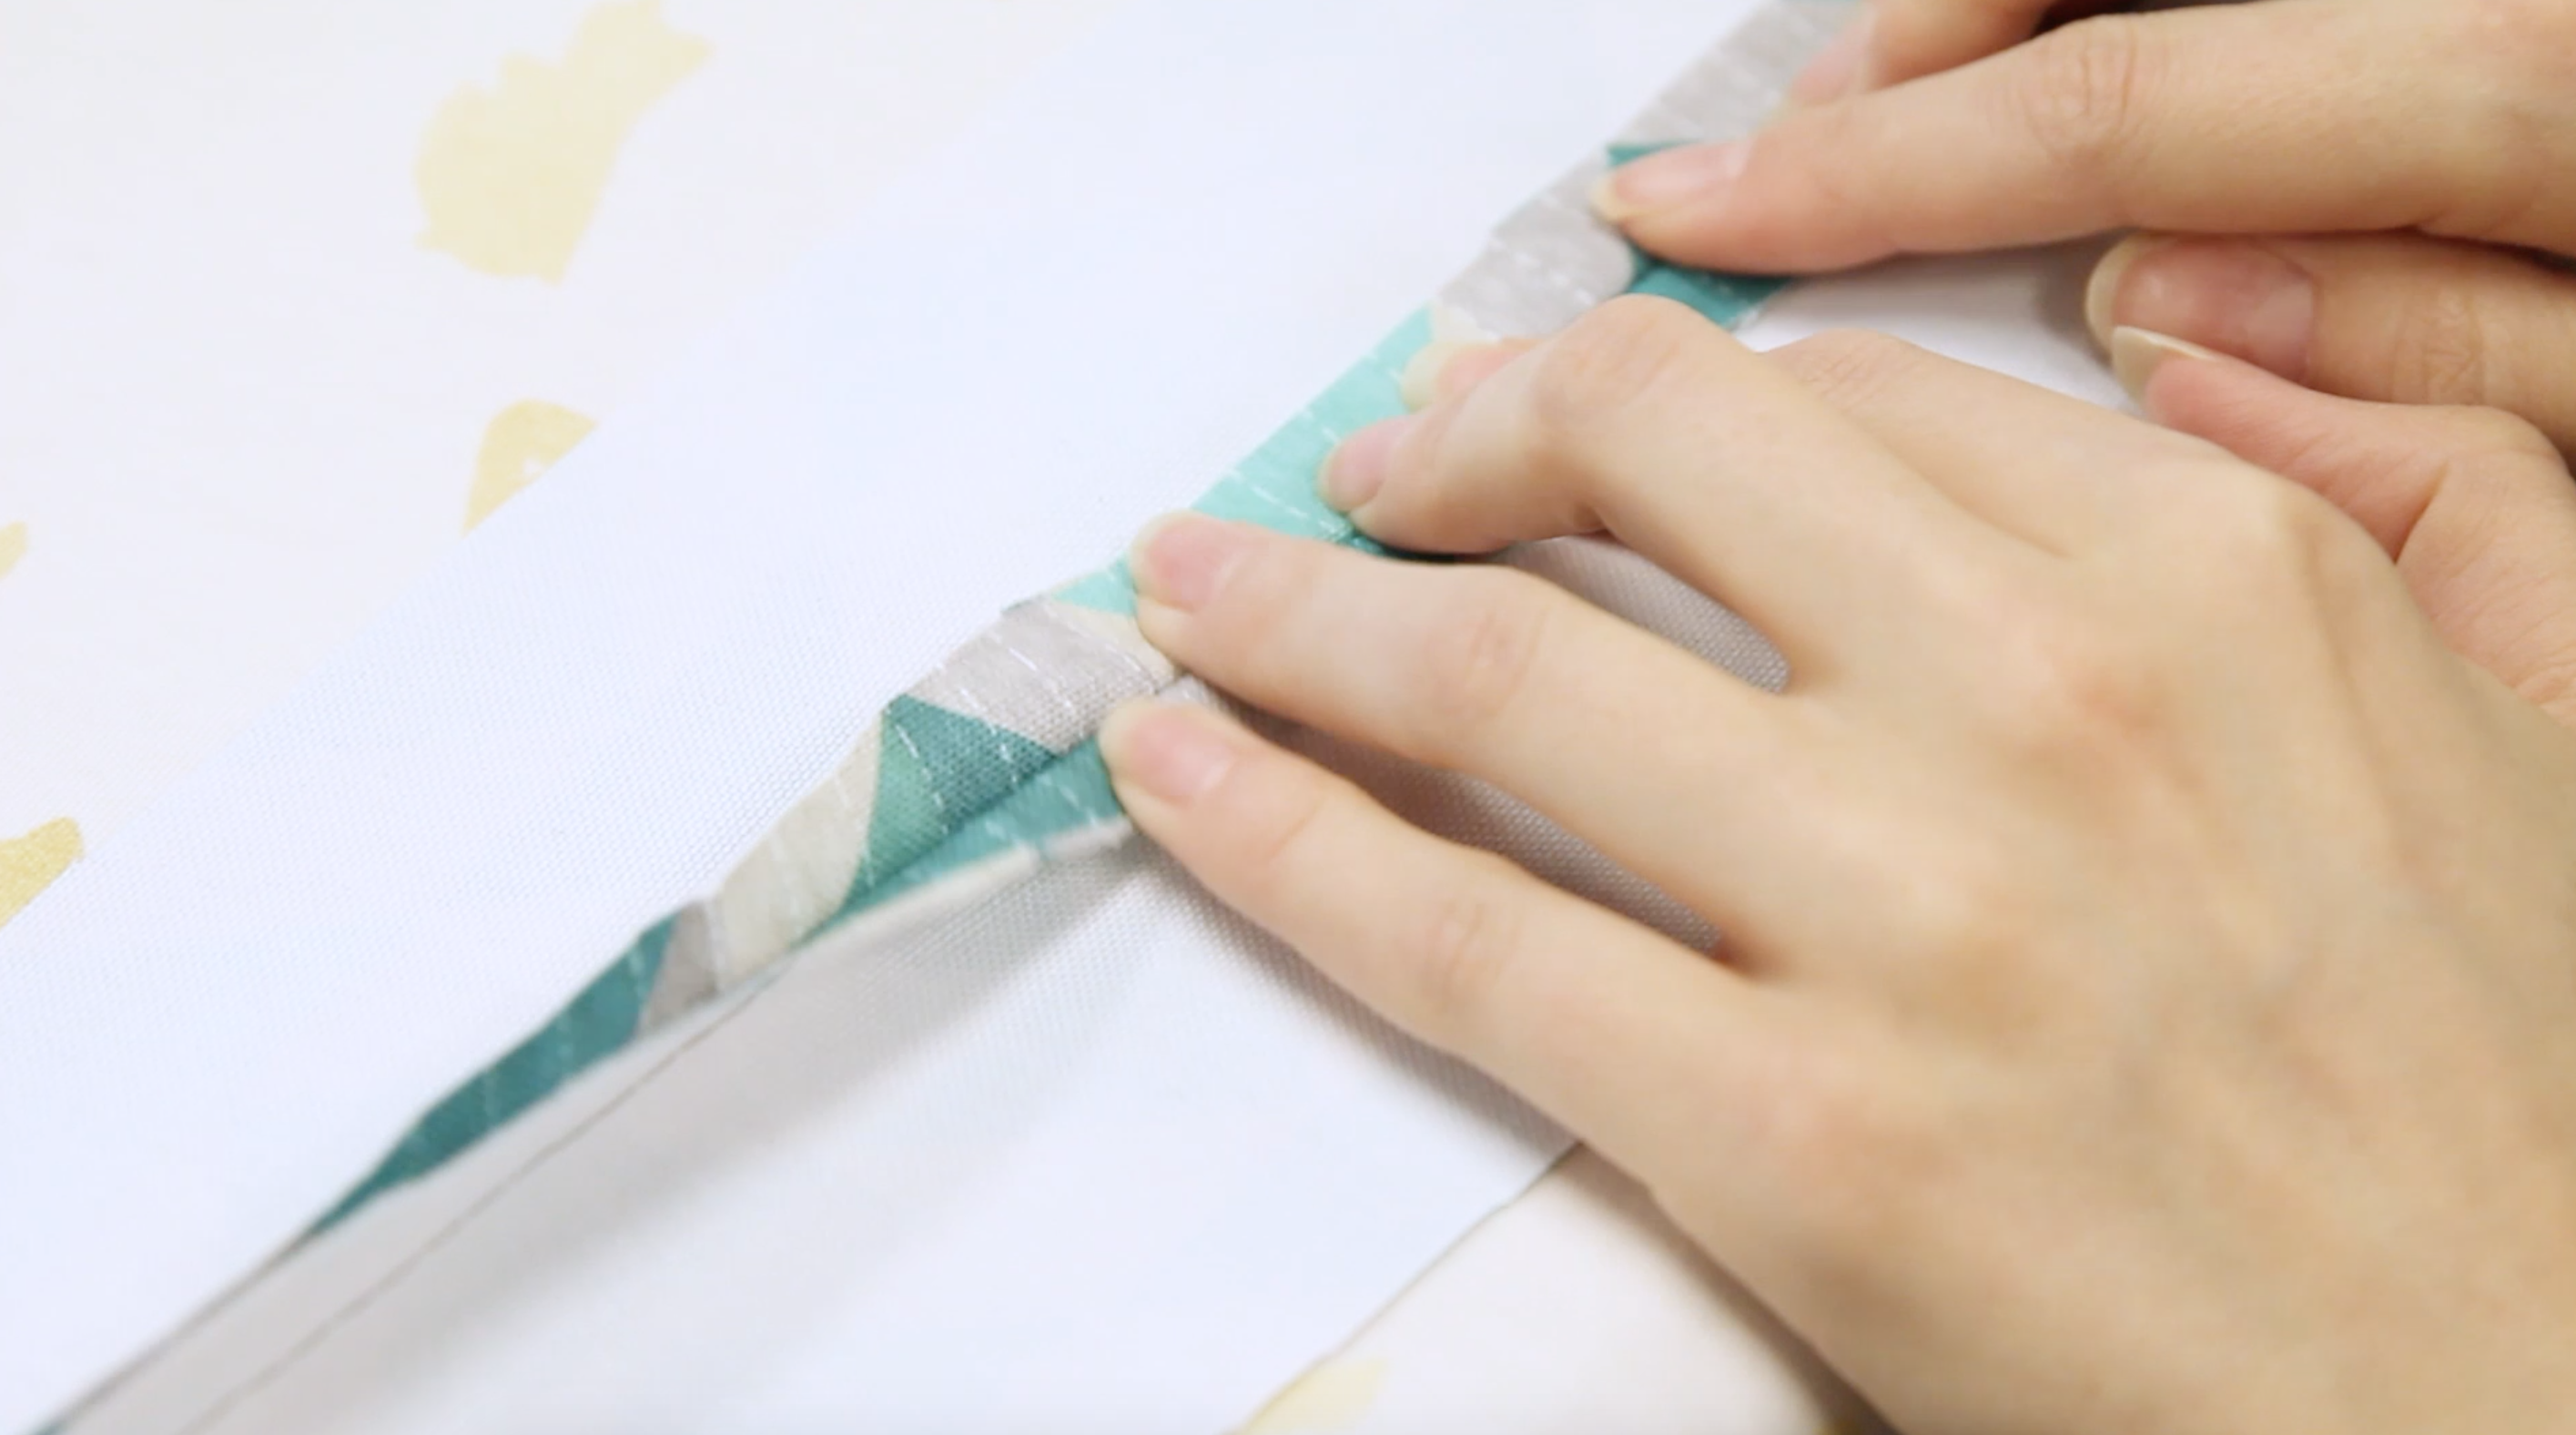
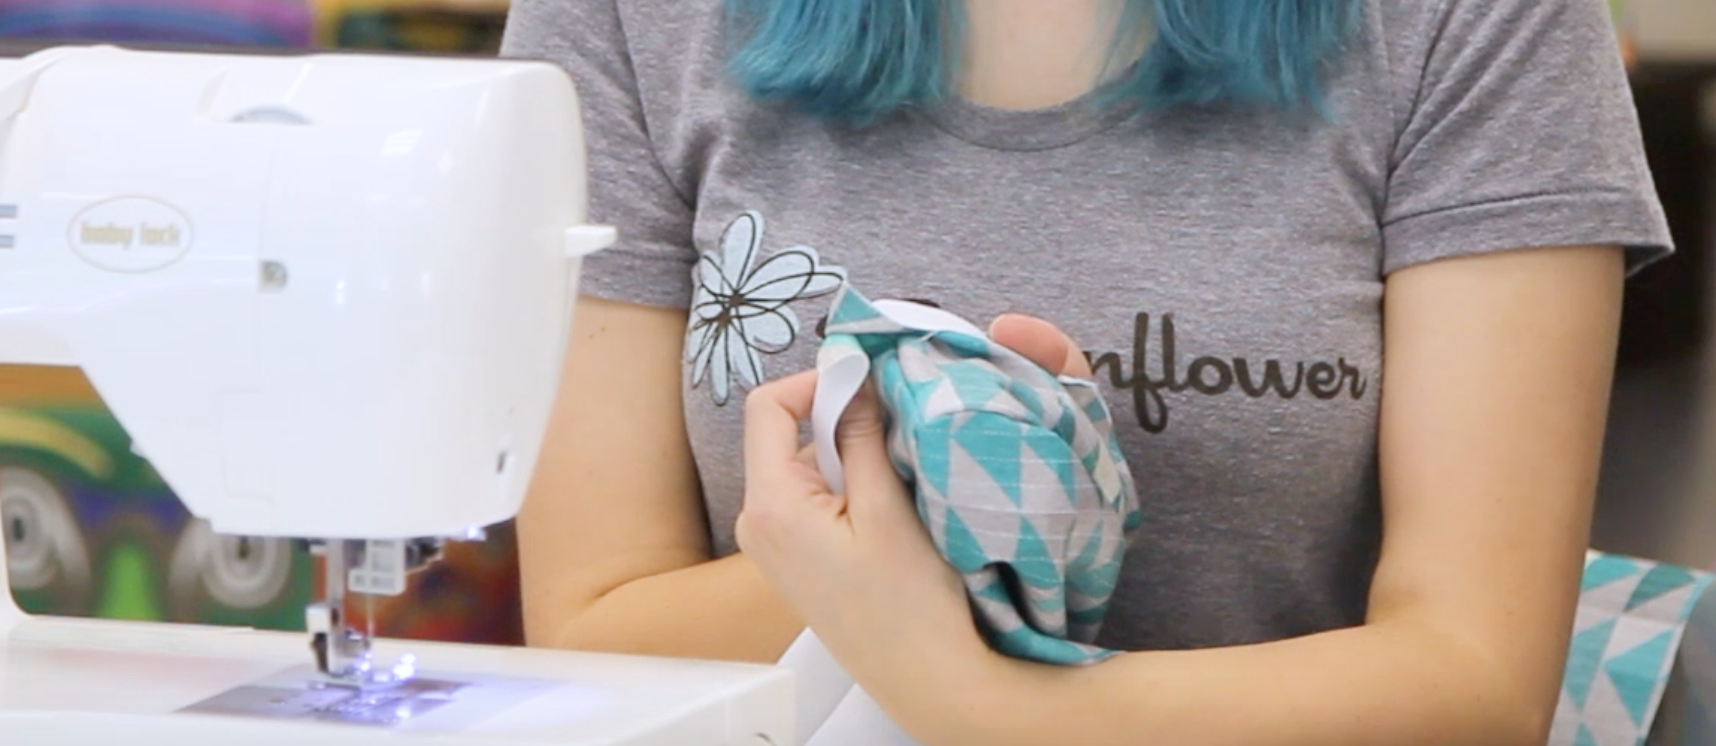
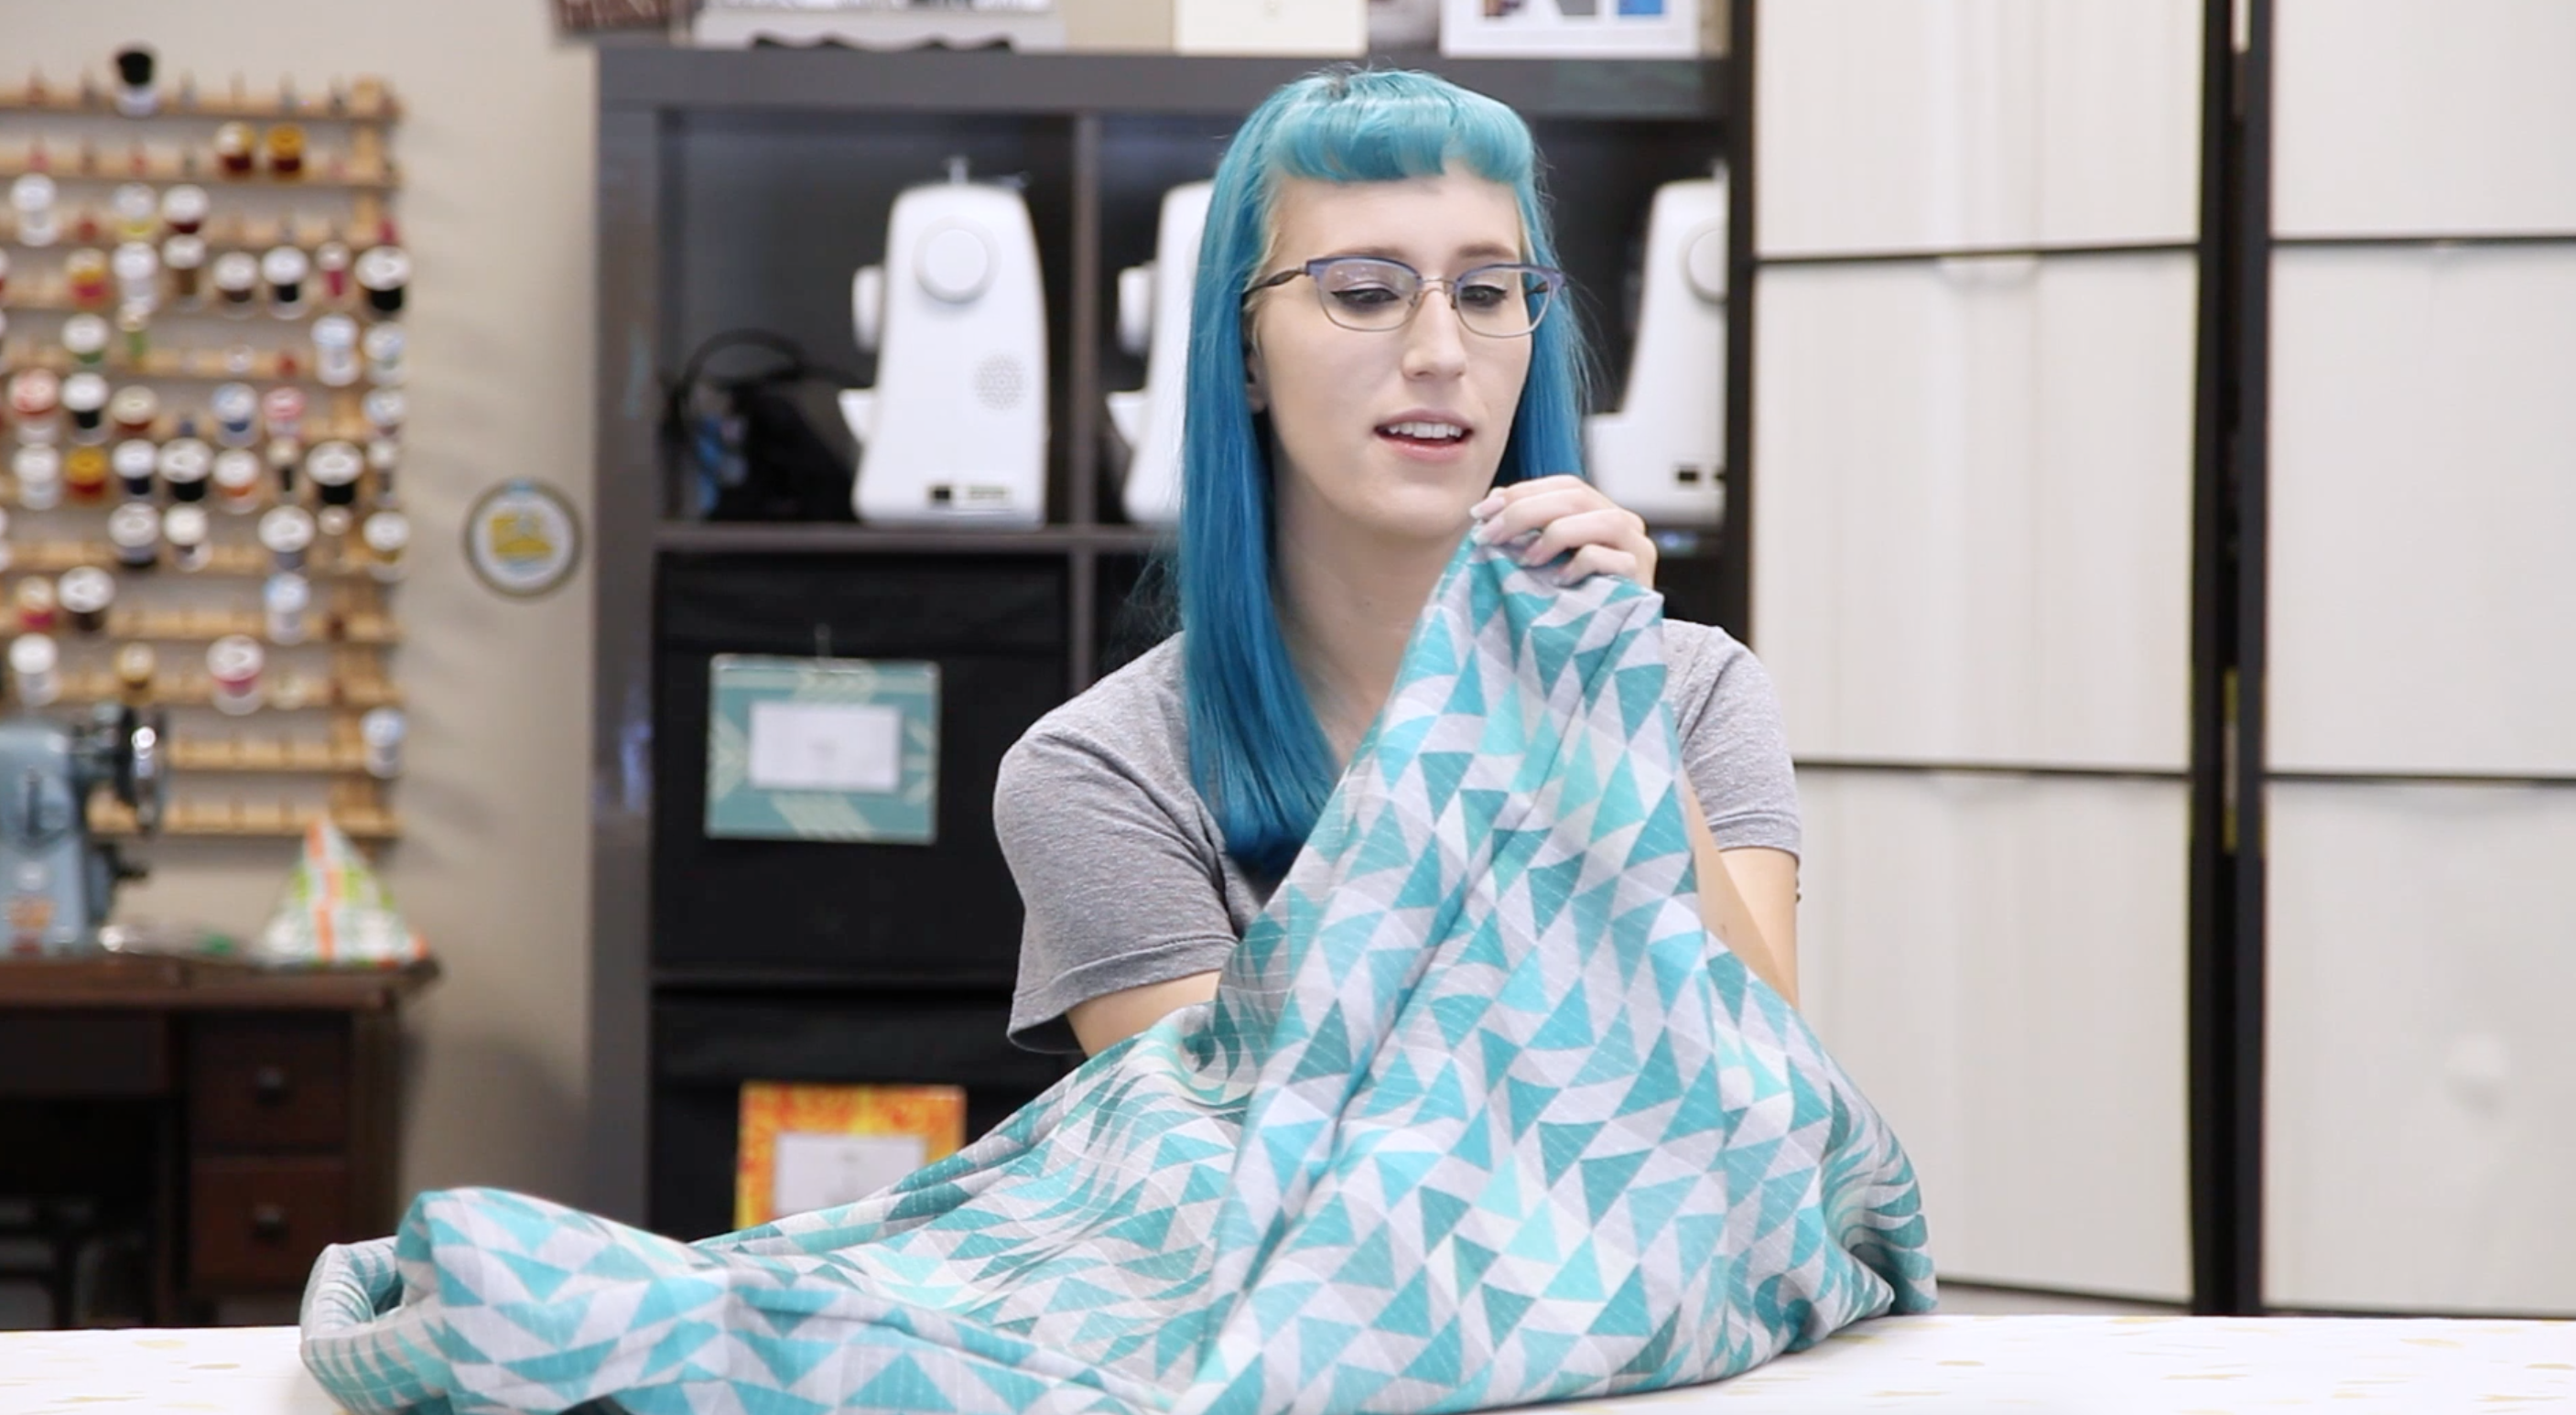
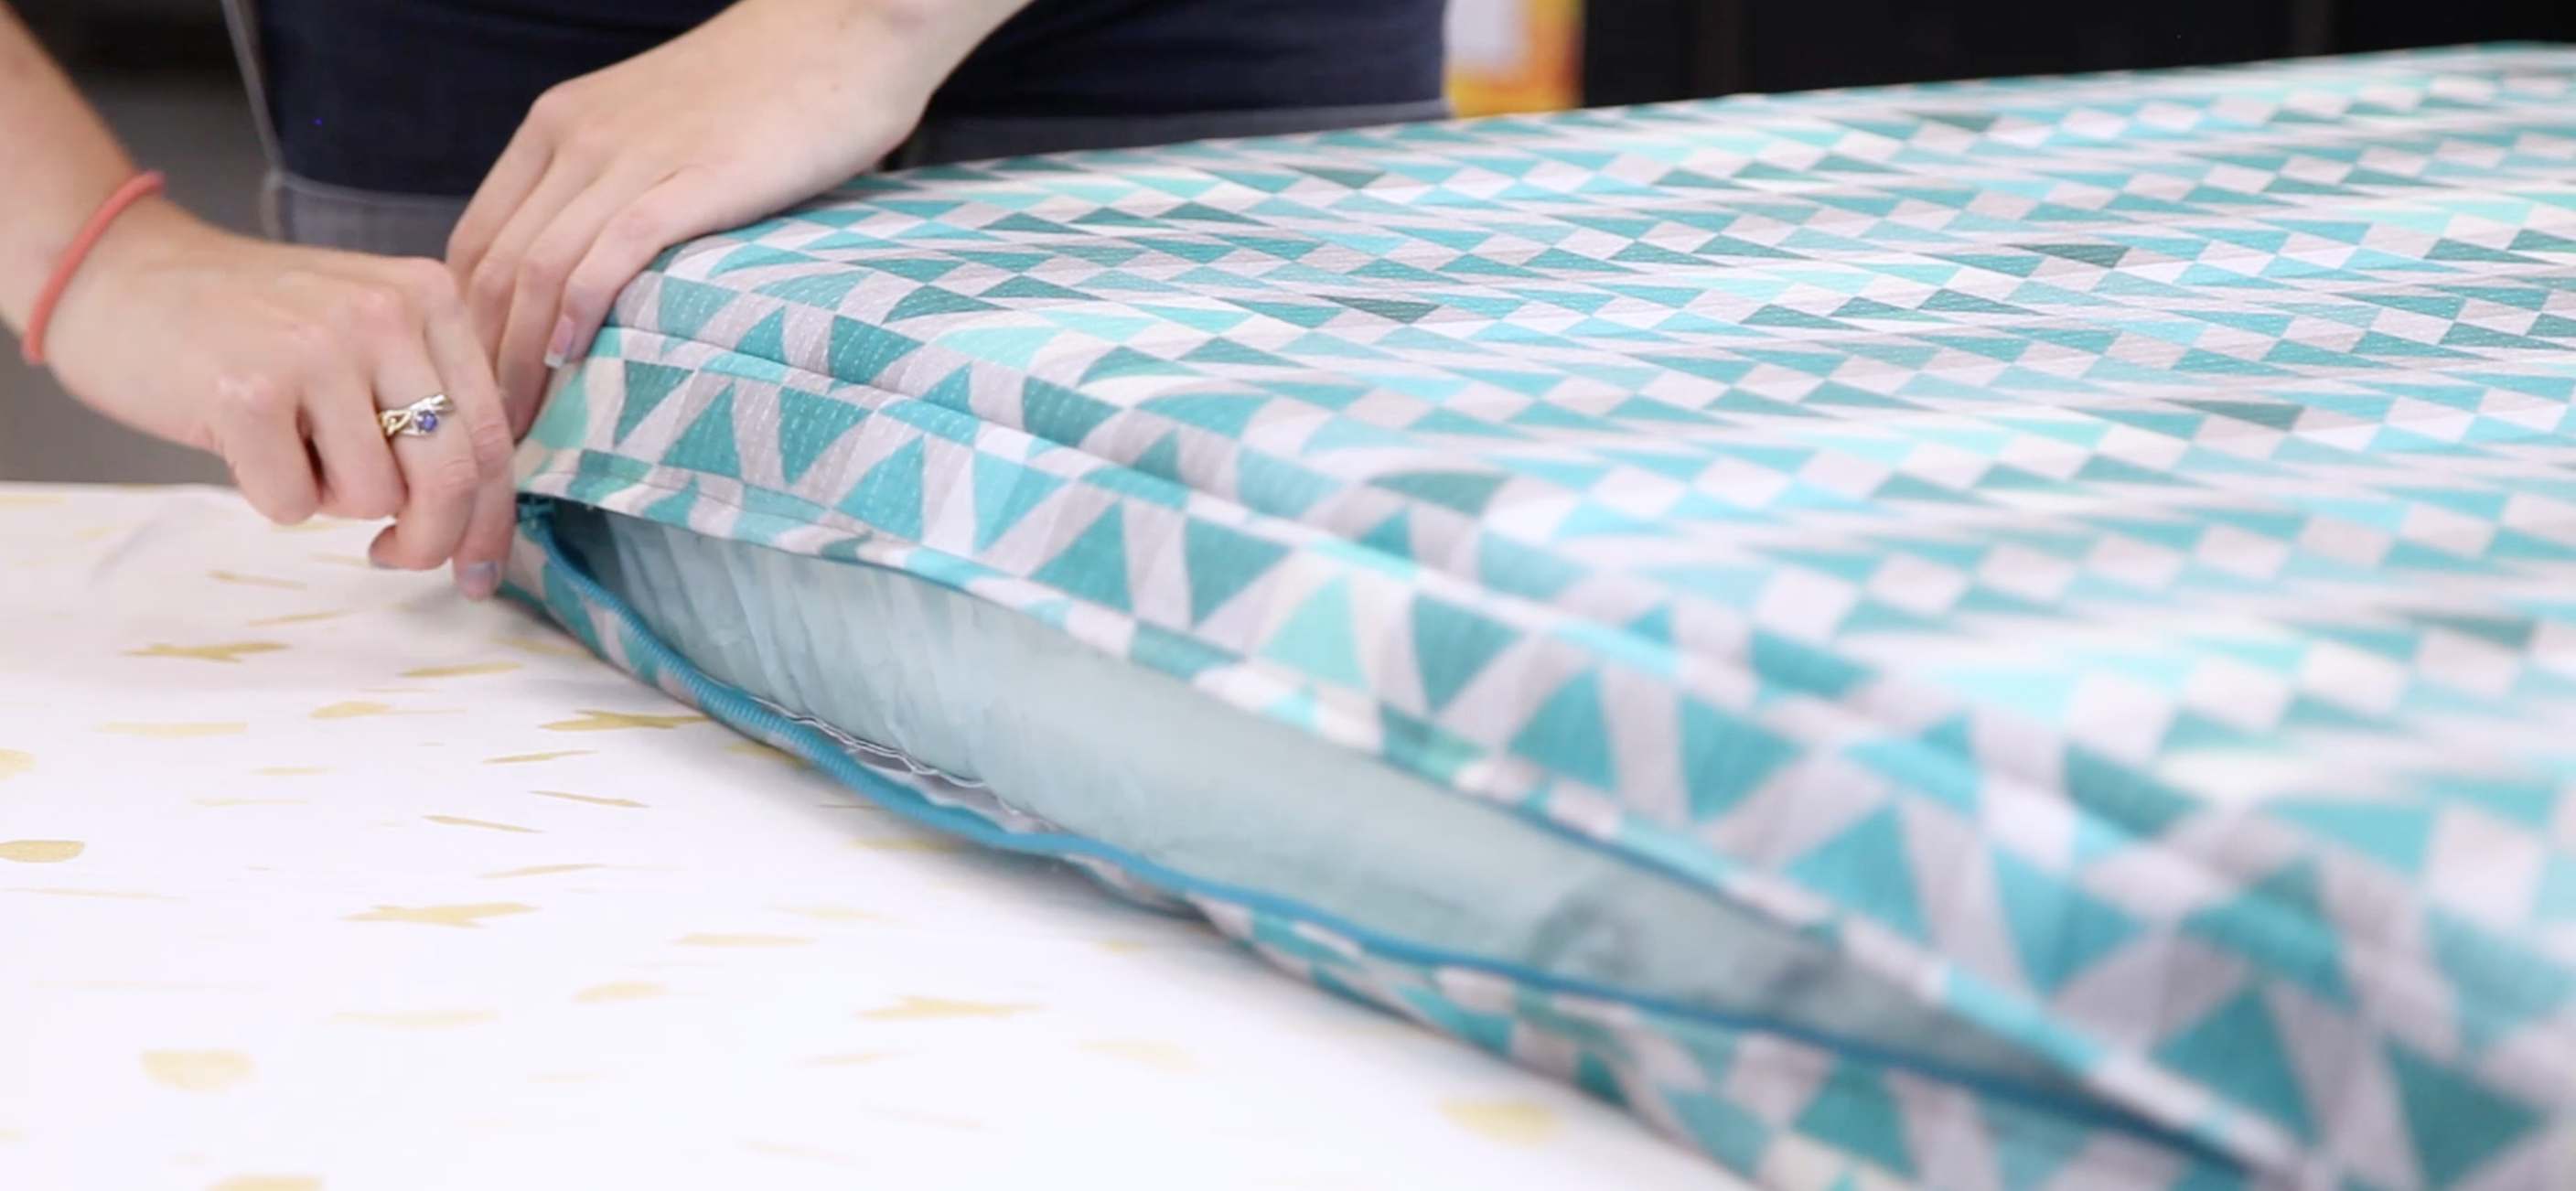
Step 3: Assemble the bed
Begin by placing two side pieces together with their short edges aligned (and right sides of the fabric facing in). With a ruler or tape measure, mark 1/2″ in from each corner and place a pin to mark those spots.
Sew the seam with a 1/2″ seam allowance, sewing only between the two pins. This means you’ll have a little 1/2″ flap at the beginning and end of the seam where the fabric isn’t sewn.
Finish sewing all around. You’ll end up with a circular loop of fabric. Now, iron all your seams open.
Next, grab the top piece and align one edge with one of the side piece edges. Pin the two edges together and sew them using the same 1/2″ seam allowance, being careful to start and end the seam a 1/2″ before the edge of the fabric. All three pieces (the top piece and two side pieces) should meet in the corner, with overlapping 1/2″ seam allowances. This way, when you turn it inside out, you’ll have a sharp corner.
When the top piece has been attached to the sides on all four edges, you’ll have a piece that looks like this!
Repeat the process to attach the bottom piece of your dog bed.
Sew all the way around the rest of the bed.
Clip the seam allowance from the corner to remove some extra weight and help your corners really pop!
Unzip your dog bed and turn it right-side out.
Push the corners out with a chopstick, bone tool or anything pointy.
Stuff the insert inside, zip it back up and you’re all done. This pet bed is pup-approved!
You’ve finished your DIY dog bed. Time to be proud of your work (and if your pet could talk, they’d tell you they’re proud, too!). Your dog is more than a pet, they’re family, and a custom bed is a fun way to give them a cozy spot that’s as unique as they are.
Don’t forget to share your creation with your world and ours by tagging #Spoonflower on your social media.
If you loved this DIY dog bed sewing tutorial and want to keep spoiling your fur baby, why not also make squeaky dog toys for extra happy pups? Or try your hand at this doughnut dog bed pattern, so that your pup has a bed in every room!
Loved this project? Get started on your next one by shopping Spoonflower’s quality fabrics.
WHY SPOONFLOWER?


