How to Make a Zipper Pouch
Zipper pouches require only a little bit of skill and a fat quarter of fabric, but they go a long way in showing off your personal style! Whether you go functional or decorative, these make an easy (and fun!) way to get organized. Pick your favorite design, learn how to install a zipper and you’ll be ready to make your own pencil case or any size zipper pouch you can dream of!

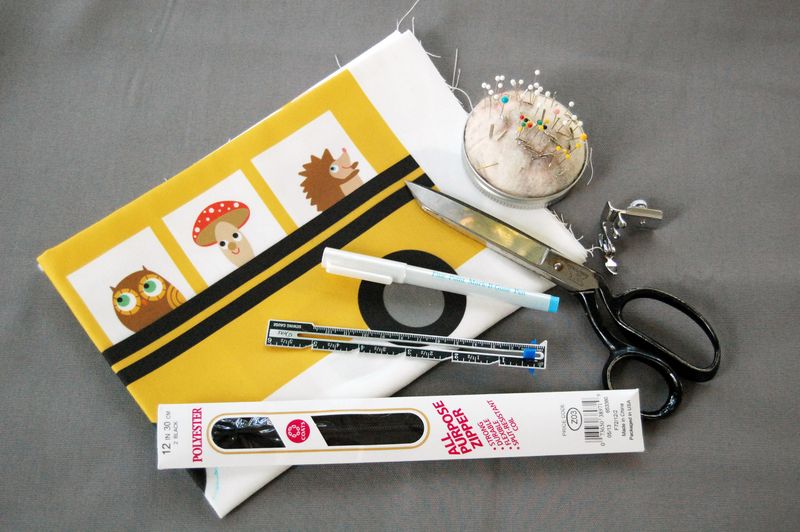
Materials for a Lined Zipper Pouch
- 2 fat quarters of fabric – we recommend Lightweight Cotton Twill, Recycled Canvas and Dogwood Denim®
- Straight pins
- One 9″ zipper
- Fabric scissors
- Ruler
- Sewing machine
- Iron
- Matching thread
Steps to Make a Zipper Pouch
Step 1. Cut Our Your Pieces
Cut our two 10″ x 7″ rectangles from each of your fat quarters. Two will be used as the outer fabric and two will be used for the lining.
Step 2. Sandwich the Zipper
Lay one one of the outer fabric piece right side up (design side up) on your work surface. With the zipper face down (wrong side of the zipper facing you), align it with the top raw edge of the fabric. On top of the zipper, place one of your lining pieces of fabric wrong side up (white side), sandwiching the zipper in between the outer fabric and the lining fabric. Pin the pieces so they stay lined up while you sew!Step 3. Sew the Zipper
Stitch the zipper into place with a 1/4″ seam allowance. Don’t sew too close! It is better to stitch a little farther away at first and go back and re-stitch than to have to pick out stitches when your zipper won’t open! This can be a little tricky — don’t worry if it takes a few tries.Step 4. Repeat
Repeat steps 2 and 3 with the remaining two pieces of outer and lining fabric. Attach the other side of your zipper.Step 5. Open Your Fabric
Open your fabric so the two pieces of outer fabrics are together and the two pieces of the lining fabrics are together. The design side of each should be touching and you should be looking at a very boring, white square (image below). Check to see if your zipper is working. Take a breath – the hardest part is over!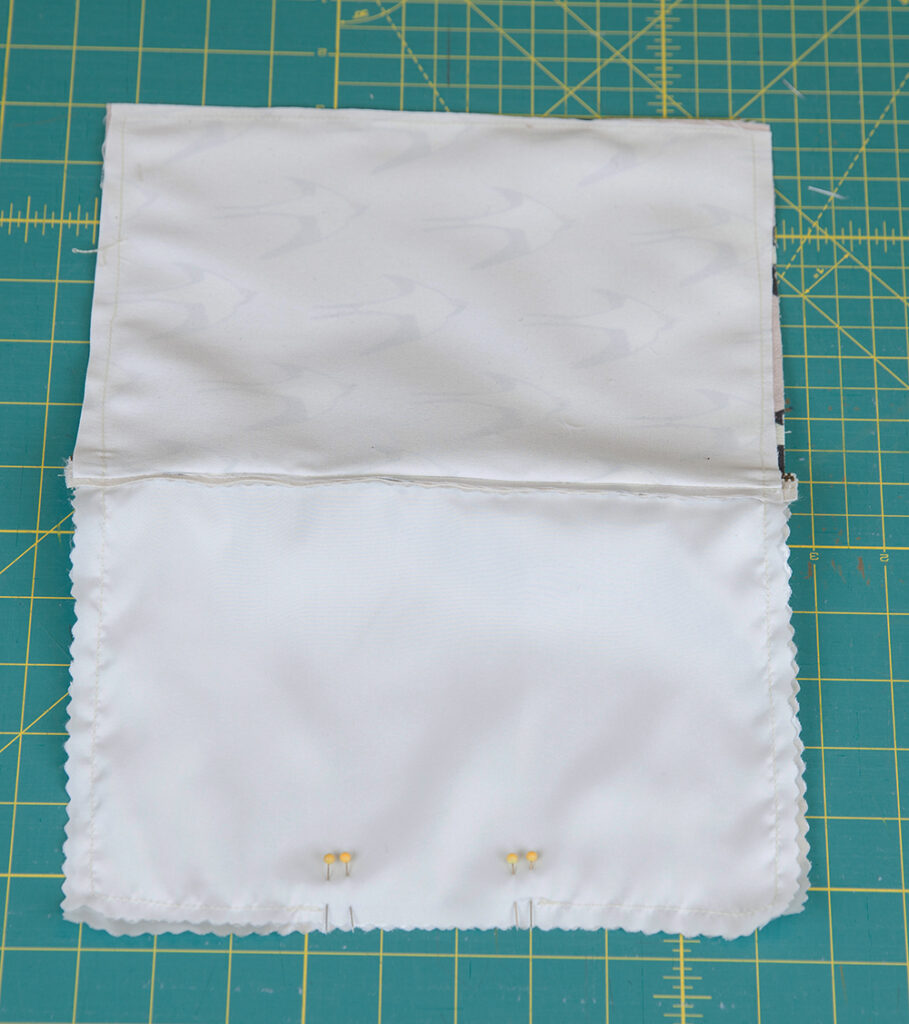
Step 6. Pin the Fabric
Using pins, carefully pin around the rectangles making sure to match the outer fabrics at the open ends of the zipper. Leave a 3″ gap at the bottom of your lining for turning / birthing / flipping inside out.Step 7. Sew the Edges
Stitch all the way around the edge with a 1/4″ seam allowance. Leave the 3″ gap at the bottom of your lining! Trim any excess fabric at the corners. Press the seams with an iron to keep it all crisp.Step 8. Turn your Bag
Using the 3″ gap you left in the lining, turn your pouch right-side out. It will be tricky, but it can be done! Use a point turner, chopstick or large, blunt knitting needle to gently push the corners out.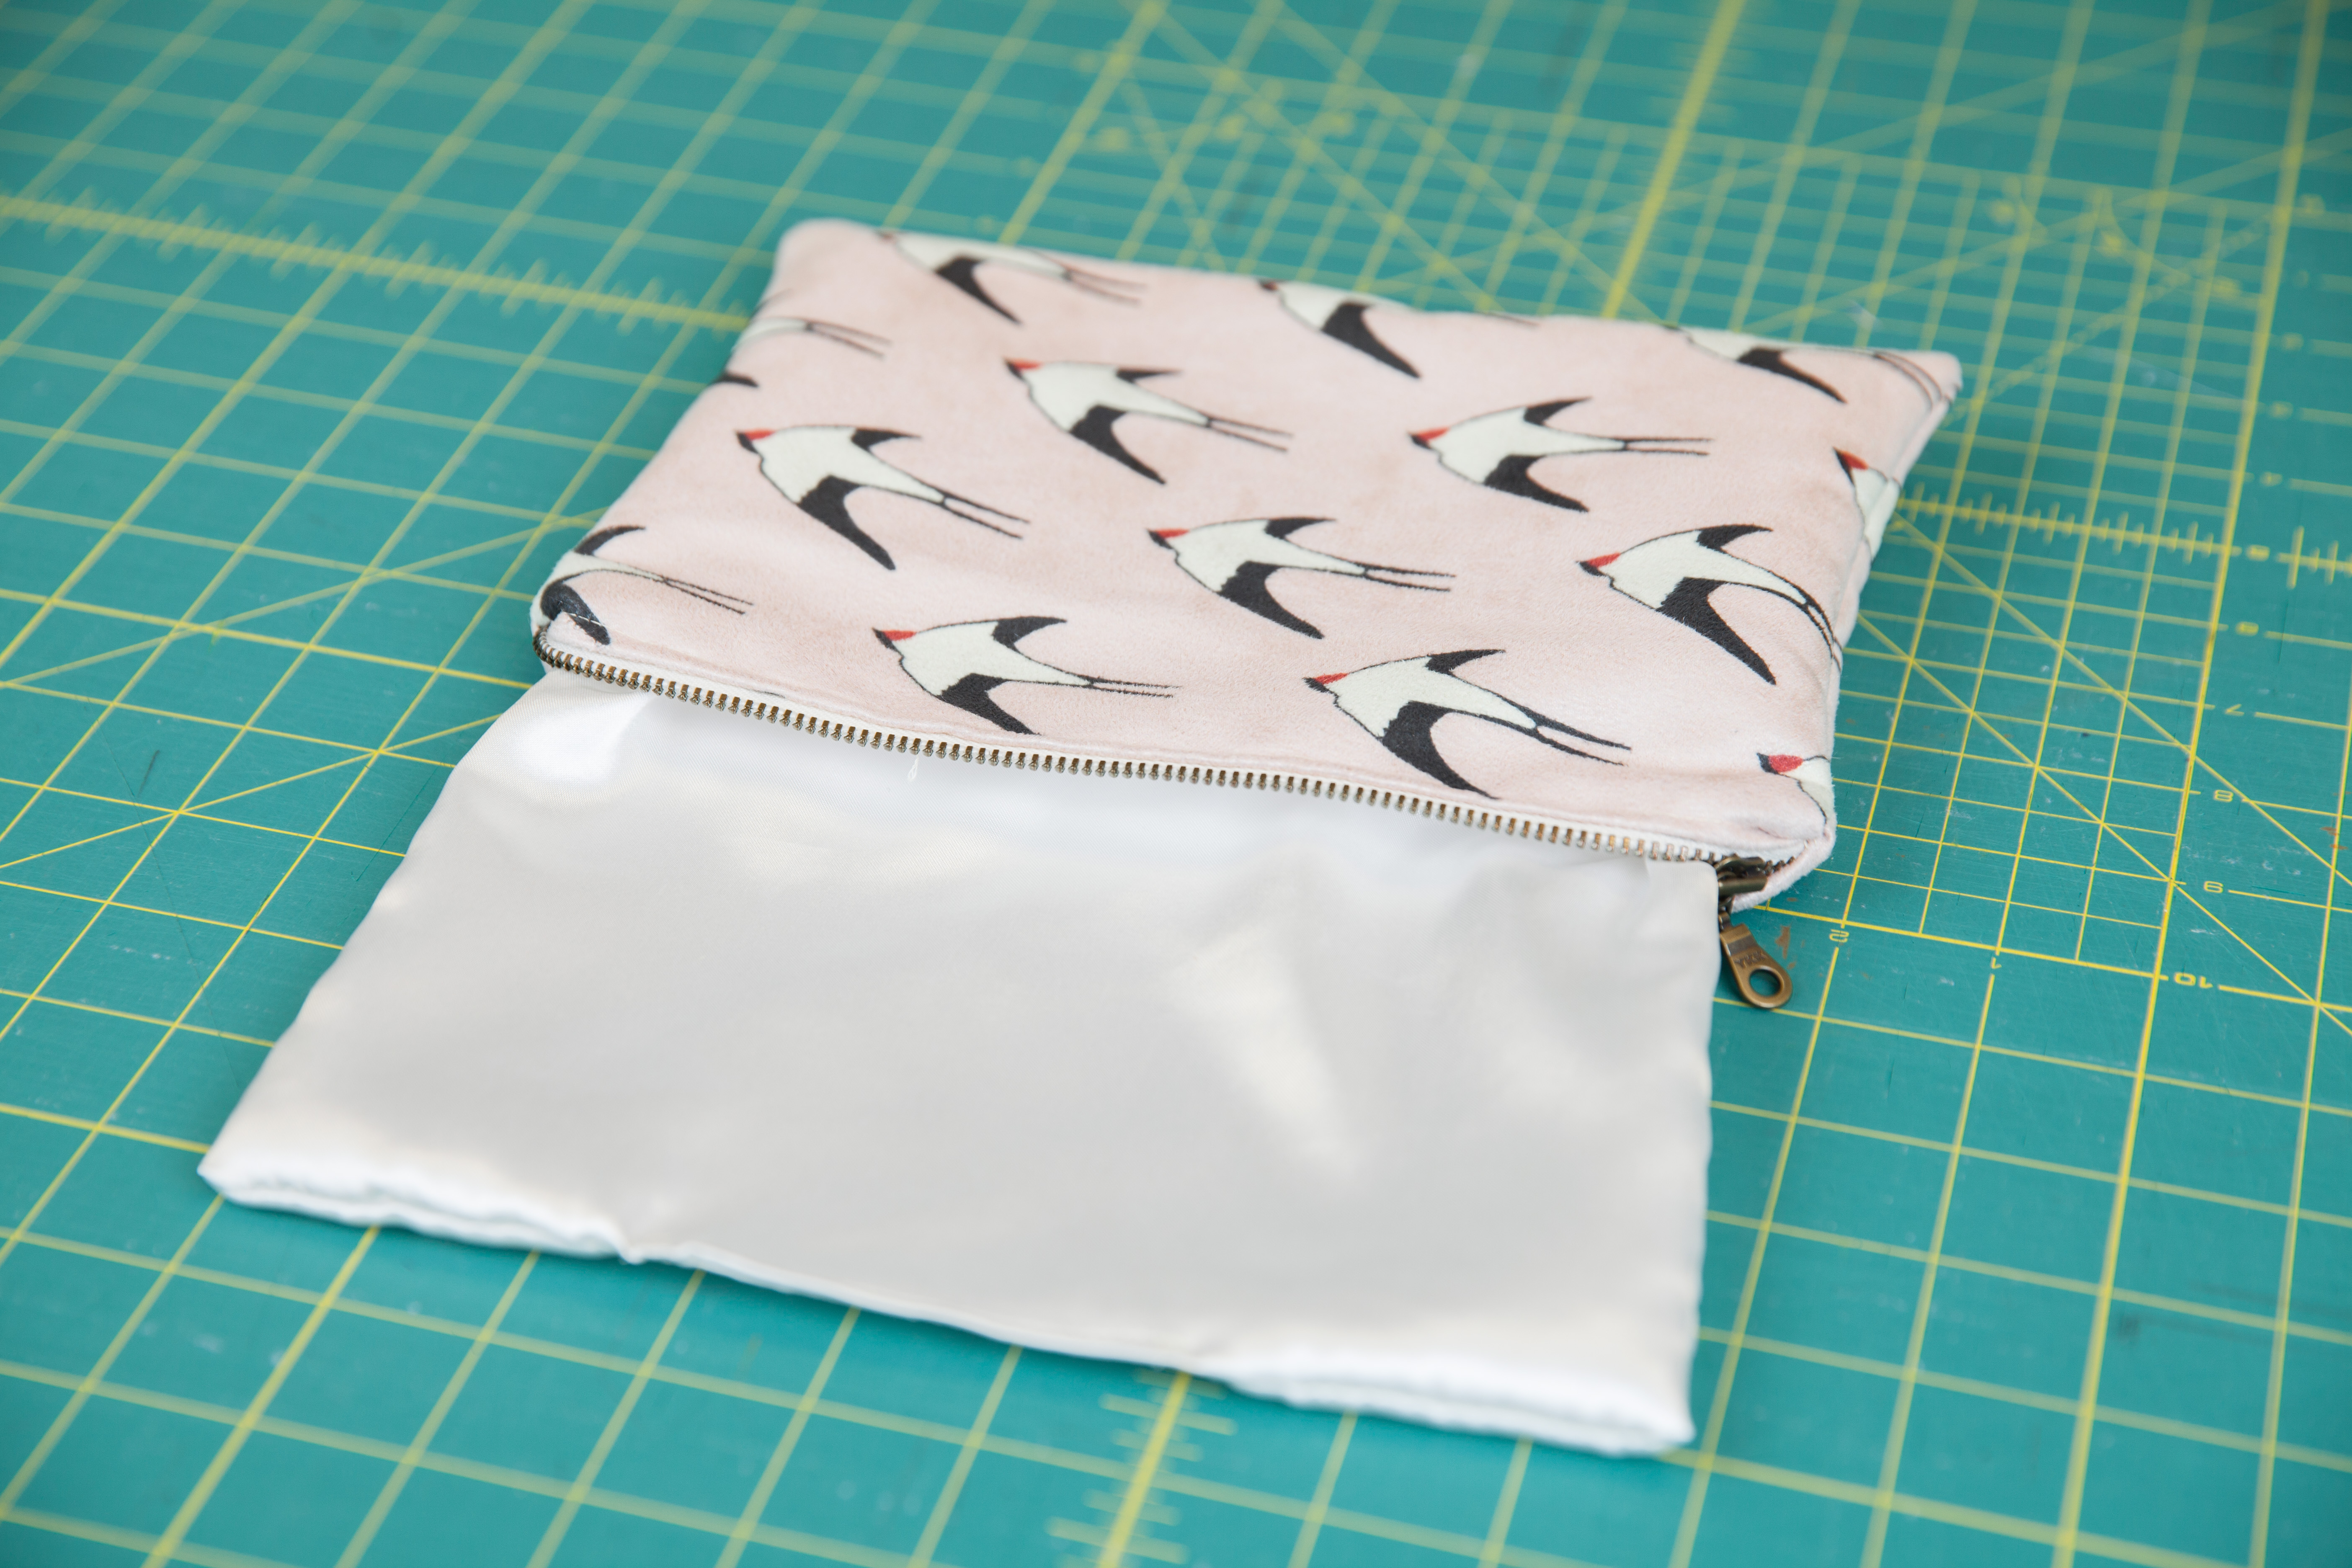
Step 9. Sew the Gap Closed
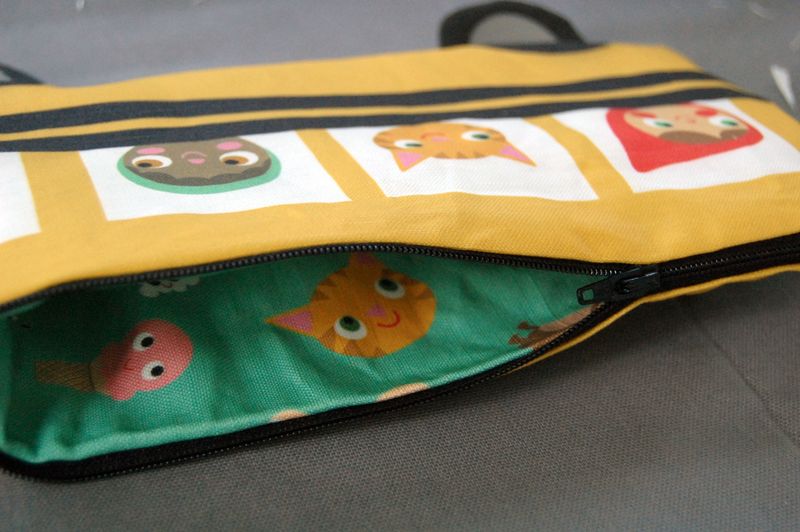
Pin the gap in your lining fabrics closed by tucking the raw edges neatly toward the wrong side of the pouch. Edgestitch into place. Tuck your lining into your outer fabric, and press to finish. Zip, zip hooray! You did it!Made to order using unique designs from artists worldwide.

The World’s Largest Design Library for Wallpaper and Textiles
Discover a world of design—from minimalist to maximalist. Thousands of global artists, with new styles added constantly.

Custom Designs on Any Item
Our made-to-order model lets you print any design on any material. Coordinate patterns across rooms for a cohesive, personalized home.

Premium Materials, Always in Stock
Trusted by pros and enthusiasts, our responsibly sourced textiles and papers offer the perfect finish—from smooth to textured, delicate to durable.

Printed on Demand in the USA
Our print-on-demand model lets you choose your design, material, and quantity—minimizing waste with non-toxic inks and reduced packaging.